In This Article
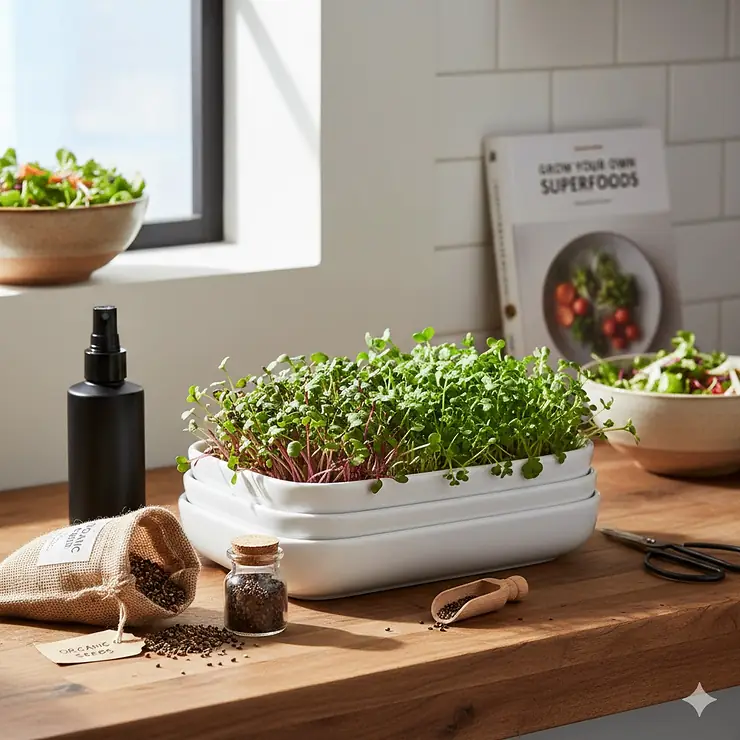
I’ll never forget the day I paid $8 for a tiny clamshell of microgreens at my local farmers market. That was my wake-up call. I realized I could grow the same amount at home for literally pennies. If you’re tired of watching your grocery bill climb every week while those expensive little greens wilt in your fridge, you’re in exactly the right place.
An affordable microgreens growing kit isn’t just about saving money, though that’s a huge perk. These miniature nutritional powerhouses pack up to 40 times more nutrients than their mature counterparts, according to research published in the National Institutes of Health database. We’re talking about transforming your kitchen counter into a nutrient-dense superfood factory that operates year-round, regardless of weather or season.
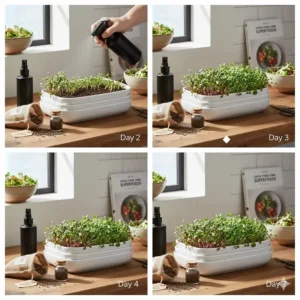
The beauty of a cheap microgreens kit is its accessibility. You don’t need a green thumb, fancy equipment, or even sunlight in some cases. Most budget microgreens setup options deliver harvest-ready greens in just 7-10 days. That’s faster than Amazon Prime, and infinitely more satisfying. Whether you’re living in a cramped studio apartment or managing a bustling family household, there’s an inexpensive microgreen kit that fits your space and budget.
Quick Comparison Table
| Product | Price Range | Growing Method | Harvest Time | Best For |
|---|---|---|---|---|
| Mountain Valley Mini Kit | $12-15 | Soil-based | 10 days | Beginners |
| Bootstrap Farmer Trays (10-pack) | $25-30 | Soil/Hydroponic | 7-14 days | DIY enthusiasts |
| Sproutlet 3-Pack | $35-40 | Self-watering | 10 days | Busy lifestyles |
| Back to the Roots 6-Pack | $40-45 | Soil-based | 7 days | Variety seekers |
| ZestiGreens Kit | $45-50 | Hydroponic/Soil | 7-10 days | Versatile growers |
| Window Garden Kit | $30-35 | Hydroponic | 10-12 days | Window growers |
| GARDYN Complete Kit | $48-55 | Hydroponic | 7-10 days | Tech-savvy users |
💬 Just one click – help others make better buying decisions too! 😊
Top 7 Affordable Microgreens Growing Kit: Expert Analysis
1. Mountain Valley Seed Company Mini Microgreens Growing Kit
If you’re dipping your toes into the microgreens world without diving headfirst into your wallet, the Mountain Valley Mini Kit is your perfect starting point. This certified organic kit strips away all the complexity and delivers exactly what you need in one compact package.
Key Specifications:
- USDA Certified Organic seeds
- Pre-fertilized soil puck (expands with water)
- Includes humidity lid and mist sprayer
Customer feedback consistently praises how foolproof this kit is. One reviewer mentioned harvesting their first crop of radish microgreens in just 9 days with zero prior gardening experience. The pre-fertilized soil puck eliminates guesswork about nutrients, and the included mist sprayer makes daily watering almost meditative.
✅ Pros:
- Ultra-affordable entry point ($12-15)
- Everything included for immediate start
- Perfect portion size for testing varieties
❌ Cons:
- Single-use design (not reusable)
- Limited yield per kit
2. Bootstrap Farmer Microgreen 1020 Trays (10-Pack)
For the cost-effective home growing enthusiast who wants to scale up fast, Bootstrap Farmer Trays represent the gold standard in money-saving gardening. Made in America from food-grade polypropylene, these shallow 1020 trays (10.75″ x 21″) are built to withstand years of continuous use.
Key Specifications:
- Extra-strength, BPA-free construction
- 1.25″ shallow depth (optimal for harvesting)
- 36 drainage holes for bottom watering
The beauty of this budget microgreens setup lies in its flexibility. You can grow hydroponically or use soil, experiment with different varieties simultaneously, and stack them for efficient space usage. Multiple growers report using the same trays for 3+ years without cracks or warping. At roughly $2.50-$3 per tray, the cost per harvest drops to mere cents.
✅ Pros:
- Exceptional durability with 2-year warranty
- Versatile for multiple growing methods
- Professional-grade at DIY prices
❌ Cons:
- Seeds and growing medium sold separately
- Learning curve for beginners
3. Sproutlet Self-Watering Microgreens Growing Kit (3-Pack)
The Sproutlet Kit solves the biggest challenge for busy people, forgetting to water. This self-watering system keeps your greens consistently hydrated without daily attention, making it the ultimate inexpensive microgreen kit for professionals, parents, or anyone with an unpredictable schedule.
Key Specifications:
- Self-watering reservoir system
- BPA-free materials
- Includes 15 compostable grow mats
Customers love the “set it and forget it” nature of this kit. The compostable grow mats mean zero mess and easy cleanup, you simply toss the used mat in your green bin and start fresh. Reviews frequently mention how the self-watering feature prevents both over and under-watering, the two most common microgreens-killing mistakes.
✅ Pros:
- Minimal daily maintenance required
- Clean, soil-free growing
- Eco-friendly compostable materials
❌ Cons:
- Replacement mats add ongoing costs
- Smaller growing area than standard trays
4. Back to the Roots Organic Microgreens Kit (6-Pack)
Back to the Roots transformed from a college dorm mushroom experiment into America’s leading organic gardening brand, and their 6-pack variety kit shows why. This cheap microgreens kit delivers certified organic seeds from six different varieties, giving you months of diverse harvests.
Key Specifications:
- 100% USDA Certified Organic and Non-GMO
- Six varieties: Sango Radish, Purple Kohlrabi, Broccoli, Kale, and more
- Made in USA with zero-waste materials
The standout feature? Free access to their “Green-Thumb Text Support” where real gardeners answer your questions. Reviewers consistently mention how the variety pack lets you discover personal favorites without buying six separate seed packets. The expanding soil discs are brilliantly designed, add water and watch them grow to fill the tray perfectly.
✅ Pros:
- Exceptional variety in one package
- Customer support via text
- Made with sustainable materials
❌ Cons:
- Trays not designed for long-term reuse
- Higher upfront cost than single-variety kits
5. ZestiGreens Self-Watering Microgreens Growing Kit
The ZestiGreens Kit earns its spot as the most versatile affordable microgreens growing kit. With a 12″ x 6″ reusable tray featuring a removable hydroponic insert, you can grow both hydroponic and soil-based microgreens using the same equipment. The bamboo surround adds an aesthetic touch that won’t embarrass you on your kitchen counter.
Key Specifications:
- Dual hydroponic/soil capability
- Includes 2 hemp grow mats
- 16-page illustrated grow guide
Customer feedback highlights the genius of the removable insert. Start with hydroponic growing for varieties like radish and arugula, then pop in some soil for larger seeds like sunflower or pea shoots. The blackout felt lid creates perfect germination conditions, and the illustrated guide walks you through each variety’s specific needs.
✅ Pros:
- Flexibility for different growing methods
- Attractive bamboo design
- Comprehensive growing instructions
❌ Cons:
- Smaller capacity than 1020 trays
- Limited to two varieties at once
6. Window Garden Microgreens Grow Kit
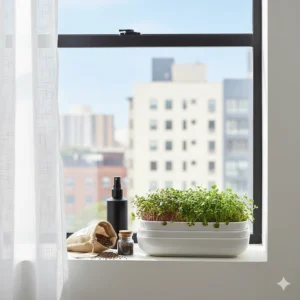
Born from a Kickstarter campaign, the Window Garden Kit takes a brilliantly simple approach to cost-effective home growing. This kit maximizes natural sunlight, reducing or eliminating the need for grow lights. The clear acrylic tray lets you monitor root development, turning your microgreens into a fascinating conversation piece.
Key Specifications:
- Designed for window placement
- Non-GMO organic seeds included
- Fiber soil and spray bottle
Reviews frequently mention how children become fascinated watching the roots grow through the clear tray. The kit’s window-focused design means zero electricity costs, your utility bill won’t budge even if you’re growing year-round. The included organic seeds get you started immediately, and the spray bottle ensures gentle, even watering.
✅ Pros:
- No electricity needed
- Educational for families
- Transparent design for monitoring
❌ Cons:
- Requires adequate window light
- Not ideal for darker homes
7. GARDYN Complete Microgreens Growing Kit
Straddling the line between affordable and premium, the GARDYN Complete Kit justifies its higher price with exceptional convenience and yield. This system includes 20 pre-seeded pads with bamboo wicks, 10 reusable grow plates, and four delicious varieties: Arugula, Mild Blend, Spicy Blend, and Red Mustard.
Key Specifications:
- 20 seed pads with integrated wicks
- 10 reusable grow plates
- Compatible with GARDYN hydroponic systems
The unique bamboo wick system creates perfectly self-regulating moisture levels. Customers rave about the consistent results, every pad germinates reliably, and harvests are predictably abundant. While pricier than other DIY microgreens alternative options, the convenience factor is undeniable. Simply add water, insert the pad, and wait.
✅ Pros:
- Extremely consistent results
- Pre-seeded convenience
- Professional-quality yields
❌ Cons:
- Higher initial investment
- Proprietary pad system
Understanding Microgreens: More Than Just Baby Vegetables
What Makes Microgreens Nutritional Powerhouses?
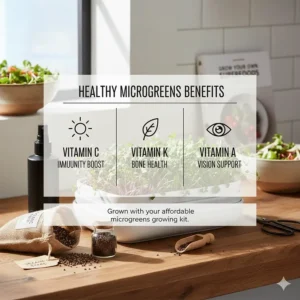
Microgreens aren’t simply immature vegetables, they’re concentrated nutrient bombs harvested at peak nutritional density. According to research from the Journal of Agricultural and Food Chemistry, these young seedlings contain significantly higher concentrations of vitamins C, E, and K compared to their mature counterparts.
The magic happens during those crucial first 7-21 days after germination. As the seedling develops its first true leaves, it packs in nutrients that would normally disperse throughout a full-grown plant. Red cabbage microgreens, for instance, contain 40 times more vitamin E than mature cabbage. That’s like condensing an entire salad’s worth of nutrients into a tablespoon of greens.
Beyond vitamins, microgreens are loaded with beneficial compounds like polyphenols, carotenoids, and antioxidants. Research published in Scientific Reports demonstrates that different varieties offer unique health benefits. Black radish microgreens show the highest antioxidant capacity, while bean microgreens excel in ascorbic acid content. This variety means you can literally eat your way through different nutritional profiles week by week.
The Economics of Growing vs. Buying
Let’s talk real numbers. Store-bought microgreens typically cost $3-6 for a 1-ounce container. If you’re adding them to meals regularly, that’s easily $50-100 monthly. An affordable microgreens growing kit changes this math dramatically.
A $30 investment in a reusable tray system and seeds can produce 20-30 ounces of microgreens over several months. That’s roughly $1-2 per ounce, a 60-75% savings compared to retail prices. Factor in that most seeds packets contain enough for multiple growing cycles, and your cost per harvest drops even further.
The environmental impact deserves mention too. Commercial microgreens travel an average of 1,500 miles from farm to table, accumulating carbon emissions and requiring refrigerated transport. Your countertop crop travels approximately three feet, from tray to plate, with zero environmental cost.
How to Choose Your Perfect Affordable Microgreens Growing Kit
Step 1: Assess Your Available Space
Be brutally honest about your counter space. A standard 1020 tray measures roughly 10″ x 20″, similar to a small baking sheet. Smaller apartments might benefit from compact options like the Mountain Valley Mini Kit or the ZestiGreens system. Spacious kitchens can accommodate multiple Bootstrap Farmer trays, creating a continuous harvest rotation.
Consider vertical space too. Some growers stack trays on wire shelving, multiplying their growing capacity without expanding their footprint. If you’re blessed with a sunny window, the Window Garden Kit makes that space work double-duty.
Step 2: Determine Your Commitment Level
Starting with microgreens requires honest self-assessment. If you struggle to water houseplants consistently, invest in self-watering systems like Sproutlet or GARDYN. These forgive forgetfulness with built-in reservoirs that maintain consistent moisture for days.
DIY enthusiasts who enjoy hands-on gardening will appreciate the flexibility of Bootstrap Farmer trays. You control every variable, from soil composition to watering schedule. This approach offers maximum customization but demands more attention.
Step 3: Consider Growing Conditions
Natural light availability significantly impacts your kit choice. South-facing windows receive ideal light for most microgreens. East or west-facing windows work but may require occasional supplemental lighting. North-facing windows or dark apartments necessitate grow lights, which adds upfront costs but remains affordable with modern LED technology.
Temperature matters less than you’d think. Microgreens thrive in typical indoor temperatures (65-75°F). Avoid placing trays near heating vents or air conditioning units where temperature fluctuations stress seedlings.
Step 4: Budget Planning Beyond the Initial Kit
Smart budgeting accounts for ongoing costs. Soil-based systems require purchasing seed-starting mix periodically, though a small bag typically costs $10-15 and lasts months. Hydroponic systems need replacement grow mats, usually $1-2 each. Seeds represent the ongoing investment, budget $5-15 for quality organic seed packets that yield multiple harvests.
Compare this to buying pre-grown microgreens weekly. The math favors growing your own by month two, with savings accelerating over time.
Step 5: Choose Your Preferred Varieties
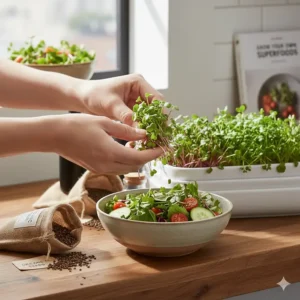
Different kits specialize in different varieties. Brassica family greens (broccoli, kale, cabbage) grow reliably in almost any system. Larger seeds like sunflower and pea shoots perform better in soil-based setups. Delicate varieties like basil appreciate the controlled moisture of self-watering systems.
Start with a variety pack like Back to the Roots to discover your preferences before committing to bulk seeds. You might discover that spicy radish microgreens elevate your morning eggs while mild sunflower shoots perfect your smoothies.
Step 6: Factor in Convenience Features
Life happens, and your microgreens kit should accommodate it. Self-watering features, clear growing instructions, and customer support all add value beyond the base price. Back to the Roots’ text support has helped countless beginners troubleshoot issues in real-time, preventing crop failures.
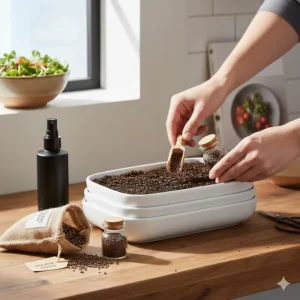
Pre-seeded options like GARDYN eliminate the tedious task of evenly distributing tiny seeds across soil. For some growers, this convenience justifies higher costs. For others, the meditative ritual of seeding becomes part of the appeal.
Step 7: Evaluate Long-Term Reusability
A truly affordable microgreens growing kit pays dividends through multiple growing cycles. Bootstrap Farmer trays last years with basic care, amortizing their cost over dozens of harvests. Single-use kits work for testing the waters but become expensive if growing becomes a habit.
Consider your likely trajectory. Casual experimenters might prefer disposable options. Those committed to sustainable living should invest in durable, reusable systems upfront.
Maximizing Your Microgreens Investment
Proper Storage Extends Seed Viability
Quality seeds represent your largest ongoing expense, so maximizing their lifespan saves money. Store seeds in airtight containers with silica gel packets in a cool, dark location. Properly stored seeds maintain 80% germination rates for 2-3 years, turning a $10 seed purchase into multiple growing seasons.
Rotate Varieties for Continuous Harvests
Stagger your plantings every 3-4 days to ensure constant supply. As one tray reaches harvest, another is germinating, and a third is mid-growth. This rotation prevents feast-or-famine cycles where you’re overwhelmed with greens one week and bare the next.
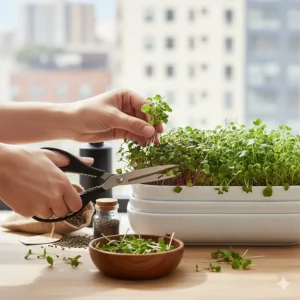
Harvest Techniques Matter
Learn to cut microgreens just above the soil line, maximizing harvestable weight while minimizing stem waste. Use sharp scissors or a clean knife. Some varieties like pea shoots and sunflower allow for a second cutting, essentially doubling your yield from one seeding.
Compost Your Growing Medium
Spent soil from microgreens makes excellent compost. The root mat adds organic matter to your compost bin, completing the cycle sustainably. Even apartment dwellers can participate in municipal composting programs, ensuring nothing goes to waste.
Common Mistakes to Avoid
Over-Seeding
Beginners often scatter seeds too densely, thinking more seeds equal more yield. Reality disagrees. Overcrowded seedlings compete for light and air circulation, creating perfect conditions for mold. Follow seed packet recommendations religiously. Sparse feels wrong initially, but those tiny seeds multiply into a lush carpet within days.
Inconsistent Watering
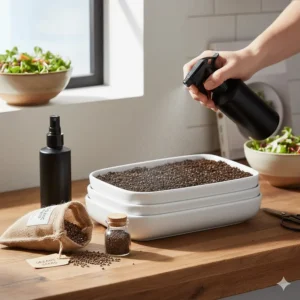
Microgreens demand consistent moisture but hate soggy conditions. The soil should feel like a wrung-out sponge, damp but not dripping. Most failures trace back to either letting the soil dry completely or drowning seeds with excessive water. Bottom watering through drainage holes provides ideal moisture levels without disturbing delicate seedlings.
Harvesting Too Early or Late
Patience rewards microgreens growers, but too much patience costs quality. Harvest when the first true leaves appear but before they fully develop. This sweet spot delivers maximum flavor and nutrition. Waiting longer doesn’t increase yield, it actually decreases it as plants begin directing energy to stem development rather than leaf production.
Ignoring Air Circulation
Stagnant air invites fungal problems. A small desk fan on low speed, directed near but not directly at your trays, prevents most mold issues. The gentle air movement strengthens stems too, creating sturdier microgreens less prone to lodging.
Advanced Tips for Budget-Conscious Growers
DIY Grow Light Solutions
Skip expensive grow light systems by repurposing affordable options. A simple LED shop light (4000-6500K color temperature) from your local hardware store costs $15-25 and perfectly serves 2-3 standard trays. Position it 4-6 inches above your greens for 12-16 hours daily.
Bulk Seed Purchasing
Once you’ve identified favorite varieties, buy seeds in bulk from agricultural suppliers rather than small packets. A pound of organic broccoli seeds costs $30-40 and grows literally hundreds of trays. Split bulk purchases with friends to reduce individual costs further.
Repurpose Household Items
Clear plastic clamshells from store-bought greens make excellent humidity domes. Yogurt containers with drainage holes work as micro-growing trays for testing new varieties. Spray bottles from cleaning products (thoroughly washed) serve as misting tools. This zero-waste approach aligns perfectly with sustainable microgreens philosophy.
Troubleshooting Common Issues
Mold on Soil Surface
White, fuzzy growth usually indicates poor air circulation or excessive moisture. Increase air movement, reduce watering frequency, and ensure your growing medium isn’t compacted. Sometimes what appears as mold is actually beneficial root hairs, these look fuzzy but grow from the stem base rather than soil surface.
Leggy, Pale Seedlings
Insufficient light causes etiolation, where seedlings stretch desperately toward any light source. Move your kit closer to windows or add supplemental lighting. Pale coloration indicates light starvation, chlorophyll production depends on adequate light intensity.
Slow or Uneven Germination
Old seeds or improper storage leads to poor germination. Buy fresh seeds from reputable suppliers and store them properly. Uneven germination often stems from uneven moisture distribution. Bottom watering solves this by ensuring consistent soil moisture throughout the tray.
Bitter or Unpleasant Taste
Harvesting too late is the usual culprit. Microgreens develop stronger, sometimes bitter flavors as they mature. Harvest at the cotyledon stage (first leaves) for milder taste, or wait for the first true leaves for more intense flavor. Temperature stress also affects taste, keep growing areas between 65-75°F.
Health and Safety Considerations
Seed Quality Matters
Never use seeds intended for conventional planting in your microgreens kit. These often carry chemical treatments unsafe for consumption. Purchase seeds specifically labeled for microgreens or sprouts, ensuring they meet food safety standards. Organic certification adds another layer of safety assurance.
Proper Hygiene
Treat your microgreens growing area like a food preparation surface because that’s exactly what it is. Wash hands before handling seeds or harvesting. Clean trays thoroughly between uses with diluted vinegar or hydrogen peroxide solution. Contamination risks increase when hygiene standards slip.
Storage After Harvest
Freshly cut microgreens last 5-7 days refrigerated in sealed containers with a slightly damp paper towel to maintain humidity. Wash them just before eating rather than after cutting, excess moisture encourages spoilage. Proper storage extends your harvest’s usability, reducing waste.
Seasonal Growing Strategies
Summer Growing Adjustments
Higher ambient temperatures accelerate growth cycles but can stress some varieties. Focus on heat-tolerant options like amaranth, basil, and Swiss chard during summer months. Increase air circulation and shade trays from intense direct sunlight, which can literally cook delicate seedlings.
Winter Growing Advantages
Cooler indoor temperatures in winter actually benefit many microgreens varieties. Slower growth produces denser nutrient concentration. Take advantage of heating system’s dry air by maintaining consistent moisture levels. Winter’s shorter days necessitate grow lights for most indoor locations.
Year-Round Rotation
Smart growers rotate varieties seasonally, matching each variety’s temperature preferences to natural conditions. Pea shoots thrive in spring and fall’s moderate temperatures. Summer favors heat-loving basil and amaranth. Winter’s perfect for cold-hardy varieties like kale and mustard.
Comparison Table: Budget vs. Premium Features
| Feature | Budget Kits ($12-30) | Mid-Range ($30-45) | Premium ($45-55) |
|---|---|---|---|
| Materials | Plastic trays, basic supplies | BPA-free, some reusable components | Food-grade, durable construction |
| Seeds Included | 1-3 varieties | 3-6 varieties | 4+ varieties, often pre-seeded |
| Growing Method | Soil or basic hydroponic | Versatile options | Advanced self-watering |
| Reusability | Limited | Moderate | High (2+ years) |
| Instructions | Basic written guide | Detailed guide | Comprehensive support + resources |
Price Range & Value Analysis
Under $20: Testing the Waters
Budget-friendly options like Mountain Valley Mini Kit let you experiment without significant financial commitment. Perfect for determining if microgreens growing suits your lifestyle before investing heavily. Expect single-use or limited-reuse components.
$20-40: Sweet Spot for Regular Growers
This range offers the best value for committed growers. Bootstrap Farmer trays, Sproutlet kits, and Window Garden systems provide years of service while maintaining affordability. You’re buying longevity and flexibility without premium pricing.
$40-55: Convenience Pays
Premium kits like GARDYN and Back to the Roots justify higher costs through convenience, variety, and support. Pre-seeded options, customer service, and proven reliability reduce failure rates. Calculate value by considering time saved and learning curve shortened.
Frequently Asked Questions
❓ How much does it cost to start growing microgreens at home?
❓ Can I reuse microgreen trays multiple times?
❓ What affordable microgreens growing kit is best for beginners?
❓ Do cheap microgreens kit produce lower quality greens?
❓ How long do microgreens seeds last in storage?
Conclusion: Your Path to Nutrient-Dense, Budget-Friendly Greens
The journey from grocery store dependency to microgreens self-sufficiency isn’t just about saving money, though you’ll absolutely accomplish that. It’s about reclaiming control over your nutrition, understanding where your food comes from, and experiencing the genuine satisfaction of eating something you grew yourself.
An affordable microgreens growing kit democratizes access to nutrient-dense superfoods. Whether you choose the $12 simplicity of Mountain Valley’s Mini Kit or the $50 sophistication of GARDYN’s Complete System, you’re making an investment that pays dividends in health, savings, and self-sufficiency.
Start small if budget constraints concern you. A single tray and one seed variety teach you everything necessary to scale up. Success breeds confidence, and before you realize it, you’ll be experimenting with varieties, troubleshooting challenges, and perhaps even supplying friends with fresh harvests.
The best affordable microgreens growing kit is the one you’ll actually use consistently. Match the kit to your lifestyle, space, and budget constraints. Your future self will thank you when you’re tossing fresh, homegrown microgreens onto meals daily while your neighbors continue paying premium prices for wilted store-bought versions.
Take action today. Your countertop awaits transformation into a productivity center that requires minimal space, minimal cost, and minimal effort while delivering maximum nutrition. The microgreens revolution isn’t coming, it’s already here, and your kitchen is the perfect place to join it.
Recommended for You
- 7 Best Hydroponic Microgreens Kit 2026
- 7 Best Broccoli Sprout Growing Kits – Superfood Cancer Prevention
- 7 Best Sprout Growing Kit Options for Fresh, Healthy Sprouts in 2026
Disclaimer: This article contains affiliate links. If you purchase products through these links, we may earn a small commission at no additional cost to you.
✨ Found this helpful? Share it with your friends! 💬🤗