In This Article
Have you ever wanted to grow restaurant-quality microgreens at home but felt overwhelmed by all the supplies you’d need? I totally get it. When I first started my microgreens journey three years ago, I spent hours researching what to buy, ordering pieces from different suppliers, and honestly making some expensive mistakes along the way.
That’s why a complete microgreens growing system changes everything. These all-in-one packages take the guesswork out of the equation, giving you seeds, trays, growing medium, and instructions all in one box. You’re literally just minutes away from starting your first crop instead of days spent shopping and researching.
Research from the USDA shows that microgreens can contain up to 40 times more nutrients than their mature counterparts, making them a powerhouse addition to any diet. Whether you’re a health enthusiast, a home chef looking to elevate your dishes, or someone interested in sustainable living, finding the right complete microgreens growing system will set you up for success from day one.
In this guide, I’ll walk you through the 7 best complete microgreens growing systems available in 2026, breaking down what makes each one special and helping you find the perfect fit for your space, budget, and growing goals. Let’s dive in! 🌱
Quick Comparison Table: Top Complete Microgreens Growing Systems
| Product | Price Range | Growing Method | LED Lights | Harvest Time | Best For |
|---|---|---|---|---|---|
| ingarden Kit | $150-200 | Hydroponic | ✅ Yes | 7 days | Premium automation |
| GARDYN System | $40-60 | Hydroponic | ❌ No | 7-10 days | Flexibility |
| ZESTIGREENS Self-Watering | $35-45 | Hydroponic/Soil | ❌ No | 7-10 days | Beginners |
| Handy Pantry Premium | $60-80 | Hydroponic | ❌ No | 7-14 days | Large batches |
| ALPAS LIFE Kit | $30-40 | Soil-based | ❌ No | 7-10 days | Budget-conscious |
| ZESTIGREENS 6-Seed Variety | $25-30 | Soil-based | ❌ No | 7-10 days | Variety seekers |
| Sproutlet 3-Pack | $35-45 | Hydroponic | ❌ No | 10 days | Multiple harvests |
💬 Just one click – help others make better buying decisions too! 😊
Top 7 Complete Microgreens Growing Systems: Expert Analysis
1. ingarden Microgreens Growing Kit – Premium Automated Solution
If you want the Tesla of microgreens systems, the ingarden kit delivers. This beautifully designed system comes with automated LED grow lights, a patent-pending hydroponic watering system, and pre-seeded pads that make growing absolutely foolproof.
Key Specifications:
- 15-watt full-spectrum LED with 4-stage lighting
- Ceramic bowl in multiple colors (beige, black, rose, mint)
- Stainless steel frame (plastic-free design)
- Includes 3 organic seed pads
The automated lighting adjusts automatically through four growth stages, and the hydroponic system uses 90% less water than conventional growing. Customer reviews consistently praise the sleek aesthetic that fits beautifully on kitchen counters, though some mention the higher price point requires commitment.
Pros:
✅ Completely automated lighting system
✅ Premium, award-winning design
✅ Carbon-neutral certified and eco-friendly
Cons:
❌ Higher initial investment ($150-200)
❌ Requires purchasing replacement seed pads
Price Range: $150-200
2. GARDYN Complete Microgreens Growing Kit – Most Flexible System
The GARDYN system stands out for its modular design that lets you control exactly how much you grow. This comprehensive starter bundle includes a sprout nursery, 20 seed pads with bamboo wicks, and 10 reusable grow plates.
Key Specifications:
- Includes 4 seed varieties (Arugula, Mild Blend, Spicy Blend, Red Mustard)
- 20 organic seed pads included
- Compatible with Gardyn hydroponic system LED lid
- Reusable grow plates for multiple harvests
What I love about GARDYN is the flexibility – you can grow just one plate or fill the entire nursery depending on your needs. Customers appreciate the quality bamboo wicks that ensure consistent moisture distribution. The system works standalone or pairs with Gardyn’s full hydroponic tower for accelerated growth under LED lighting.
Pros:
✅ Modular design for customizable growing
✅ High-quality reusable components
✅ Four distinct flavor profiles included
Cons:
❌ LED lights sold separately
❌ Slightly larger footprint than compact kits
Price Range: $40-60
3. ZESTIGREENS Self-Watering Microgreens Growing Kit – Best for Beginners
The ZESTIGREENS Self-Watering kit revolutionizes beginner-friendly growing with its innovative hydroponic insert and elegant bamboo frame. This all-in-one microgreens kit eliminates the daily misting routine that trips up many newcomers.
Key Specifications:
- 12″ x 6″ tray with bamboo surround
- Hydroponic insert with blackout felt lid
- 2 hemp grow mats included
- Red Garnet Amaranth and Superfood Mix seeds
The self-watering design means you just add water once, and the system keeps your microgreens perfectly hydrated for days. Customer feedback highlights the beautiful presentation that looks great on countertops and the versatility to switch between hydroponic and soil growing by removing the insert.
Pros:
✅ No daily watering required
✅ Beautiful bamboo aesthetic
✅ Converts between hydroponic and soil methods
Cons:
❌ Smaller growing area than professional trays
❌ Hemp mats need replacement after each harvest
Price Range: $35-45
4. Handy Pantry Premium Hydroponic Microgreens Growing Kit – Best for Large Harvests
For serious microgreens enthusiasts, the Handy Pantry Premium kit delivers professional-grade growing capacity. This comprehensive starter bundle includes six 4oz seed packets, professional 20″ x 10″ trays, and premium bamboo grow pads.
Key Specifications:
- 3 solid trays + 3 drainage trays (20″ x 10″)
- 6 seed varieties: Basic Salad Mix, Spicy Salad Mix, Radish Blend, Red Cabbage, Yellow Mustard, Seasonal Mix
- Premium bamboo hydroponic grow pads
- pH test strip kit and spray bottle included
This ready-to-grow package gives you everything for substantial harvests that can actually supplement your family’s diet meaningfully. Customers love having multiple trays to stagger harvests for continuous supply. The company’s 50+ years in the sprouting industry shows in the quality components.
Pros:
✅ Professional-sized growing capacity
✅ Extensive seed variety included
✅ pH testing for optimal growth
Cons:
❌ Requires more counter space
❌ Larger initial learning curve
Price Range: $60-80
5. ALPAS LIFE Complete Home Microgreens Kit – Best Budget Option
The ALPAS LIFE kit proves you don’t need to spend a fortune for quality microgreens. This full microgreens setup includes everything essentials at a wallet-friendly price point, making it perfect for testing the waters.
Key Specifications:
- 2 sets of 8.8″ x 5.5″ growing trays
- Premium spray mister bottle
- Pre-measured coco coir growing medium
- Organic radish and broccoli seeds (sourced in USA)
What makes this kit special is the attention to sustainability – reusable trays, recyclable packaging, and organic growing medium all align with eco-conscious values. Customer reviews praise the detailed instructions that make first-time growing stress-free. The family-owned Wisconsin company provides excellent customer support.
Pros:
✅ Affordable entry point under $40
✅ Sustainable, eco-friendly materials
✅ US-sourced organic seeds
Cons:
❌ Smaller growing capacity
❌ Coir medium requires replacement
Price Range: $30-40
6. ZESTIGREENS Complete Microgreens Growing Kit with 6 Seeds – Best Variety Pack
For those who want to explore different flavors, the ZESTIGREENS 6-Seed variety pack is unbeatable. This microgreens kit with seeds offers the most comprehensive starter bundle for discovering your favorites.
Key Specifications:
- 6 organic seed packets: Sunflower, Pea, Broccoli, Mixed Salad, Red Amaranth, Purple Rambo Radish
- Cardboard growing trays included
- Coconut coir soil pucks
- Complete growing instructions
The seed variety here is exceptional – from mild sunflower to spicy radish, you’ll discover diverse flavors and textures. Customers appreciate the cardboard trays as an eco-friendly, compostable option. The coconut coir expands when hydrated, making setup incredibly simple.
Pros:
✅ Most seed variety in any kit (6 types)
✅ USDA certified organic seeds
✅ Compostable growing trays
Cons:
❌ Cardboard trays not reusable
❌ Manual watering required
Price Range: $25-30
7. Sproutlet Microgreen Grow Kit (3-Pack) – Best Value Set
The Sproutlet 3-pack offers exceptional value with three complete growing setups, fifteen grow mats, and seeds to get started. This includes growing medium package is perfect for those wanting continuous harvests.
Key Specifications:
- 3 growing trays with humidity domes
- 15 compostable grow mats
- 2 packets organic microgreen seeds
- BPA-free, food-safe materials
The dome lids create perfect humidity during germination, and the self-watering design simplifies care. Customers love having three trays to stagger planting every few days for continuous supply. The compact size fits easily on any countertop without dominating space.
Pros:
✅ Three complete setups for rotation
✅ Self-watering system included
✅ Affordable per-tray cost
Cons:
❌ Limited seed varieties included
❌ Smaller individual tray size
Price Range: $35-45
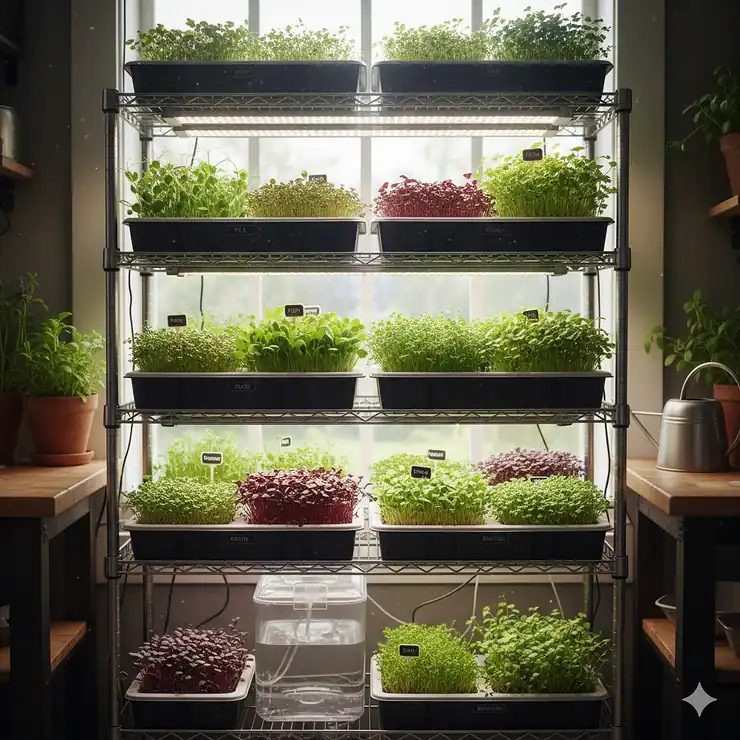
Understanding Complete Microgreens Growing Systems
A complete microgreens growing system brings together all the essential components you need to start growing these nutritious powerhouses at home. Think of it as your microgreens starter kit – no hunting around for individual pieces, no worrying if you’ve forgotten something crucial.
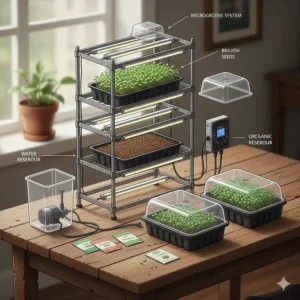
What Makes a System “Complete”?
The best all-in-one microgreens kit includes several key components that work together seamlessly. You’ll get growing trays designed specifically for microgreens, with proper drainage and appropriate depth. Seeds are included – usually multiple varieties so you can experiment with different flavors and nutrition profiles.
Growing medium comes in various forms depending on the system. Some comprehensive starter bundles use soil or coconut coir, while hydroponic systems rely on hemp mats or grow pads. Both methods work beautifully; it’s really about your personal preference and growing environment.
Instructions guide you through each step, from seeding to harvest. The best kits include troubleshooting tips too, because let’s be honest – even with a foolproof system, questions come up, especially for first-timers.
Why Choose an All-in-One Kit?
Starting with a ready-to-grow package saves you significant time and frustration. I learned this the hard way when I first tried piecing together my own setup. I bought trays that were too shallow, seeds without knowing proper density, and a growing medium that retained too much moisture. My first three batches failed miserably.
Research indicates that microgreens harvested between 7-21 days contain concentrated nutrients and bioactive compounds that support human health. With a complete system, you’re set up for success from the start, maximizing your chances of harvesting those nutrient-dense greens.
Cost-effectiveness matters too. Buying components separately usually costs 30-50% more than purchasing a bundled kit. Plus, manufacturers design these systems with components that work together optimally – matching tray sizes to appropriate seed quantities, for example.
Types of Complete Microgreens Growing Systems
Hydroponic Systems
Hydroponic complete microgreens growing systems use water-based growing instead of soil. These setups typically include special grow mats or pads that hold moisture while supporting seed germination and root development.
The advantages? Cleaner growing with no soil mess on your counter, faster germination in many cases, and easier harvesting since roots aren’t entangled in soil. The ZESTIGREENS Self-Watering and ingarden kits exemplify excellent hydroponic designs.
Hydroponic systems particularly shine for smaller seeds like arugula, mustard, and salad mixes. The consistent moisture level prevents the soil compaction issues that sometimes plague tiny seeds.
Soil-Based Systems
Soil-based systems use potting mix, coconut coir, or other growing mediums. These full microgreens setups often feel more familiar to traditional gardeners and work wonderfully for larger seeds like sunflower, pea, and radish.
The ALPAS LIFE and ZESTIGREENS 6-Seed kits use soil-based methods. Advantages include more forgiveness if you forget to water (soil retains moisture longer), natural nutrient provision from organic mediums, and the ability to compost spent medium after harvest.
Some growers prefer the earthy connection of soil growing, and there’s something satisfying about working with natural mediums. Kids especially love getting their hands in the soil when helping with microgreens!
Hybrid/Convertible Systems
Smart designs like the ZESTIGREENS Self-Watering offer both methods in one kit. The hydroponic insert can be removed, letting you add soil instead. This flexibility means you can experiment to find your preferred method or choose based on which seed varieties you’re growing.
Convertible systems maximize your investment by adapting to different growing preferences and situations. Growing delicate seeds hydroponically but switching to soil for heartier varieties? No problem with these versatile setups.
Key Features to Consider in a Complete Microgreens Growing System
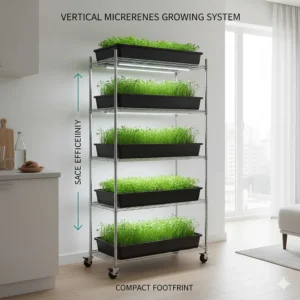
Growing Capacity and Tray Size
Consider your household’s consumption and available counter space. A single 10″ x 20″ tray yields roughly 8-12 ounces of microgreens – enough for one person’s weekly salad garnish or a family’s weekly sandwich toppings.
Smaller kits like ALPAS LIFE (8.8″ x 5.5″) work perfectly for apartments or testing the waters. Larger systems like Handy Pantry Premium with multiple 20″ x 10″ trays suit serious growers or families wanting substantial harvests.
Think about your goals. Garnishing meals occasionally? A compact system suffices. Replacing store-bought greens or sharing with friends? Go larger from the start.
Seed Variety and Quality
The number and types of seeds included significantly impact your experience. Beginner-friendly varieties like broccoli and mild salad mixes grow reliably for anyone. Spicier options like radish and mustard add exciting flavor for adventurous eaters.
Look for USDA organic certification and non-GMO guarantees. USDA research confirms that growing conditions significantly affect nutrient retention in microgreens, starting with seed quality.
The ZESTIGREENS 6-Seed kit excels here with six distinct varieties, while focused kits like ALPAS LIFE include just two proven varieties. Neither approach is wrong – it depends whether you want variety or simplicity initially.
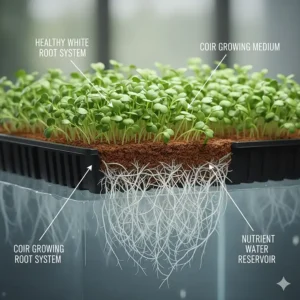
Growing Medium Type
Coconut coir has become incredibly popular for microgreens. This sustainable byproduct of coconut processing retains moisture beautifully while providing excellent drainage. It’s pH-neutral and naturally resistant to mold.
Hemp and jute mats work wonderfully in hydroponic setups, holding moisture without becoming waterlogged. They’re biodegradable and compostable after use.
Traditional potting soil remains reliable, especially for larger seeds. It provides natural nutrients, though it’s messier than alternatives. Quality organic mixes specifically designed for microgreens work best.
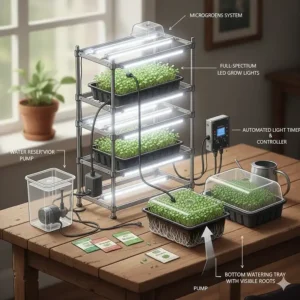
Watering System
Self-watering designs like the ZESTIGREENS Self-Watering kit eliminate daily misting, perfect for busy schedules. Bottom-watering trays ensure consistent moisture without overwatering delicate seedlings.
Manual systems require more attention but give you greater control. They’re often simpler and more affordable. Spray bottles work well for small batches, while bottom-watering trays suit larger grows.
Consider your schedule honestly. Travel frequently? Self-watering systems prevent disasters. Home most days? Manual watering works fine and costs less.
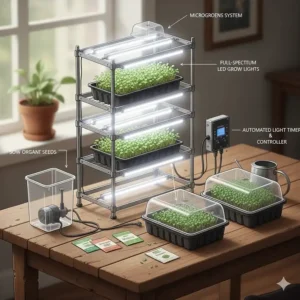
Lighting Requirements
Some complete microgreens growing systems include LED grow lights (like ingarden), while others rely on natural sunlight. Each approach has merits.
LED systems grow microgreens consistently regardless of season or window availability. They accelerate growth and can increase nutrient density through optimized light spectrum. However, they add significant cost.
Sunny windowsills work beautifully for most microgreens if you have good south-facing exposure. Natural light is free and many growers prefer it. However, growth slows in winter months in northern climates.
Hybrid approaches work well – grow near windows but supplement with a simple LED panel during darker months. The flexibility keeps costs reasonable while ensuring year-round success.
How to Choose the Best Complete Microgreens Growing System
Step 1: Assess Your Available Space
Measure your intended growing area before purchasing. Kitchen counters, sunny windowsills, spare bedrooms, and even basements with proper lighting all work. Account for tray dimensions plus extra space for working around them.
Vertical space matters for systems with humidity domes or LED lights. Ensure adequate clearance above your growing surface. Most microgreens need 12-18 inches of vertical clearance including the dome.
Step 2: Determine Your Budget
Complete systems range from $25 to $200+. Budget options under $40 (like ALPAS LIFE or ZESTIGREENS 6-Seed) work wonderfully for beginners testing the hobby.
Mid-range kits ($40-80) like GARDYN or Handy Pantry provide better long-term value with reusable components and larger capacity. They’re ideal if you’re confident you’ll continue growing.
Premium automated systems ($150+) like ingarden justify their cost for serious enthusiasts wanting maximum convenience and aesthetic appeal. Consider them if you value automation and premium design.
Step 3: Match Seeds to Your Taste Preferences
Start with familiar flavors. If you love arugula in salads, ensure your kit includes it or similar peppery greens. Prefer mild flavors? Look for lettuce, pea shoots, or sunflower varieties.
Adventurous eaters should grab variety packs like the ZESTIGREENS 6-Seed kit. You’ll discover new favorites and understand which flavors you want to grow repeatedly.
Consider allergies too. Sunflower microgreens contain common allergens for some people. Pea shoots can trigger legume allergies. Most kits list seed varieties clearly for easy verification.
Step 4: Consider Your Experience Level
Never grown anything before? Start simple with foolproof kits like ZESTIGREENS Self-Watering or ALPAS LIFE. Clear instructions, forgiving growing methods, and smaller scale build confidence.
Some gardening background? Mid-range systems like GARDYN or Handy Pantry offer more flexibility and capacity without overwhelming complexity.
Experienced growers wanting convenience? The ingarden automated system lets you focus on harvesting and enjoying rather than daily monitoring.
Step 5: Evaluate Long-Term Costs
Initial purchase price is just one factor. Consider ongoing expenses like replacement seeds, growing medium, and (for LED systems) electricity.
Reusable components lower long-term costs significantly. The GARDYN grow plates and Handy Pantry trays last for years with proper care. Disposable cardboard trays cost pennies per harvest but accumulate over time.
Calculate rough annual costs. Most growers spend $10-30 monthly on supplies after initial setup, far less than buying microgreens at $4-6 per ounce at stores.
Setting Up Your Complete Microgreens Growing System
Initial Setup Process
Unbox your all-in-one microgreens kit and inventory all components against the included list. Wash reusable trays with mild soap and water even if they look clean – manufacturing residue can inhibit germination.
Prepare your growing medium according to instructions. Coconut coir requires hydration (usually 10-15 minutes in warm water). Hemp mats should be pre-moistened but not waterlogged. Soil should be evenly moist throughout.
Spread medium evenly in trays, creating a level surface approximately 1-2 inches deep for soil-based systems. Hydroponic mats should lie flat without air pockets underneath.
Seed Planting Technique
Calculate seed density carefully – this makes or breaks your harvest. Most microgreens need 1-2 tablespoons of seed per 10″ x 10″ area. Larger seeds (sunflower, pea) use more; tiny seeds (mustard, arugula) use less.
Spread seeds evenly across the growing surface. I use the “sprinkle and shake” method – sprinkle seeds, then gently shake the tray to settle them into gaps. You want good coverage without seeds piled on each other.
Press seeds gently into contact with growing medium. I use another tray or flat surface to apply even pressure across all seeds simultaneously. This ensures consistent germination.
Blackout Period Management
Most microgreens benefit from 2-4 days of darkness after planting. This blackout phase encourages strong root development and straight stem growth.
Cover your tray with an inverted tray, cardboard, or the included blackout cover. Ensure air can circulate (don’t seal edges) to prevent mold while maintaining darkness.
Check daily by briefly removing the cover. Look for sprouting seeds with stems about 1-2 inches tall. When you see this growth, it’s time for light.
Providing Proper Light Exposure
Move sprouted microgreens to their light source immediately after the blackout period. Delayed light exposure causes leggy, weak stems that topple over easily.
Position trays 6-12 inches below LED lights or in bright, indirect window light. Microgreens need 4-6 hours of quality light daily minimum. More light generally produces darker, more flavorful greens.
Rotate trays daily if using window light to ensure even growth across all sides. LED systems with built-in automation handle this perfectly, while natural light requires your attention.
Watering Schedule and Technique
After blackout, most microgreens need watering 1-2 times daily. The goal is consistent moisture without waterlogging. Touch the growing medium – it should feel like a wrung-out sponge.
Bottom-watering prevents issues with top-heavy seedlings toppling. Pour water into the drainage tray and let it wick up through the growing medium. Empty excess water after 15-20 minutes.
Misting works for hydroponic hemp mats and during early growth. Use a fine spray bottle to moisten without creating puddles. Some growers prefer this method throughout, though it requires more frequent attention.
Maintaining Your Microgreens Growing System
Daily Care Requirements
Morning checks take just 2-3 minutes. Look for adequate moisture, observe growth progression, and watch for any issues like mold or pests. Consistency matters more than lengthy interventions.
Water as needed based on touch-testing your medium. Environmental factors (humidity, temperature, air circulation) affect watering frequency significantly. You’ll develop an intuitive feel within a few days.
Rotate trays if using directional light sources. This simple step prevents lopsided growth where one side of your tray grows faster than the other.
Temperature and Humidity Control
Most microgreens thrive in 65-75°F (18-24°C) – standard room temperature. Warmer speeds growth but increases mold risk. Cooler slows growth but produces sturdier plants.
Humidity ideally stays at 40-60% during main growth. Higher humidity during the blackout period aids germination. Lower humidity after uncovering prevents mold while still supporting growth.
Simple solutions work for humidity control. A small fan improves air circulation, reducing mold risk in humid climates. A humidity tray (water-filled tray with pebbles) helps in dry winter conditions.
Pest Prevention
Indoor microgreens rarely face pests compared to outdoor gardens. Still, fungus gnats occasionally appear, especially with soil-based systems. They’re attracted to moist organic matter.
Prevention works better than treatment. Avoid overwatering, ensure good air circulation, and don’t leave old growing medium sitting around. Yellow sticky traps catch adult gnats before they lay eggs.
Mold appears as white or gray fuzzy growth, distinct from normal root hairs. Prevent mold through adequate air circulation, proper watering technique (avoid surface watering late in the day), and appropriate humidity levels.
Troubleshooting Common Issues
Leggy, pale growth indicates insufficient light. Move closer to light source or increase hours of exposure. Leggy microgreens lack flavor and nutrients – don’t harvest them. Instead, start over with better lighting.
Mold problems usually stem from excessive moisture or poor air circulation. Reduce watering frequency, ensure air moves around trays, and maintain appropriate room temperature. Some slight mold on growing medium is manageable; extensive mold requires discarding that batch.
Poor germination results from old seeds, incorrect moisture, or wrong temperature. Fresh seeds (check dates), consistent moisture (never letting medium dry completely during germination), and appropriate warmth (don’t start seeds in cold areas) solve most issues.
Yellowing plants near harvest time is normal as cotyledons open. However, yellow seedlings indicate nutrient deficiency (less common in microgreens) or insufficient light. Harvest on schedule and adjust lighting for next batch.
Harvesting and Using Your Microgreens
When to Harvest
Most microgreens are ready 7-14 days after planting when the first true leaves appear above the cotyledons (seed leaves). At this stage, nutrients peak while tender texture remains.
Visual cues help determine readiness. Look for vibrant green color, upright growth to 1-3 inches tall, and those first true leaves emerging. Different varieties reach harvest at different times even planted simultaneously.
Taste-testing works beautifully. Snip a few stems and taste. Full flavor development indicates readiness. Some varieties taste better slightly younger (milder) or older (more intense).
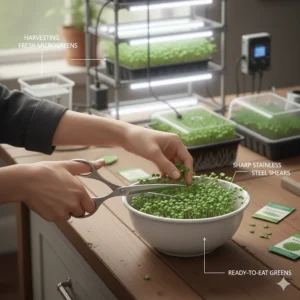
Harvesting Techniques
Use clean, sharp scissors or kitchen shears. Cut stems about ½ inch above the growing medium to avoid harvesting roots or medium. Work in sections rather than trying to harvest everything simultaneously.
Harvest just before use for maximum freshness and nutrition. Research shows microgreens begin losing nutrients quickly after cutting, making fresh-cut superior to pre-harvested options.
Don’t pull or tear microgreens – cutting cleanly prevents damage to neighboring plants if you’re harvesting incrementally. Gentle handling preserves delicate leaves and stems.
Storage Best Practices
Consume immediately after harvest for peak nutrition and flavor. However, properly stored microgreens last 5-7 days refrigerated.
Gently wash harvested greens if needed (unnecessary if growing medium stayed off leaves). Pat dry completely with paper towels or use a salad spinner. Excess moisture causes rapid deterioration.
Store in airtight containers lined with paper towels to absorb residual moisture. Keep refrigerated at 35-40°F. Check daily and replace damp paper towels to extend storage life.
Culinary Applications
Fresh microgreens elevate everyday meals instantly. Sprinkle over morning eggs or avocado toast for nutrient-dense breakfast upgrades. Layer into sandwiches for texture and flavor complexity.
Salad toppers might be the most popular use. Mix different varieties for visual appeal and varied flavors. The concentrated nutrition means a small handful provides significant health benefits.
Blend into smoothies for nutrition without texture issues. Most microgreens blend smooth unlike mature greens. Start with mild varieties like sunflower or pea before experimenting with spicier options.
Garnish finished dishes just before serving. The delicate nature of microgreens means heat wilts them quickly, so add them as final touches to soups, pizzas, pastas, and main dishes for maximum visual impact.
Comparing Complete Microgreens Systems vs. Individual Components
Cost Analysis: Kit vs. DIY
Buying a complete microgreens growing system costs more upfront than the absolute cheapest DIY approach. A basic DIY setup using repurposed containers and bulk seeds might cost $15-20 initially.
However, quality DIY setups matching kit performance easily exceed kit prices. Professional trays ($10-15), quality growing medium ($8-12), organic seeds ($12-20 for variety), spray bottles ($5-8), and instruction resources add up quickly to $50-75+.
Time investment tips the scales further toward complete systems. Researching components, sourcing from multiple suppliers, coordinating delivery, and troubleshooting compatibility issues consumes hours. Kits bundle everything tested to work together seamlessly.
Long-term costs favor reusable systems regardless of origin. After initial investment, both approaches cost $10-30 monthly for seeds and medium replenishment. The key is choosing reusable components over disposable ones.
Quality and Reliability Factors
Manufacturer-designed systems ensure component compatibility. Tray dimensions match included seed quantities precisely. Growing medium suits the included varieties. Instructions reference the actual components you’re using.
DIY approaches risk mismatched pieces – trays too shallow for seed density, growing medium wrong for your preferred varieties, or watering systems inappropriate for tray design. These mismatches cause failures that discourage beginners.
Brand reputation matters for ongoing support. Established companies like Handy Pantry (50+ years) or innovative brands like ingarden (award-winning design) stand behind products. Need help? Their customer service understands exactly what you purchased.
Generic DIY setups lack this support network. Online forums help, but responses vary in quality and relevance to your specific situation. The frustration of failed batches without clear solutions drives many people away from microgreens entirely.
Convenience Comparison
Complete kits arrive ready to start growing. Unbox, read instructions, prepare medium, plant seeds – you’re harvesting in 7-10 days. The streamlined experience builds confidence and enthusiasm.
DIY requires research phase, shopping phase, assembly phase, then finally growing phase. Each step introduces potential delays and decision paralysis. Beginners often struggle knowing which choices matter and which are personal preference.
Ongoing convenience favors complete systems slightly. Replacement supplies exist specifically for your system, removing guesswork. The GARDYN replacement seed pads fit perfectly. ingarden eco-packs are pre-measured correctly.
DIY offers ultimate flexibility long-term. Want to try a new variety? Buy those exact seeds. Prefer different growing medium? Switch without system constraints. Experienced growers often appreciate this flexibility after mastering basics with a kit.
Advanced Tips for Complete Microgreens Growing System Success
Optimizing Growing Conditions
Temperature fine-tuning improves results significantly. Most microgreens prefer 70°F (21°C) for germination and 65°F (18°C) for main growth. Cooler temperatures produce more compact, flavorful plants but extend harvest time 2-3 days.
Air circulation often gets overlooked. A small oscillating fan set to low, positioned near (not directly on) trays, prevents mold while strengthening stems. Outdoor air exchange once daily also helps if weather permits.
Water quality matters more than many realize. Chlorinated city water works fine after sitting overnight for chlorine to dissipate. Well water might be too hard or contain excessive minerals. Filtered water is ideal if you notice growth issues with tap water.
Maximizing Nutritional Value
USDA research identifies red cabbage, cilantro, garnet amaranth, and green daikon radish as having the highest concentrations of vitamins C, carotenoids, K, and E respectively. Rotate different varieties to ensure diverse nutrient intake.
Harvest timing affects nutrition significantly. Peak nutrient density occurs when true leaves just emerge but before extensive stem elongation begins. This sweet spot varies by variety but typically falls at 7-10 days for most species.
Light spectrum influences phytochemical production. Blue light enhances chlorophyll and vitamin production. Red light encourages stem growth and antioxidant development. Full-spectrum LEDs or natural sunlight provide balanced nutrition. Avoid growing in complete shade or with only yellow/warm artificial light.
Succession Planting Strategy
Stagger new plantings every 3-4 days for continuous harvest. Start three trays using this schedule – you’ll harvest one tray every few days while others are at different growth stages.
Track planting dates and variety performance using a simple chart or app notes. You’ll identify which varieties grow fastest in your conditions and which flavors you consume most frequently, allowing focused purchasing of replacement seeds.
Scale up gradually. Many beginners plant too much at once, leading to waste when everything matures simultaneously. Better to have smaller, continuous harvests matching your consumption rate.
Health Benefits of Growing Your Own Microgreens
Nutritional Advantages
Microgreens pack incredible nutritional density into tiny packages. Studies demonstrate that microgreens have anti-inflammatory, anti-cancer, anti-bacterial, and anti-hyperglycemia properties, making them functional foods beneficial to human health.
Home-grown microgreens offer freshness impossible with store-bought options. You harvest minutes before consumption, preserving heat-sensitive vitamins and volatile compounds that degrade quickly after cutting. This freshness translates to superior nutrition.
Variety access expands dramatically growing your own. Grocery stores typically stock only common types like pea shoots or sunflower. Your complete microgreens growing system lets you explore dozens of varieties impossible to find commercially.
Sustainability and Environmental Impact
Growing microgreens at home dramatically reduces your food miles. No transportation from farm to distributor to store to home – your countertop is the farm. This local approach eliminates packaging waste from plastic clamshells too.
Water usage drops significantly with home systems, especially hydroponic designs. The ingarden kit uses 90% less water than conventional agriculture for equivalent nutritional output. Closed-loop systems recirculate water rather than irrigating fields.
Year-round growing capability reduces reliance on imported produce during winter months. Your complete microgreens growing system produces fresh nutrition regardless of season or regional growing conditions, supporting food security and reducing global agricultural pressure.
Cost Savings Over Time
Store-bought microgreens cost $3-7 per ounce – expensive even compared to organic produce. A single tray from your complete microgreens growing system yields 8-12 ounces for $2-4 in supplies.
Calculate annual savings quickly. If you replace just one $5 package of store microgreens weekly with home-grown equivalents, you save $260 yearly. Your system typically pays for itself within 2-3 months of regular use.
Beyond monetary savings, the enjoyment and satisfaction of growing your own food adds value difficult to quantify. Many growers report this psychological benefit equals or exceeds financial savings, especially children and elderly folks enjoying the nurturing process.
Frequently Asked Questions
❓ How long does it take to grow microgreens with a complete microgreens growing system?
❓ Can I reuse the growing medium in my microgreens kit with seeds?
❓ Do I need LED grow lights or can I use natural sunlight for my full microgreens setup?
❓ What's the difference between a hydroponic and soil-based ready-to-grow package?
❓ How often do I need to buy replacement supplies for my includes growing medium system?
Conclusion: Choosing Your Perfect Complete Microgreens Growing System
Finding the right complete microgreens growing system transforms your approach to healthy eating and sustainable living. Whether you choose the automated elegance of ingarden, the flexible versatility of GARDYN, or the budget-friendly simplicity of ALPAS LIFE, you’re investing in daily nutrition that exceeds anything available in stores.
For beginners, I recommend starting with mid-range options like the ZESTIGREENS Self-Watering kit ($35-45) or ZESTIGREENS 6-Seed variety pack ($25-30). These comprehensive starter bundles balance affordability, quality components, and foolproof success while letting you explore this rewarding hobby without massive financial commitment.
Serious enthusiasts wanting maximum convenience should consider the ingarden automated system despite its premium price. The set-it-and-forget-it automation, beautiful design, and carbon-neutral certification justify the investment for daily users who value both nutrition and aesthetics.
Families and high-volume growers will appreciate the Handy Pantry Premium kit’s professional capacity and extensive seed variety. This ready-to-grow package delivers restaurant-quality yields supporting actual dietary supplementation rather than just garnishing.
Remember that any complete microgreens growing system outperforms attempting to source components separately as a beginner. The integrated design, tested compatibility, and included instructions eliminate the trial-and-error phase that discourages so many people from establishing consistent growing habits.
Start today by choosing a kit matching your space, budget, and goals. Your future self will thank you as fresh, nutrient-dense microgreens become a daily part of your healthy lifestyle! 🌱
✨ Don’t Miss These Exclusive Deals!
🔍 Ready to start growing? Check current pricing and availability on any of these complete microgreens growing systems. These carefully selected kits will help you create restaurant-quality nutrition your family will love!
Recommended for You
- 7 Best Affordable Microgreens Growing Kits 2026 (Under $50)
- 7 Best Hydroponic Microgreens Kit 2026
- 7 Best Broccoli Sprout Growing Kits – Superfood Cancer Prevention
Disclaimer: This article contains affiliate links. If you purchase products through these links, we may earn a small commission at no additional cost to you.
✨ Found this helpful? Share it with your friends! 💬🤗