In This Article
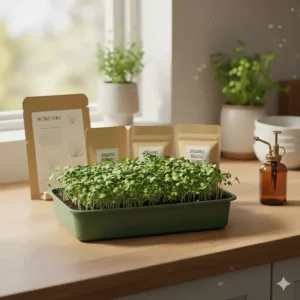
Have you ever wondered how restaurants get those vibrant, flavorful microgreens that transform ordinary dishes into culinary masterpieces? I’ll let you in on a secret: you don’t need a green thumb or fancy equipment to grow them at home. With the right microgreens growing kit for beginners, you can harvest fresh, nutrient-dense greens in just 7-10 days right from your kitchen counter.

Here’s something that shocked me when I first started researching: according to the USDA Agricultural Research Service, microgreens can contain up to nine times higher nutrient levels than their mature counterparts. We’re talking about tiny greens that pack 40 times more vitamins, minerals, and antioxidants per ounce than full-grown vegetables. Whether you’re looking to boost your family’s nutrition, save money on organic produce, or simply enjoy a rewarding hobby, a beginner microgreens kit makes it incredibly simple.
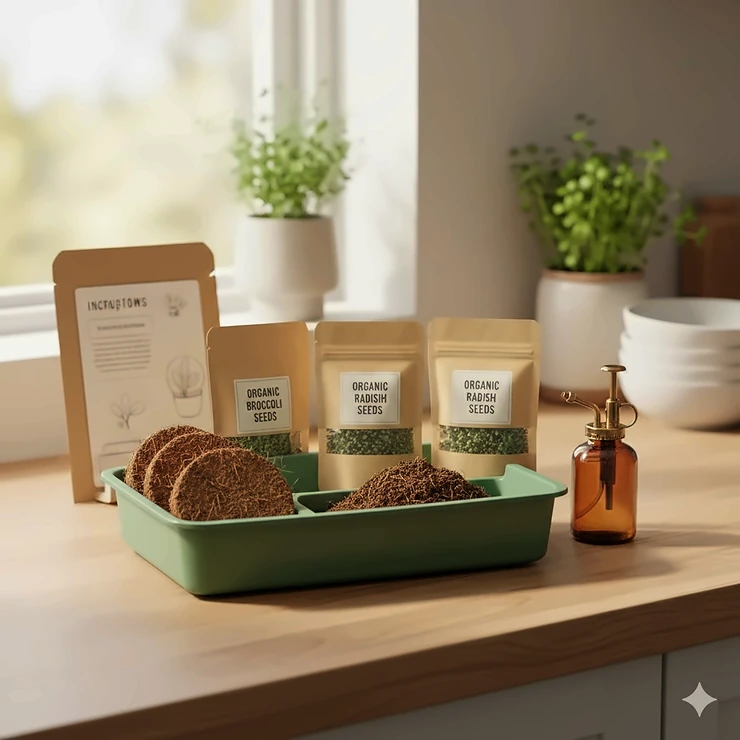
The beauty of modern microgreens kits is that they’ve eliminated all the guesswork. No more worrying about proper drainage, light exposure, or complicated growing schedules. The best easy microgreens kit options today come with everything you need: pre-measured seeds, growing trays, humidity domes, and foolproof instructions. Some even feature self-watering systems and automated LED lights that do the work for you.
In this comprehensive guide, I’ll walk you through the 7 best microgreens growing kits that are perfect for first time microgreens growers. Whether you’re working with a tight budget or ready to invest in a premium automated system, you’ll find the perfect match for your needs, space, and lifestyle.
Quick Comparison Table: Top Microgreens Growing Kits at a Glance
| Product | Type | Price Range | Harvest Time | Best For | Rating |
|---|---|---|---|---|---|
| ZestiGreens Self-Watering Kit | Hydroponic | $35-$45 | 7-10 days | Budget-conscious beginners | ⭐⭐⭐⭐½ |
| HAMAMA Microgreens Kit | Seed Quilts | $40-$60 | 7-10 days | No-fail growing | ⭐⭐⭐⭐⭐ |
| Sproutlet 3-Pack System | Self-watering | $30-$40 | 10 days | Multiple varieties | ⭐⭐⭐⭐ |
| GARDYN Complete Kit | Hydroponic nursery | $45-$65 | 7-10 days | Serious home growers | ⭐⭐⭐⭐½ |
| ingarden Smart Garden | Automated LED | $145-$180 | 7 days | Luxury & automation | ⭐⭐⭐⭐⭐ |
| AOMGD 4-Tier Stackable | Multi-level | $25-$35 | 7-10 days | Space maximization | ⭐⭐⭐⭐ |
| Mountain Valley Mini Kit | Soil-based | $12-$18 | 10 days | Trial & gifting | ⭐⭐⭐⭐ |
💬 Just one click – help others make better buying decisions too!😊
✨ Don’t Miss These Exclusive Deals!
🔍 Take your home growing to the next level with these carefully selected products. Click on any highlighted item to check current pricing and availability. These tools will help you create authentic nutrition-packed microgreens your family will love!
Top 7 Microgreens Growing Kit for Beginners: Expert Analysis
1. ZestiGreens Self-Watering Microgreens Growing Kit
If you’re searching for a simple microgreen growing solution that won’t break the bank, the ZestiGreens Self-Watering Kit is your answer. This kit brilliantly combines affordability with functionality, making it ideal for first time microgreens growers who want to test the waters without a major commitment.
Key Specifications:
- 12″x6″ reusable tray with bamboo surround
- Hydroponic insert with blackout felt lid
- Includes 2 hemp grow mats and organic seed varieties (Red Garnet Amaranth, Superfood Mix)
- 16-page illustrated grow guide
What sets this kit apart is its versatility. You can grow hydroponically using the included insert, or remove it to use soil instead—giving you flexibility as you learn which method works best for your lifestyle. Customers rave about the straightforward setup process and the consistently high germination rates. One reviewer mentioned harvesting their first crop in just 8 days with zero prior gardening experience.
The bamboo frame adds a touch of style to your kitchen counter, while the comprehensive guide walks you through every step with clear illustrations. This foolproof microgreens method includes everything from seed selection to harvesting techniques.
✅ Pros:
- Dual growing options (hydroponic or soil)
- Beautiful bamboo aesthetic
- Excellent germination guarantee
❌ Cons:
- Smaller growing surface than some competitors
- Manual watering required
Price: $35-$45 | Best for: Budget-conscious beginners wanting style and simplicity
2. HAMAMA Microgreens Growing Kit
The HAMAMA Microgreens Growing Kit has revolutionized home microgreen cultivation with its patented Seed Quilt technology. This easy microgreens kit is specifically engineered for people who’ve killed every plant they’ve ever owned—and that’s not an exaggeration.
Key Specifications:
- Patented Seed Quilt system (seeds + growing medium + humidity dome all-in-one)
- Available in plastic tray or ceramic versions
- 3 varieties included: Kale, Broccoli, and Salad Mix
- Add water once and harvest in 7-10 days
Here’s what makes HAMAMA special: you literally add water once and walk away. The Seed Quilts are pre-seeded mats that eliminate measuring, spreading, and all the fussy steps that intimidate beginners. Customers consistently report near-perfect success rates, with many saying it’s the first plant they’ve successfully grown.
The system works in low light conditions, so you don’t need a sunny windowsill. Reviews highlight how the ceramic tray option adds elegance to kitchens, while the plastic version is perfect for those who prioritize function over form. The company’s customer service team (based in the US) provides outstanding support if you encounter any issues.
✅ Pros:
- Virtually fail-proof Seed Quilt system
- Works in any lighting condition
- Excellent customer support
❌ Cons:
- Ongoing seed quilt purchases needed
- Slightly higher upfront cost
Price: $40-$60 | Best for: Absolute beginners and self-proclaimed “plant killers”
3. Sproutlet Microgreen Grow Kit (3-Pack)
The Sproutlet 3-Pack System delivers exceptional value by giving you three complete growing stations in one purchase. This beginner microgreens kit is perfect for families who want to experiment with multiple varieties simultaneously or ensure a continuous harvest cycle.
Key Specifications:
- 3 growing trays with domes
- 15 compostable grow mats included
- 2 packets of organic microgreen seeds
- Self-watering design with BPA-free materials
What impressed me most about this kit is the self-watering capability. The compostable grow mats maintain consistent moisture levels, eliminating the daily watering routine that trips up many beginners. Customers appreciate how this step-by-step microgreens guide approach lets them stagger plantings—you can have microgreens at different growth stages, ensuring fresh harvests every few days.
The compact design fits perfectly on standard kitchen countertops, and the domes create ideal humidity conditions for rapid germination. Users report consistent 10-day harvest cycles with minimal intervention. The included organic seeds (varieties may vary) give you a solid starting point.
✅ Pros:
- Three complete systems for varied growing
- Mess-free compostable mats
- Space-efficient design
❌ Cons:
- No LED lighting included
- Limited seed variety in starter pack
Price: $30-$40 | Best for: Families wanting continuous harvests and variety
4. GARDYN Complete Microgreens Growing Kit
Serious about becoming a home microgreens producer? The GARDYN Complete Kit is designed for those ready to move beyond casual hobbyist status. This comprehensive system includes professional-grade components that deliver restaurant-quality results.
Key Specifications:
- Sprout nursery with 10 reusable grow plates
- 20 seed pads (5 varieties: Arugula, Mild Blend, Spicy Blend, Red Mustard)
- Bamboo wicks for optimal moisture distribution
- Compatible with Gardyn hydroponic system
This kit shines in its flexibility and scalability. You choose what and how much to grow each time, making it adaptable to your changing needs. The four included varieties give you diverse flavor profiles—from peppery Arugula to zesty Spicy Blend. Customers particularly love the nutrient density, with microgreens offering up to 40% greater nutrient concentration than mature vegetables.
The bamboo wick system ensures consistent moisture without oversaturation—a common beginner mistake. Many users place their nursery on the Gardyn hydroponic system lid for optimal LED lighting, though it works well in sunny windows too. Reviews consistently mention the superior flavor and crisp texture compared to other kits.
✅ Pros:
- Professional-grade components
- Highly flexible growing options
- Excellent flavor profiles
❌ Cons:
- Requires seed pad refills
- Best results need good lighting
Price: $45-$65 | Best for: Dedicated growers wanting professional results
5. ingarden Microgreens Growing Kit
If you’re ready to invest in the Rolls-Royce of microgreens systems, the ingarden Smart Garden represents the pinnacle of automated home growing technology. This premium kit has won prestigious Red Dot and iF Design Awards for good reason—it’s stunning, efficient, and incredibly easy to use.
Key Specifications:
- Automated 4-stage LED grow lights (15-watt energy-efficient)
- Patent-pending hydroponic watering system
- Ceramic bowl with stainless steel frame (plastic-free)
- 3 organic seed pads included, ready in 7 days
- Available in Beige, Black, Rose, Mint, Ocean Blue, Ocean White
This foolproof microgreens method is as close to “set it and forget it” as growing gets. Simply place seed pads, add water, press a button, and the automated LED system takes over. The lights emit specific wavelengths that activate phytochemical development, growing microgreens 4x faster than traditional soil methods.
What truly distinguishes ingarden is the verified nutritional quality—they’re the first company to have microgreens lab-tested by Eurofins and Bilacon. Results show their Red Cabbage microgreens contain 230% more vitamin A than mature red cabbage. The system uses 90% less water than conventional farming and is carbon-neutral certified.
Customers consistently rate this 5 stars, praising both the aesthetic appeal and remarkable ease of use. The dishwasher-safe components make cleanup effortless. Plus, for every kit sold, ingarden donates a meal to a child through the UN World Food Programme.
✅ Pros:
- Fully automated LED growing system
- Award-winning design
- Lab-verified superior nutrition
❌ Cons:
- Premium price point
- Requires proprietary seed pads
Price: $145-$180 | Best for: Design-conscious users wanting premium automation and maximum nutrition
6. AOMGD 4-Tier Stackable Sprouts Growing Kit
Maximize your growing capacity without sacrificing precious counter space with the AOMGD 4-Tier Stackable Kit. This simple microgreen growing solution is perfect for apartment dwellers and anyone with limited kitchen real estate.
Key Specifications:
- 4 stackable growing trays with lids
- Blackout sleeve and drain tray included
- Food-grade PP material (BPA-free)
- Suitable for alfalfa, broccoli, radish, barley seeds
- No soil required—just add water
The vertical stacking design is ingenious—you can grow four different varieties simultaneously in the footprint of a single tray. The perforated trays ensure excellent drainage and ventilation, creating optimal conditions for seed germination. Customers report consistently fast sprouting times and minimal effort required.
This kit excels as an educational tool for families. Parents love using it to teach children about nutrition and plant biology—kids get excited watching different seeds sprout at varying speeds across the tiers. The transparent design lets you monitor progress without disturbing the growing process.
The small ventilation holes control humidity perfectly, preventing common issues like mold or excessive moisture. Plus, the durable construction means you’ll use this kit for years, making it an excellent long-term value despite the modest initial investment.
✅ Pros:
- Space-saving vertical design
- Grow multiple varieties simultaneously
- Great for educational purposes
❌ Cons:
- No seeds included
- Requires regular monitoring
Price: $25-$35 | Best for: Space-conscious growers and families with children
7. Mountain Valley Mini Microgreens Growing Kit
Perfect for testing the microgreens waters or giving as a thoughtful gift, the Mountain Valley Mini Kit offers a complete growing experience in a compact, affordable package. This beginner microgreens kit proves that great things really do come in small packages.
Key Specifications:
- Single-serve growing container with humidity lid
- Pre-fertilized soil puck (certified organic)
- Organic seeds (Salad Mix: Broccoli, Cabbage, Arugula, Kale, Kohlrabi)
- Mist sprayer included
- Detailed illustrated instructions
What makes this mini kit special is how it removes every possible barrier to entry. Everything arrives in one compact package—you don’t need to source anything separately. The pre-fertilized soil puck expands when moistened, eliminating messy soil handling. Customers love how this foolproof microgreens method delivers results in about 10 days with minimal space and zero fuss.
The USDA Certified Organic seeds ensure you’re growing the cleanest, healthiest greens possible. The Salad Mix variety provides diverse flavors and nutrients in one harvest. Reviews frequently mention this kit as the perfect stocking stuffer or introduction to indoor gardening for skeptical friends.
Mountain Valley Seed Company (a US-based company) backs every kit with personalized customer service. Their passion for helping people succeed with growing shines through in both product quality and support. While the single-use design means you’ll need refill supplies eventually, it’s an incredibly low-risk way to discover if microgreens are right for you.
✅ Pros:
- Ultra-affordable entry point
- Everything included, nothing extra needed
- Perfect for gifting
❌ Cons:
- Single-use container
- Smaller yield than multi-tray systems
Price: $12-$18 | Best for: Curious beginners, gifting, and testing before committing
What Are Microgreens and Why Should Beginners Grow Them?
Microgreens are young vegetable seedlings harvested when they’re just 1-3 inches tall, typically 7-21 days after germination. Unlike sprouts (which are grown in water and eaten whole including roots), microgreens are grown in soil or hydroponic media and only the stems and leaves are consumed.
According to research published in ScienceDirect, microgreens possess anti-inflammatory, anti-cancer, anti-bacterial, and anti-hyperglycemia properties, making them a functional food that benefits human health. Their concentrated nutrition comes from being harvested at the cotyledon stage when nutrient levels are at peak density.
For beginners, microgreens offer unmatched advantages: they grow incredibly fast (most varieties in 7-10 days), require minimal space (a standard 10×20 tray fits on any countertop), and need basic supplies (seeds, growing medium, water, light). There’s no weeding, no pest management, and no complex fertilization schedules. You can grow them year-round indoors regardless of climate or season.
The cost savings are substantial too. A single packet of microgreen seeds (often $3-$5) can produce multiple harvests worth $20-$30 of store-bought greens. Plus, you control exactly what goes into your food—no pesticides, no questionable farming practices, just pure, fresh nutrition. As Penn State researchers note, microgreens can be grown in a variety of soilless production systems in small spaces indoors, making them accessible to anyone.
Understanding Different Types of Microgreens Kits
Hydroponic Systems
Hydroponic kits grow microgreens without soil, using water and a growing medium like hemp mats or coconut coir. These systems tend to be cleaner, faster, and produce consistently high yields. They’re ideal for apartment dwellers who want to avoid dirt and mess.
Soil-Based Kits
Traditional soil-based systems use organic potting mix or pre-fertilized soil pucks. Many gardeners prefer this method because it feels more natural and often produces richer flavors. The soil provides minerals that can enhance nutritional profiles.
Self-Watering Designs
Self-watering kits feature reservoir systems that wick moisture to the growing medium automatically. This technology eliminates the most common beginner mistake—inconsistent watering. Perfect for busy people or those new to any type of gardening.
Automated LED Systems
Premium automated kits include built-in LED grow lights optimized for microgreen development. These systems work anywhere, regardless of natural light availability, and typically produce faster, more uniform growth. The investment pays off in convenience and consistent results.
Step-by-Step Microgreens Guide: How to Choose the Right Kit
Step 1: Assess Your Available Space
Measure your intended growing area. Countertop kits typically need 12-20 inches of horizontal space. Vertical stackable systems can fit in surprisingly small footprints if you’re height-limited rather than width-limited.
Step 2: Determine Your Budget
Entry-level kits start around $12-$18, mid-range options run $30-$65, and premium automated systems reach $145-$180. Consider long-term value—higher upfront cost might save money if it includes reusable components and reduces failure rates.
Step 3: Consider Your Commitment Level
First time microgreens growers should start with truly foolproof systems like HAMAMA or Mountain Valley Mini kits. Once you’ve proven you’ll stick with it, upgrade to more sophisticated systems that offer greater flexibility and yield.
Step 4: Evaluate Maintenance Preferences
Hate daily tasks? Choose self-watering or automated systems. Enjoy hands-on gardening? Manual systems give you more control and connection to the growing process. Be honest about your lifestyle and habits.
Step 5: Think About Variety and Quantity Needs
Growing for one person? A single tray system works great. Feeding a family? Look for multi-tray options or stackable systems. Want diverse flavors? Choose kits offering multiple seed varieties or compatibility with various seed types.
Essential Growing Tips for Beginners
Light Requirements
Most microgreens need 4-6 hours of indirect sunlight daily or 12-16 hours of LED grow light exposure. South-facing windows work beautifully for natural light growing. If using artificial lights, position them 6-12 inches above the growing surface for optimal results.
Watering Techniques
The golden rule: keep the growing medium consistently moist but never waterlogged. Misting works well in early germination stages. Once seedlings emerge, bottom watering (adding water to the tray below) prevents damaging delicate stems and reduces disease risk.
Temperature and Humidity
Microgreens thrive in typical indoor temperatures (65-75°F). Most varieties tolerate normal household humidity levels, though some prefer slightly higher humidity during germination. Humidity domes included with many kits create ideal micro-environments.
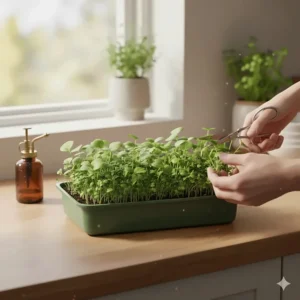
Harvesting at the Right Time
Harvest when the first true leaves appear, typically 7-14 days after sowing depending on variety. Use sharp scissors to cut stems just above the growing medium. Rinse gently, pat dry, and use immediately for maximum nutrition and flavor.
Preventing Common Problems
Avoid overcrowding seeds—proper spacing ensures good air circulation and reduces mold risk. Don’t overwater—soggy conditions invite fungal issues. Use clean equipment and fresh, quality seeds. If mold appears, increase air circulation and reduce moisture.
Comparing Microgreens to Traditional Gardening
| Factor | Microgreens | Traditional Gardening |
|---|---|---|
| Time to Harvest | 7-21 days | 30-120+ days |
| Space Required | 1-2 sq ft | 10-100+ sq ft |
| Year-Round Growing | Yes (indoors) | No (seasonal) |
| Pest Management | Minimal | Extensive |
| Nutrient Density | 4-40x higher | Standard |
| Initial Investment | $12-$180 | $50-$500+ |
Popular Microgreen Varieties for Beginners
Mild Flavors (Perfect Starting Point)
- Sunflower: Nutty, crunchy, loaded with protein
- Pea Shoots: Sweet, tender, high in vitamins A and C
- Broccoli: Mild cabbage flavor, sulforaphane powerhouse
Medium Intensity
- Kale: Slightly peppery, mineral-rich
- Cabbage: Mild tang, vitamin K champion
- Arugula: Gentle pepper bite, copper-rich
Bold Flavors (For Adventurous Palates)
- Radish: Spicy punch, loaded with antioxidants
- Mustard: Wasabi-like heat, anti-inflammatory compounds
- Mizuna: Zesty, unique flavor profile
Start with milder varieties to develop your technique, then experiment with bold flavors once you’re confident. Many growers enjoy mixing varieties for complex flavor profiles in salads and garnishes.
Microgreens Kit Value Analysis
Budget Options ($12-$40)
Budget kits like Mountain Valley Mini and AOMGD stackable systems provide excellent value for cautious beginners. You’ll need to purchase seeds and growing medium separately after initial supplies run out, but the low entry cost makes experimentation affordable. Expect to invest another $10-$15 every 2-3 months for supplies.
Mid-Range Systems ($40-$70)
Kits like ZestiGreens, HAMAMA, and Sproutlet offer the sweet spot of quality, features, and price. These systems typically include everything for multiple growing cycles and feature thoughtful design elements that reduce failure rates. Ongoing costs vary but generally run $15-$25 monthly if you’re growing continuously.
Premium Automated Options ($145-$180)
Systems like ingarden represent significant investments but deliver convenience, reliability, and superior nutrition. Factor in the time savings from automation, reduced water usage, and guaranteed germination rates. While seed pad costs add up, many users find the no-fail results and aesthetics justify the premium pricing.
Health Benefits of Home-Grown Microgreens
Research from the U.S. Department of Agriculture shows microgreens contain substantially higher amounts of health-promoting micronutrients than their mature counterparts. These concentrated nutrients offer remarkable benefits for overall wellness.
Cardiovascular Support
Microgreens contain high levels of polyphenols and antioxidants that support heart health. Red cabbage and broccoli microgreens are particularly rich in compounds that may help reduce cholesterol levels and improve arterial function.
Enhanced Immune Function
The vitamin C, vitamin E, and beta-carotene concentrations in microgreens strengthen immune response. Arugula and kale microgreens provide exceptional vitamin A levels, critical for maintaining healthy mucous membranes that serve as first-line immune defenses.
Blood Sugar Regulation
Studies suggest certain microgreens, particularly broccoli and fenugreek varieties, may help improve cellular glucose uptake and insulin sensitivity. Their high fiber and antioxidant content supports stable blood sugar levels.
Cancer-Fighting Compounds
Cruciferous microgreens (broccoli, kale, cabbage, radish) contain concentrated sulforaphane—a compound extensively studied for its potential anti-cancer properties. One ounce of broccoli microgreens provides sulforaphane equivalent to 1.5 pounds of mature broccoli.
Digestive Health
The enzymes present in fresh microgreens aid digestion and nutrient absorption. Unlike mature vegetables that lose enzymes during transport and storage, home-grown microgreens deliver maximum enzymatic activity when consumed immediately after harvest.
Sustainability and Cost Savings
Growing microgreens at home dramatically reduces your environmental footprint while stretching your grocery budget. A typical microgreens kit uses 90% less water than conventional agriculture and eliminates transportation emissions—your food travels from tray to plate in seconds, not thousands of miles.
The economics are compelling: store-bought organic microgreens often cost $3-$5 per ounce, while home-grown varieties cost roughly $0.25-$0.75 per ounce when you factor in seeds, growing medium, and utilities. A family consuming 2-3 ounces weekly saves $400-$600 annually compared to purchasing from grocery stores or farmers markets.
Zero packaging waste is another significant benefit. No plastic clamshells, no shipping materials—just compostable growing medium and reusable trays. Many systems use biodegradable components throughout, making them genuinely sustainable choices for eco-conscious consumers.
Troubleshooting Common Beginner Mistakes
Problem: Seeds Won’t Germinate
Solution: Check seed age (old seeds lose viability), ensure proper moisture (damp but not soaked), verify temperature (most seeds need 65-75°F), and confirm you’re not covering seeds too deeply. Some varieties need light to germinate, while others prefer darkness initially.
Problem: Mold or Fungus Growth
Solution: Improve air circulation by using a small fan on low setting, reduce watering frequency, avoid overcrowding seeds, and ensure humidity dome is vented or removed once sprouts emerge. Clean all equipment thoroughly between plantings with diluted hydrogen peroxide solution.
Problem: Leggy, Pale Seedlings
Solution: Increase light exposure—microgreens stretching toward light sources aren’t receiving adequate illumination. Move trays closer to windows or add supplemental LED lighting. Pale color indicates chlorophyll deficiency from insufficient light.
Problem: Slow or Uneven Growth
Solution: Check for consistent moisture levels throughout the growing medium, verify temperature stability, and ensure seeds were distributed evenly without clumping. Some seeds naturally have longer germination periods than others—radish sprouts in 3-4 days while peas need 10-12 days.
Problem: Bitter or Off Flavors
Solution: Harvest at the proper stage (when first true leaves appear but before second set develops), ensure adequate but not excessive light, and taste different varieties—some like mustard and radish are naturally spicy. Water quality can affect flavor, so try filtered water if your tap water is heavily chlorinated.
❓ FAQ: Common Questions About Microgreens Growing Kit for Beginners
❓ How long does it take for a beginner microgreens kit to produce the first harvest?
❓ Do microgreens growing kits work in low light conditions?
❓ What is the best easy microgreens kit for someone with no gardening experience?
❓ Can you reuse a microgreens growing kit for multiple harvests?
❓ Are microgreens growing kits worth the investment compared to buying microgreens?
Conclusion: Start Your Microgreens Journey Today
Choosing the right microgreens growing kit for beginners doesn’t need to be complicated. Whether you’re drawn to the budget-friendly simplicity of the Mountain Valley Mini Kit, the fail-proof technology of HAMAMA’s Seed Quilts, or the automated luxury of the ingarden system, there’s a perfect match for your needs, budget, and lifestyle.
The beauty of starting with microgreens is that failure is almost impossible with modern kits—they’ve truly mastered the foolproof microgreens method. You’ll experience the pride of your first harvest within days, not months, and the nutritional boost is scientifically proven to be exceptional. Recent studies confirm microgreens provide concentrated vitamins, minerals, phenolic compounds, and antioxidants that serve as viable nutritional supplements.
Remember, the best kit is the one you’ll actually use consistently. Start small if you’re uncertain—a $12 mini kit or a $35 basic system proves the concept without major commitment. As your confidence and enthusiasm grow, you can always expand with additional trays or upgrade to more sophisticated systems.
The step-by-step microgreens guide approach I’ve outlined removes all guesswork. Simply choose your kit based on your priorities (budget, automation level, space constraints), follow the included instructions, and you’ll be harvesting fresh, nutrient-dense greens before you know it. Your kitchen counter is about to become the most productive square foot in your home.
Take that first step today. Your future self—and your taste buds—will thank you for the decision to grow these remarkable nutritional powerhouses at home. Fresh, vibrant, incredibly nutritious microgreens are just one week away from becoming a regular part of your daily meals.
Recommended for You
- 7 Best Microgreens Growing Kit With Light 2026
- 7 Best Microgreen Growing Kit Picks for 2025
- 7 Best Shiitake Mushroom Growing Kits 2025 (Expert Tested)
Disclaimer: This article contains affiliate links. If you purchase products through these links, we may earn a small commission at no additional cost to you.
✨ Found this helpful? Share it with your friends! 💬🤗