In This Article
What if I told you that tiny green shoots could pack up to 50 times more cancer-fighting power than full-grown broccoli? Research from Johns Hopkins University shocked the nutrition world when it revealed that broccoli sprouts contain astronomical levels of sulforaphane, a compound that scientists now call nature’s most powerful cancer prevention molecule.
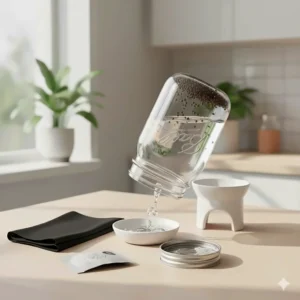
Here’s the thing though: store-bought sprouts sit on shelves for days, losing precious nutrients by the hour. Plus, contamination risks have made many health-conscious folks nervous about commercial options. That’s where a broccoli sprout growing kit becomes your kitchen’s secret weapon.
I’ve been growing my own broccoli sprouts for three years now, and honestly, it’s transformed how I think about nutrition. These miniature powerhouses take just 5 days from seed to harvest, require zero gardening experience, and deliver fresh sulforaphane-rich greens whenever you want them. Whether you’re battling inflammation, supporting your body’s natural detox pathways, or just want the freshest superfood possible, growing your own is the smartest move you’ll make this year.
In this guide, I’ll walk you through the 7 best broccoli sprout growing kits available on Amazon right now, breaking down exactly which one fits your lifestyle, budget, and sprouting goals.
Quick Comparison Table
| Product | Type | Price Range | Capacity | Best For | Rating |
|---|---|---|---|---|---|
| Handy Pantry Complete Kit | Mason Jar | $25-$35 | 1 quart | Beginners with seeds included | 4.6/5 |
| Zeato 2-Jar Kit | Mason Jar | $20-$28 | 32 oz (2 jars) | Multiple batches | 4.5/5 |
| Masontops Bean Screen | Mason Jar Lid | $15-$22 | Fits wide mouth jars | Budget-conscious | 4.4/5 |
| YARRD 3-Tier Tray | Stackable Tray | $35-$45 | Multi-level | High-volume growers | 4.3/5 |
| Easy Sprout Sprouter | Specialty Container | $18-$26 | 1 quart | Humid climates | 4.7/5 |
| Wholesome Hearth Kit | Ceramic | $28-$38 | Medium | Aesthetic-focused | 4.2/5 |
| Handy Pantry Standard | Mason Jar Lid Only | $18-$24 | Fits any wide mouth | DIY enthusiasts | 4.5/5 |
💬 Just one click – help others make better buying decisions too!😊
Top 7 Broccoli Sprout Growing Kits: Expert Analysis
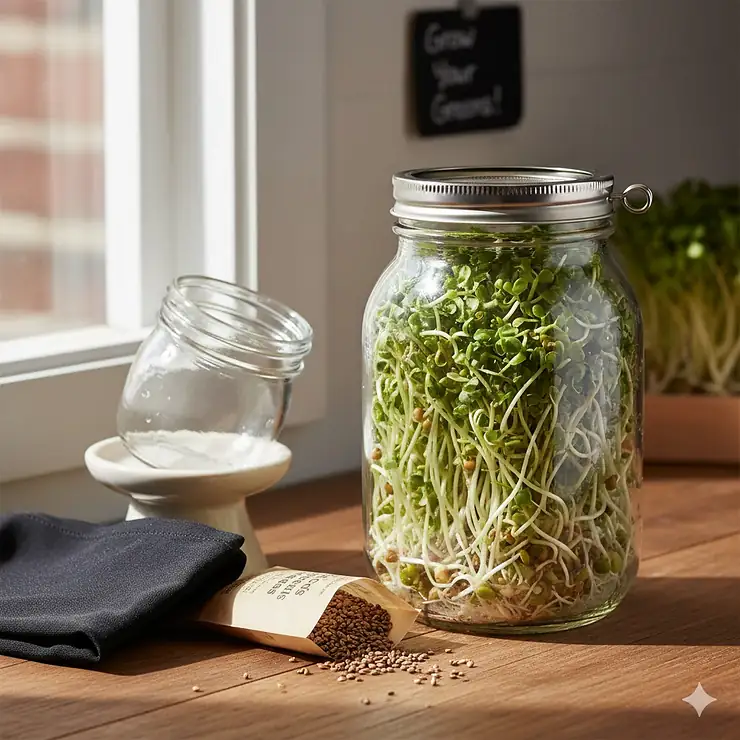
1. Handy Pantry Complete Organic Broccoli Sprout Growing Kit
The Handy Pantry Complete Kit is hands-down the best all-in-one option for anyone serious about growing broccoli sprouts at home. This kit eliminates the guesswork entirely.
Key Specifications:
- Includes quart mason jar, 316 stainless steel lid, sprouting stand, and 4 oz organic broccoli seeds
- Medical-grade stainless steel that’s 100% rust-proof and dishwasher safe
- OTCO certified organic, non-GMO seeds with high germination rates
Customer Insights: Users consistently praise the quality of the stainless steel components and the detailed instructions. One reviewer mentioned harvesting fresh sprouts within 5 days on their first try, noting the seeds had a 95%+ germination rate. The stand’s angled design ensures perfect drainage, which prevents the bacterial growth that ruins many amateur sprouting attempts.
✅ Complete starter kit with everything needed
✅ Premium 316 stainless steel (no rust ever)
✅ Includes 4 oz certified organic seeds
❌ Pricier than lid-only options
❌ Only one jar included
Price Range: $25-$35
This is perfect for beginners who want a foolproof system and don’t mind investing a bit more upfront for quality components that’ll last years.
2. Zeato Sprouting Jar Kit – 2 Pack Complete Set
The Zeato kit gives you double the sprouting power with its two-jar system, making it ideal for maintaining a continuous supply of fresh broccoli sprouts.
Key Specifications:
- 2 wide mouth 32 oz mason jars with 316 stainless steel mesh lids
- Includes blackout sleeves for light control, sprouting tray, stand, and cleaning brush
- Premium rust-proof materials, dishwasher safe
Customer Insights: Growers love the blackout sleeves feature, which allows them to control sprouting conditions for different seed types. Multiple reviewers mentioned successfully growing broccoli, alfalfa, and mung beans simultaneously. The included cleaning brush makes maintenance effortless, and the stand holds both jars at optimal drainage angles.
✅ Two jars for continuous harvesting
✅ Blackout sleeves for optimal growth control
✅ Complete accessories including brush
❌ Seeds not included
❌ Takes up more counter space
Price Range: $20-$28
Perfect for families or health enthusiasts who want a steady supply of different sprout varieties without constant reseeding.
3. Masontops Bean Screen Plastic Mason Jar Sprouting Lids
The Masontops Bean Screen represents the budget-friendly entry point into serious sprouting, designed specifically for those who already own mason jars.
Key Specifications:
- BPA-free plastic lids with precision threading for all wide mouth jars
- Inverted spout design for splash-free rinsing
- Standing pegs for upside-down drainage, faceted sides prevent rolling
Customer Insights: Users appreciate the ingenious inverted spout that eliminates the need to unscrew the lid during rinsing. However, some noted that broccoli seeds (being tiny) can slip through the mesh during the first 1-2 days of sprouting. Once sprouted, the roots prevent any loss. The anti-roll design is brilliant for small kitchens where counter space is precious.
✅ Most affordable option for jar owners
✅ Innovative inverted spout design
✅ Dishwasher safe and durable
❌ Some seed loss in early stages
❌ Jar and seeds sold separately
Price Range: $15-$22
Ideal for budget-conscious sprouters or those wanting to test the waters before committing to a full system.
4. YARRD Stainless Steel 3-Tier Seed Sprouting Kit
The YARRD 3-Tier system takes sprouting to commercial levels, perfect for serious health enthusiasts growing large quantities.
Key Specifications:
- 8.7-inch diameter stainless steel trays, 5.5 inches high
- 3 mesh germination trays plus 1 base tray for moisture retention
- Food-grade stainless steel throughout, lightweight and portable
Customer Insights: High-volume growers praise the stackable design that maximizes vertical space. One restaurant owner reported using this system to supply their establishment with fresh microgreens daily. The mesh allows excellent air circulation between levels, preventing the mold issues common with dense sprouting. Users recommend starting with one level until you master the rhythm, then expanding.
✅ Massive capacity for bulk growing
✅ Restaurant-quality stainless steel
✅ Space-efficient vertical design
❌ Learning curve for beginners
❌ Higher initial investment
Price Range: $35-$45
Best suited for experienced sprouters, large families, or anyone wanting to grow sprouts commercially or for regular juice/smoothie production.
5. Easy Sprout Sprouter by Sproutpeople
The Easy Sprout Sprouter has earned legendary status among sprouting enthusiasts, particularly those in humid climates where mold can be problematic.
Key Specifications:
- 1-quart BPA-free growing vessel with superior ventilation system
- Dual lid system: domed for home use, flat for travel
- Small seed insert snaps in for tiny seeds like broccoli
- Includes solid storage lid for refrigerator
Customer Insights: This sprouter’s convection-based ventilation system uses heat from growing sprouts to circulate fresh humidified air naturally. Users in Florida, Louisiana, and other humid regions swear by it, reporting zero mold issues. The small seed insert is crucial for broccoli sprouts, preventing seed loss through drainage holes. Many sprouters own multiple units to maintain continuous production.
✅ Best air circulation of any sprouter
✅ Perfect for humid environments
✅ Travel-friendly with dual lid system
❌ Plastic construction (though BPA-free)
❌ Seeds sold separately
Price Range: $18-$26
The go-to choice for anyone in high-humidity areas or frequent travelers who want to maintain their sprouting routine on the road.
6. Wholesome Hearth Ceramic Sprouting Kit
The Wholesome Hearth kit brings elegance to sprouting with its beautiful ceramic design that looks at home on any countertop.
Key Specifications:
- Elegant ceramic dish with bamboo blackout lid
- Stackable design for multiple seed varieties
- Optimized seed germination tray design
Customer Insights: This kit appeals to those who care about kitchen aesthetics as much as nutrition. The ceramic material maintains more stable temperatures than plastic or glass, which some users report leads to more consistent sprouting. The bamboo lid doubles as a blackout cover and serving tray. However, the ceramic is heavier and requires more careful handling than plastic alternatives.
✅ Beautiful countertop appearance
✅ Temperature-stable ceramic material
✅ Eco-friendly bamboo components
❌ Heavier and more fragile
❌ Premium pricing for aesthetics
Price Range: $28-$38
Perfect for health-conscious individuals who want their sprouting setup to complement modern, minimalist kitchen designs.
7. Handy Pantry Standard Broccoli Sprouting Kit (Lid Only)
The Handy Pantry Standard Kit gives you the premium Trellis + Co. stainless steel lid with organic seeds, letting you use your own jars.
Key Specifications:
- One 316 stainless steel sprouting lid (double-thick ring)
- 4 oz bag of OTCO certified organic broccoli seeds
- Includes sprouting stand and detailed instructions
- Fits most wide mouth mason jars (Ball, Kerr, Bernardin)
Customer Insights: DIY enthusiasts love this middle-ground option. The medical-grade 316 stainless steel lid resists rust even after years of use, and users report it’s superior to cheaper mesh lids that deteriorate quickly. The included seeds are consistently praised for their 90%+ germination rates. Many sprouters buy multiple lids to have several batches going simultaneously with jars they already own.
✅ Premium stainless steel construction
✅ Includes organic certified seeds
✅ Use with existing mason jars
❌ Jar sold separately
❌ No drainage tray included
Price Range: $18-$24
Ideal for experienced home cooks who already have mason jars and want to upgrade to a professional-quality sprouting system without buying redundant components.
What Is a Broccoli Sprout Growing Kit and Why You Need One
A broccoli sprout growing kit is a specialized system designed to germinate and grow broccoli seeds into nutrient-dense sprouts in your kitchen within 4-6 days. Unlike traditional gardening, sprouting requires no soil, minimal space, and takes just minutes of daily maintenance. These kits typically include a container with drainage capabilities, mesh screens or lids for rinsing, and sometimes organic seeds to get you started.
The magic happens through a simple rinse-and-drain cycle that keeps seeds moist without becoming waterlogged. What makes these kits essential rather than optional is their ability to deliver consistent results while preventing the bacterial contamination that plagued early DIY sprouting attempts. Modern designs incorporate food-grade materials, optimized air circulation, and precise drainage angles that maintain the delicate moisture balance sprouts need to thrive.
Here’s what sets quality kits apart: they eliminate common failure points like mold growth, seed rot, and uneven sprouting. A well-designed broccoli sprout growing kit essentially creates a microclimate where conditions stay optimal 24/7, producing crunchy, sulforaphane-rich sprouts with minimal effort on your part.
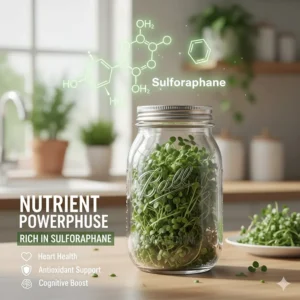
Understanding Sulforaphane: The Cancer-Fighting Compound in Broccoli Sprouts
Sulforaphane stands as one of nature’s most extensively studied phytochemicals, and the research backing its health benefits is nothing short of remarkable. This powerful isothiocyanate forms when you chew or blend broccoli sprouts, triggering an enzymatic reaction between glucoraphanin (the precursor) and myrosinase (the activating enzyme).
The Science Behind Cancer Prevention
Research published by the National Institutes of Health demonstrates that sulforaphane operates through multiple anti-cancer mechanisms. It activates phase 2 detoxification enzymes that help your body eliminate potential carcinogens before they can damage DNA. Studies have shown sulforaphane’s effectiveness against various cancer types, including prostate, breast, colon, and melanoma.
Memorial Sloan Kettering Cancer Center reports that sulforaphane demonstrates anticancer effects by inducing cell cycle arrest and triggering apoptosis (programmed death) in cancer cells while leaving healthy cells unharmed. Clinical trials have explored its potential in breast cancer patients, with promising results in reducing cancer stem cells that drive tumor resistance and recurrence.
Why Sprouts Trump Mature Broccoli
Here’s the game-changer: broccoli sprouts contain 20-50 times more sulforaphane than mature broccoli plants. Johns Hopkins researchers discovered this concentration difference in the 1990s, fundamentally changing how we view these tiny greens. A handful of 3-day-old sprouts delivers the same sulforaphane punch as 1-2 pounds of cooked broccoli.
The bioavailability factor matters too. Studies show that up to 75% of nutrients in fresh broccoli sprouts enter your bloodstream, compared to just 19% from cooked broccoli. This absorption efficiency, combined with the concentrated sulforaphane levels, makes growing broccoli sprouts at home one of the most cost-effective cancer prevention strategies available.
Beyond cancer, MD Anderson Cancer Center research indicates sulforaphane may help reduce estrogen-related cancer risk, support cardiovascular health, and protect against neurodegenerative diseases like Alzheimer’s and Parkinson’s.
How to Choose the Best Broccoli Sprout Growing Kit
1. Assess Your Space and Sprouting Volume
Start by measuring your available counter or cabinet space. Mason jar systems typically need 6-8 inches of vertical clearance and a 5-inch diameter footprint. Tray systems require more horizontal space but can stack vertically. Consider how many sprouts you’ll realistically consume weekly. One quart jar yields about 2 cups of sprouts, enough for daily smoothies or salads for 3-4 days.
2. Material Quality Matters for Longevity
Food-grade materials directly impact both safety and durability. Look for 316 stainless steel mesh rather than cheaper 304 grade, as it resists corrosion better with constant moisture exposure. BPA-free plastic is acceptable for containers, but glass jars offer visibility to monitor growth stages. Avoid any kit with rust-prone or toxic materials, as sprouts absorb compounds from their environment.
3. Drainage Design Prevents Disaster
Proper drainage ranks as the single most critical feature preventing mold and bacterial growth. Quality kits incorporate angled stands that position jars for complete water evacuation. Mesh size should balance water flow with seed retention—holes too large lose tiny broccoli seeds, while too-small openings cause water pooling. Look for designs with standing pegs or built-in drainage bases that eliminate manual jar positioning.
4. Consider Maintenance and Cleaning Requirements
Daily rinsing takes less than a minute, but some designs make the process easier than others. Inverted spouts allow water addition without removing lids, saving time and reducing contamination risk. Dishwasher-safe components simplify sanitization between batches. Smooth surfaces without crevices prevent bacterial buildup that compromises future sprouting attempts.
5. Seed Compatibility and Expansion Options
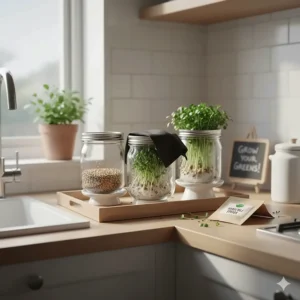
While focusing on broccoli sprouts, many growers eventually experiment with alfalfa, radish, or mung beans. Versatile kits accommodate various seed sizes through interchangeable inserts or adjustable mesh. Some systems let you add more jars or trays as your sprouting ambitions grow, protecting your initial investment.
6. Budget Versus Long-Term Value
Entry-level lids cost $15-20 but require existing jars. Complete kits range from $25-45 yet include everything for immediate sprouting. Calculate cost-per-use over 2-3 years, factoring in replacement frequency. Premium stainless steel systems may cost more upfront but outlast plastic alternatives that need replacement every 12-18 months.
7. Special Features for Specific Needs
Blackout sleeves benefit those growing in bright kitchens or wanting sweeter, longer sprouts. Ceramic systems appeal to design-conscious individuals. Compact travel-friendly sprouters suit frequent travelers. Multiple-jar kits work for families or those wanting continuous harvest cycles. Match features to your lifestyle rather than buying unnecessary extras.
Step-by-Step Guide: Growing Broccoli Sprouts at Home
Growing your own broccoli sprouts transforms from intimidating to second nature after your first successful batch. This process delivers fresh, sulforaphane-rich superfoods in just 5 days with minimal effort.
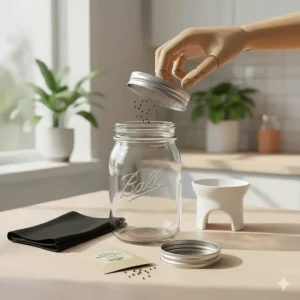
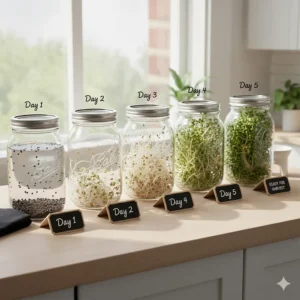
Day 1: Soaking (Evening)
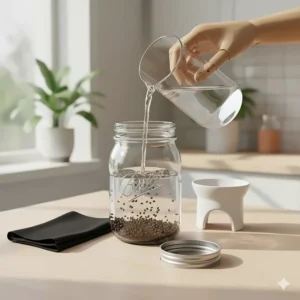
Measure 2 tablespoons of organic broccoli seeds into your sprouting jar. This seemingly small amount expands dramatically, yielding 1.5-2 cups of finished sprouts. Add cool water until seeds float freely with room to move. Seal with the mesh lid and let soak for 8-12 hours at room temperature, away from direct sunlight. This initial hydration activates the germination process.
Day 2: First Rinse (Morning and Evening)
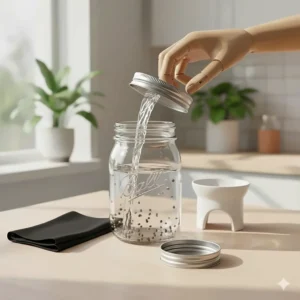
Pour out the soaking water through the mesh lid—no need to remove it. Rinse thoroughly with fresh cool water, swirling gently to distribute moisture evenly. Drain completely by inverting the jar at a 45-degree angle on your sprouting stand. You’ll notice tiny white root tips emerging by evening’s second rinse. Twice-daily rinsing prevents mold while maintaining the moisture essential for growth.
Days 3-4: Active Growth Phase
Continue morning and evening rinses, spending just 30 seconds per session. Sprouts begin developing small green leaves and growing rapidly. Keep jars in indirect light during this phase—too much darkness produces pale, thin sprouts, while excessive direct sunlight causes bitterness. The sprouting mass expands visibly between each rinse cycle.
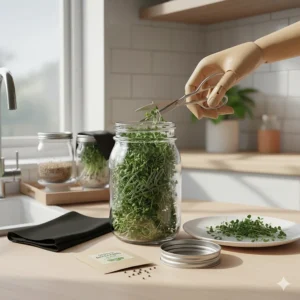
Day 5: Greening and Final Rinse
Place your jar in bright indirect light for 4-6 hours to green up the leaves, maximizing chlorophyll and nutrient content. Perform one final thorough rinse, then drain completely. Your broccoli sprouts are ready when they’ve developed vibrant green leaves and measure 1-2 inches long with visible roots.
Harvesting and Storage
Transfer dried sprouts to a clean, dry container lined with paper towel to absorb residual moisture. Refrigerate at 35-40°F. Properly dried sprouts last 5-7 days, though their sulforaphane content peaks within the first 2-3 days post-harvest. Rinse before consuming to remove any remaining seed hulls.
Troubleshooting Common Issues
Mold appears as fuzzy growth (distinct from fine white root hairs). It signals insufficient drainage or too-warm temperatures. Slimy sprouts result from skipped rinses or stagnant water. Brown, wilted leaves indicate over-rinsing or excessive light exposure. Adjust your routine based on these visual cues rather than rigid schedules, as humidity and temperature affect growth rates.
Health Benefits of Growing Broccoli Sprouts at Home
Cancer Prevention and Treatment Support
The most compelling reason to grow broccoli sprouts centers on their exceptional cancer-fighting properties. Research from Clinical Cancer Research demonstrates that sulforaphane inhibits breast cancer stem cells by 65-80% in laboratory studies. These cancer stem cells drive tumor resistance and recurrence, making them critical therapeutic targets.
Studies published in Frontiers in Nutrition reveal sulforaphane’s dual mechanism—it blocks the conversion of procarcinogens to active carcinogens while simultaneously triggering the body’s natural detoxification pathways. Clinical trials with prostate cancer patients showed reduced disease progression after consuming broccoli sprout preparations for just 12 months.
Cardiovascular Protection
Sulforaphane activates Nrf2 pathways that reduce oxidative stress and inflammation in blood vessels. This mechanism helps prevent atherosclerosis (arterial plaque buildup) and supports healthy blood pressure regulation. Regular consumption of broccoli sprouts has been linked to improved cholesterol profiles and reduced markers of cardiovascular disease risk.
Brain Health and Cognitive Function
The fat-soluble nature of sulforaphane allows it to cross the blood-brain barrier, delivering antioxidant and anti-inflammatory protection directly to neural tissue. Research suggests regular intake may slow age-related cognitive decline and reduce the risk of neurodegenerative conditions like Alzheimer’s and Parkinson’s disease.
Digestive System Support
Broccoli sprouts exhibit powerful antimicrobial effects against Helicobacter pylori, the bacterium responsible for gastritis, ulcers, and increased stomach cancer risk. Studies show that consuming broccoli sprouts can reduce H. pylori colonization while supporting beneficial gut bacteria diversity. The fiber content promotes healthy bowel movements and may prevent constipation.
Detoxification Enhancement
Your liver’s phase 2 detoxification enzymes get a significant boost from sulforaphane consumption. Research conducted in Qidong, China demonstrated that broccoli sprout beverages increased excretion of airborne carcinogens by 61% for benzene and 23% for acrolein. This enhanced detoxification helps protect against unavoidable environmental toxins in polluted areas.
Diabetes Management
Preliminary studies indicate sulforaphane may improve insulin sensitivity and help regulate blood sugar levels. The compound appears to reduce glucose production in the liver while improving glucose uptake in cells, though more human research is needed to confirm these effects.
Anti-Inflammatory Effects
Chronic inflammation underlies countless modern diseases, from arthritis to metabolic syndrome. Sulforaphane modulates inflammatory pathways by inhibiting NF-κB, a key protein complex that controls inflammatory responses. This action may provide relief for those with inflammatory conditions while protecting against inflammation-related diseases.
Mason Jar vs Tray Systems: Which Is Right for You?
Mason Jar Systems: Simplicity Meets Efficiency
Mason jar systems dominate the home sprouting market for good reason. They offer maximum visibility, allowing you to monitor every growth stage without opening the container. The glass construction provides chemical-free growing conditions while being dishwasher safe for thorough sanitization between batches.
Advantages: Compact footprint saves counter space, typically requiring just 5-6 inches. Initial investment stays low if you already own wide-mouth jars. The transparent design helps beginners recognize normal growth patterns versus potential problems. Most kits integrate seamlessly with standard Ball or Kerr jars available at any grocery store.
Limitations: Growing multiple seed varieties simultaneously requires multiple jars and stands, which can clutter limited counter space. Handling wet glass jars twice daily increases breakage risk. Some users find the constant jar rotation tedious when maintaining 3-4 batches at different stages.
Best For: Beginners learning the sprouting rhythm, small households consuming modest amounts, those with limited counter space, and anyone who values seeing their sprouts develop through clear glass.
Tray Systems: Volume and Variety
Stackable tray systems excel at producing larger quantities while accommodating multiple seed types in one footprint. The vertical design maximizes space efficiency, allowing you to grow broccoli, alfalfa, and radish sprouts simultaneously without separate containers.
Advantages: Stainless steel construction proves virtually indestructible and never absorbs odors or stains. Larger capacity suits families or health enthusiasts consuming sprouts daily. The stackable design means adding production capacity doesn’t require additional counter space. Restaurant-quality results become achievable at home.
Limitations: Higher upfront costs (typically $35-50) create a barrier for curious beginners. The opaque materials prevent visual monitoring, requiring more sprouting experience to recognize proper moisture levels by feel. Cleaning multi-level trays demands more time than simple jars. Learning to balance moisture across stacked levels takes practice.
Best For: Experienced sprouters ready to scale up production, families of 4+, those growing multiple sprout varieties, anyone with vertical but limited horizontal counter space, and individuals interested in commercial-scale home production for juicing or dehydrating.
Hybrid Approach: The Practical Solution
Many dedicated sprouters eventually adopt both systems, using jars for small specialty batches and trays for high-volume staples. This flexibility lets you experiment with new seeds in jars while maintaining steady production in trays. The investment remains reasonable since quality components last years with proper care.
Organic vs Conventional Seeds: Does It Matter?
The seed quality debate extends beyond organic certification to encompass germination rates, chemical residues, and sulforaphane potential. Understanding these factors helps you make informed purchasing decisions that balance cost with health outcomes.
Organic Certification Advantages
Certified organic broccoli sprouting seeds guarantee freedom from synthetic pesticides, herbicides, and GMO contamination. Since sprouts involve consuming the entire plant—roots, seeds, and all—any chemical residues from conventional farming concentrate in your harvest. The USDA organic seal or OTCO certification ensures seeds meet strict production standards throughout their lifecycle.
Germination testing reveals organic seeds often perform better, with many quality brands reporting 90-95% germination rates compared to 70-85% for budget conventional options. This difference translates directly to yield—more sprouted seeds mean more nutrition per tablespoon of starting material.
Chemical Residue Concerns
Conventional seeds may carry pesticide residues that persist through the sprouting process. While sprouting itself reduces some compounds through dilution and metabolic transformation, studies show certain pesticides remain detectable in mature sprouts. Given that people grow broccoli sprouts specifically for health benefits, introducing potential toxins seems counterproductive.
Sulforaphane Content Variations
Research indicates organically grown broccoli plants produce higher concentrations of defensive compounds like glucoraphanin (sulforaphane’s precursor) because they face natural pest pressure without chemical intervention. This survival mechanism may translate to more potent sprouted seeds, though definitive studies comparing organic versus conventional sprout nutrient levels remain limited.
Cost-Benefit Analysis
Organic broccoli sprouting seeds typically cost $12-18 per pound versus $8-12 for conventional options. However, one pound yields approximately 8-10 pounds of finished sprouts. This means organic seeds add roughly $0.50-0.75 per batch—minimal considering the health investment. The cost difference shrinks further when factoring in higher germination rates that organic seeds consistently demonstrate.
Storage and Seed Viability
Organic seeds stored properly (cool, dry, dark conditions) maintain viability for 2-3 years, while conventional seeds often degrade faster due to pre-treatment chemicals. Buying organic in bulk becomes economically smart for regular sprouters, especially when purchased from reputable suppliers like Handy Pantry, Mumm’s, or Sproutpeople who test each seed lot for purity and germination.
Maintenance and Cleaning Best Practices
Daily Rinse Routine: The Non-Negotiable Foundation
Your sprouting success hinges on consistent, thorough rinsing. Cool water (65-75°F) works best—cold water slows growth, while warm water encourages bacterial proliferation. Use moderate water pressure; aggressive streams damage delicate sprouts while weak trickles leave dry pockets. Swirl gently during rinsing to ensure every seed receives moisture and oxygen.
The twice-daily schedule (morning and evening, roughly 12 hours apart) maintains optimal moisture without waterlogging. Some sprouters add a third midday rinse during hot weather when evaporation accelerates. Listen to your sprouts—if they look dry or limp, increase rinsing frequency rather than extending rinse duration.
Deep Cleaning Between Batches
After harvesting, immediately disassemble your sprouting system for thorough cleaning. Rinse all components with hot water (140°F+) to dislodge seed hulls and organic residue. Many sprouters run components through dishwasher cycles, but hand washing with dish soap and a bottle brush ensures crevices get attention.
For stubborn buildup or perceived contamination concerns, create a sanitizing solution of 1 tablespoon white vinegar per cup of water. Soak all components for 10-15 minutes, then rinse thoroughly. Avoid harsh chemicals or bleach, as residues can inhibit germination in subsequent batches. Some experienced sprouters use hydrogen peroxide (1 teaspoon per cup of water) as an eco-friendly sanitizer.
Stainless Steel Care
316 stainless steel mesh should last indefinitely with proper care, but improper handling causes premature wear. Never use abrasive scrubbers or steel wool that scratch the surface and create bacterial harboring spots. If mineral deposits from hard water accumulate (appearing as white film), soak in diluted white vinegar overnight. The mesh should feel smooth to the touch—any roughness indicates damage requiring replacement.
Mold Prevention Strategies
Mold appears as fuzzy growth (distinct from normal white root hairs) and ruins entire batches. Prevention beats remediation every time. Ensure complete drainage after each rinse—jars should dry noticeably between rinse cycles, not remain continuously wet. Adequate air circulation around your sprouting area helps; avoid enclosed cabinets during active sprouting phases.
Temperature management plays a crucial role. Keep sprouting areas between 65-75°F. Warmer temperatures accelerate growth but also favor mold, while cooler temps slow everything down. High humidity environments (Florida, coastal regions) benefit from fans that gently circulate air without directly blowing on sprouts.
Storage Container Sanitization
The containers you transfer finished sprouts into require the same attention as sprouting equipment. Glass or BPA-free plastic works best, thoroughly cleaned and dried before use. Line containers with clean paper towel to absorb residual moisture that would otherwise promote spoilage. Replace towels daily to maintain freshness throughout the 5-7 day refrigerated storage period.
Quarterly Deep Maintenance
Every 3-4 months, perform comprehensive system inspection. Check mesh for tears, stands for stability, and containers for cracks. Replace any questionable components before they cause batch failures. This proactive approach costs less than wasted seeds and effort from preventable equipment failure.
Common Mistakes to Avoid When Growing Broccoli Sprouts
Overcrowding the Container
New sprouters often use too many seeds, thinking more input equals more output. In reality, overcrowding restricts air circulation and creates moisture pockets where mold thrives. Dense sprout masses tangle together, making rinsing ineffective and causing uneven growth. Stick to 2 tablespoons maximum per quart jar. You’ll actually harvest more usable sprouts from properly spaced seeds than from an overcrowded jar where half the batch gets discarded due to spoilage.
Inconsistent Rinsing Schedule
Life gets busy, but skipping even one rinse cycle compromises your entire batch. Morning rinses missed mean sprouts sit for 16+ hours without fresh water, risking dehydration and bacterial growth. Evening rinses skipped leave sprouts waterlogged overnight. Set phone alarms if needed until the routine becomes habitual. Many experienced sprouters coordinate rinses with morning coffee and evening dinner prep—tying the task to existing habits ensures consistency.
Inadequate Drainage
Leaving sprouts in standing water ranks as the fastest route to failure. Water pooling in containers or insufficient drainage angles creates anaerobic conditions where harmful bacteria flourish. Your sprouting stand should position jars at a 45-degree angle minimum, allowing gravity to pull all excess water away. If water beads remain on the mesh after 2-3 minutes of draining, your setup needs adjustment. Some sprouters place absorbent towels under their stands to wick away the last moisture droplets.
Wrong Temperature Exposure
Broccoli sprouts tolerate a narrow temperature band. Above 75°F, growth accelerates but so does bacterial risk and bitterness. Below 60°F, germination stalls and sprouts become stringy. Direct sunlight causes overheating and tough, bitter leaves. Fluorescent or LED grow lights work better than natural light for controlled growing conditions. Avoid placing sprouting containers near stoves, heating vents, or cold window drafts.
Using Tap Water in Hard Water Areas
Municipal water often contains chlorine, fluoride, and minerals that inhibit germination or impart off-flavors. Chlorine levels above 1ppm can reduce germination rates by 20-30%. If your tap water tastes chemically or leaves mineral deposits in kettles, switch to filtered or spring water for sprouting. The minimal cost pays dividends in germination success and flavor quality. Some sprouters let tap water sit overnight in open containers, allowing chlorine to dissipate naturally.
Harvesting Too Early
Impatience costs nutrition. Day 3-4 sprouts contain significantly less sulforaphane than fully mature day 5-6 sprouts. While edible earlier, you’re sacrificing the cancer-fighting compounds you’re specifically growing them for. Wait until leaves turn vibrant green and sprouts measure 1.5-2 inches. The final greening phase under light dramatically increases nutrient density—don’t skip it.
Poor Seed Quality
Bargain seeds from questionable sources often disappooint with low germination rates and potential contamination. Seeds older than 3 years lose viability, even if stored properly. Always purchase from reputable suppliers who test germination rates and screen for pathogens. Spending an extra $3-4 per pound on quality seeds prevents wasted effort and ensures your health investment pays off.
Ignoring Warning Signs
Brown, slimy, or foul-smelling sprouts signal bacterial contamination—don’t try to salvage them. Trust your nose; fresh sprouts smell clean and slightly grassy. Any off odors mean the batch should go to compost immediately. Similarly, extensive yellowing or wilting indicates problems. Experience teaches you to recognize normal variation versus genuine issues, but when in doubt, discard and start fresh.
Comparing Budget vs Premium Broccoli Sprout Growing Kits
The $15-25 Budget Range: Entry-Level Options
Budget kits center around basic plastic or stainless steel mesh lids designed for existing wide-mouth mason jars. These systems deliver functional sprouting without frills, perfect for testing whether home sprouting fits your lifestyle before committing serious money.
What You Get: Simple mesh lids, basic drainage capability through gravity, minimal accessories. The Masontops Bean Screen typifies this category—durable BPA-free plastic with anti-roll features and inverted spout. You’ll need your own jars, stands often substitute with kitchen bowls, and seeds require separate purchase.
Performance Reality: Budget systems work fine for determined sprouters willing to overcome minor inconveniences. Drainage proves adequate if you’re vigilant about positioning. Plastic may stain over time, and cheaper mesh sometimes develops rough edges that trap seeds. Expect 12-24 months of regular use before replacement becomes necessary.
Best For: Curious beginners, budget-conscious households, those wanting to test sprouting before investing, or anyone with abundant patience for hands-on adjustments.
The $25-40 Mid-Range: Sweet Spot Territory
Mid-range kits offer the best value proposition, combining quality materials with complete systems that include everything needed for immediate success. The Handy Pantry Complete Kit and Zeato 2-Jar System dominate this category.
What You Get: Premium 316 stainless steel components, proper drainage stands, quality seeds included, comprehensive instructions, and thoughtful design features like blackout sleeves or cleaning brushes. Materials last 5+ years with normal care, and customer support from established brands helps troubleshoot issues.
Performance Reality: These kits eliminate most common beginner mistakes through superior drainage angles, optimal mesh sizing, and rust-proof materials. The initial seed supply lasts 8-12 batches, and included stands ensure consistent results from day one. Build quality supports daily use without degradation.
Best For: Serious health enthusiasts committed to regular sprouting, families wanting reliable systems, those valuing time savings from properly designed equipment, and anyone planning long-term sprouting practice.
The $40-60+ Premium Range: Professional-Grade Systems
Premium systems target experienced sprouters, high-volume users, or those wanting commercial-quality results. The YARRD 3-Tier Stainless Steel System exemplifies this category with restaurant-grade construction and capacity.
What You Get: All-stainless steel construction (no plastic), multi-level growing capability, maximum capacity, professional drainage design, and components rated for continuous commercial use. These systems often stack for space efficiency while growing multiple varieties simultaneously.
Performance Reality: Premium kits justify their cost through longevity (10+ years typical), superior results from optimized design, and significantly higher production capacity. The learning curve steepens as you master multi-level moisture management, but experienced users produce 3-4x more sprouts than single-jar systems. Built to withstand daily commercial use, they handle home use indefinitely.
Best For: Experienced sprouters scaling up production, families of 5+, health enthusiasts making daily smoothies or juices, anyone interested in selling sprouts to friends/farmers markets, and those who view sprouting as a long-term lifestyle investment.
Feature-by-Feature Cost Justification
Drainage Systems: Budget kits rely on manual positioning ($15-20), mid-range provide dedicated stands ($25-35), premium offer integrated multi-level systems ($40+). The time savings and failure prevention from proper drainage repay premium costs within months.
Material Longevity: Plastic lids ($15-20) need replacement every 1-2 years, quality stainless ($25-35) lasts 5+ years, commercial-grade stainless ($40+) proves virtually indestructible. Calculate total cost of ownership, not just initial purchase price.
Seed Quality: Budget kits omit seeds (add $8-15), mid-range include premium organic seeds (4-8 batches worth), premium sometimes provide seed variety packs. Factor this into your comparison.
Design Refinement: Each price jump brings tangible improvements—better air circulation, easier cleaning, reduced mold risk, higher germination success. Beginners particularly benefit from forgiving mid-range designs that compensate for technique mistakes.
Maximizing Sulforaphane Content in Your Homegrown Sprouts
Harvest Timing for Peak Nutrition
Sulforaphane concentration peaks precisely when broccoli sprouts reach 3-4 days of growth, making harvest timing critical for maximum health benefits. Research shows glucoraphanin (sulforaphane’s precursor) accumulates rapidly during days 2-3, then myrosinase enzyme activity increases on days 4-5. This combination creates the perfect storm of cancer-fighting potential.
Many growers harvest too early, sacrificing 30-50% of potential sulforaphane content. The visual cue: vibrant green leaves fully developed, sprouts measuring 1.5-2 inches with visible root systems. Day 3 sprouts appear yellowish-white with minimal leaf development. Waiting those extra 1-2 days transforms good sprouts into extraordinary nutritional powerhouses.
The Greening Phase: Light Exposure Strategy
After 4 days of growth in indirect light, expose your sprouts to bright (but not direct) sunlight for 4-8 hours. This crucial greening phase activates chlorophyll production and increases sulforaphane precursors by 20-30%. Fluorescent or LED grow lights work better than sunlight, providing consistent intensity without overheating risks.
Avoid excessive light exposure—more than 8 hours produces tough, bitter sprouts as the plant shifts from producing beneficial compounds to developing defense mechanisms. The sweet spot balances tender texture with maximum nutrition. Some commercial growers use specific light spectrums (blue-heavy LEDs) to optimize phytochemical production, but standard kitchen lighting suffices for home growers.
Storage Methods That Preserve Nutrients
Sulforaphane content degrades rapidly post-harvest, declining 50% within 7 days of refrigeration. To maximize retention, harvest only what you’ll consume within 2-3 days. Store finished sprouts in breathable containers—glass jars loosely covered or containers with air vents. Complete airtight sealing accelerates deterioration.
Temperature control matters significantly. Maintain refrigeration at 35-38°F (2-3°C). Warmer temps speed enzyme activity that breaks down glucoraphanin, while freezing damages cellular structures and destroys myrosinase. Some research suggests brief cold exposure (1-2 minutes at 32°F immediately post-harvest) may actually boost sulforaphane precursors, though this remains controversial.
Preparation Techniques That Enhance Bioavailability
Chewing thoroughly activates myrosinase through cell wall rupture, converting glucoraphanin to sulforaphane. Alternatively, blending sprouts in smoothies creates the same effect. The critical window: consume within 10-15 minutes of chopping/blending, as active sulforaphane degrades when exposed to air.
Adding mild heat (≤70°C/158°F) for 10 minutes before consumption actually increases sulforaphane formation by 3.5-fold in some studies. Light steaming or brief blanching deactivates epithiospecifier protein, which otherwise diverts glucoraphanin into less beneficial compounds. However, excessive heat (boiling) destroys myrosinase entirely, eliminating sulforaphane production.
Combining with Myrosinase-Rich Foods
If your sprouts lack active myrosinase (rare with fresh homegrown but common in supplements), combine them with other myrosinase sources. Mustard powder, horseradish, wasabi, or raw radishes all contain this enzyme. Add 1/4 teaspoon mustard powder to smoothies or salads containing broccoli sprouts to ensure complete conversion.
Seed Selection Impact on Sulforaphane
Not all broccoli varieties produce equal sulforaphane levels. Calabrese broccoli seeds (most common sprouting variety) contain high glucoraphanin concentrations. Some specialty suppliers now offer super-high sulforaphane varieties bred specifically for sprouting, containing 2-3x normal levels. While pricier, these specialized seeds justify their cost for those prioritizing cancer prevention.
Best Practices for Continuous Sprouting Supply
The Staggered Planting System
Professional sprouters maintain 3-4 jars at different growth stages, ensuring fresh harvests every 1-2 days. Start jar one on Monday, jar two on Wednesday, jar three on Friday. By the following Monday when jar one is harvested, you start jar four. This rotation provides continuous supply without overwhelming you with simultaneous harvests.
Label each jar with masking tape and marker noting the start date. This simple organization prevents confusion about which batch needs what attention. Many sprouters dedicate specific colored lids or jars to different seed varieties—green for broccoli, red for radish, clear for alfalfa.
Seed Storage for Optimal Viability
Proper seed storage extends viability from months to years. Store unopened seed packages in cool (50-60°F), dark, dry locations. Once opened, transfer seeds to airtight glass jars with desiccant packets (silica gel). Refrigeration works for long-term storage (1+ years), though room temperature proves fine for 6-12 months if humidity stays low.
Test germination rates quarterly on older seed stocks. Soak 20 seeds overnight, then spread on damp paper towel. After 48 hours, count how many sprouted. Less than 70% germination means it’s time for fresh seeds. This simple test prevents wasted effort on non-viable seeds.
Batch Size Optimization
Finding your ideal batch size takes experimentation. Track how many days each jar lasts your household. If you’re discarding sprouts because they spoiled before consumption, reduce starting seed quantity. If you’re constantly running out, increase batch size or add another jar to your rotation.
Most single individuals find 1-2 tablespoons per jar ideal (yielding 1.5-2 cups). Couples often prefer 2-3 tablespoons, while families of four might use 3-4 tablespoons or multiple simultaneous jars. Remember, larger batches require more meticulous rinsing to ensure even moisture distribution.
Seasonal Adjustments
Summer’s heat and humidity accelerate growth but also increase mold risk. Reduce seed density and increase rinse frequency (3x daily) during hot months. Winter’s dry air and cool temperatures slow growth—add a midday rinse and consider sprouting in slightly warmer locations (near, not on, heating sources).
Geographic variations matter too. Florida growers battle humidity year-round, benefiting from fans and reduced seed density. Arizona’s arid climate allows larger batches but may require an extra rinse. Adapt general guidelines to your specific environment rather than following rigid rules.
Travel and Vacation Planning
The Easy Sprout system’s flat travel lid enables sprouting on the road. For longer trips, some sprouters dehydrate fresh harvests before leaving (sulforaphane partially survives dehydration). Alternatively, gift active jars to neighbors or family—they’ll appreciate fresh sprouts while your seeds don’t go to waste.
Equipment Rotation and Backup
Serious sprouters maintain backup components—extra lids, stands, and jars. This redundancy prevents production gaps when primary equipment needs deep cleaning or replacement. It also allows expanded capacity when you’re entertaining or want to experiment with new seed varieties without disrupting your established broccoli sprout routine.
Environmental and Cost Benefits of Home Sprouting
Financial Savings Analysis
Store-bought organic broccoli sprouts average $4-6 per 4-ounce package. Growing your own produces equivalent amounts for approximately $0.50-0.75 in seeds and water costs. One pound of organic sprouting seeds ($12-18) yields 8-10 pounds of finished sprouts—roughly 32-40 store packages worth $128-240. The return on investment hits 600-1000% over just the first few months.
Factor in reduced food waste too. Homegrown sprouts stay fresher longer since you harvest precisely when needed, while store-bought packages often spoil before complete consumption. The average household throws away 25-30% of purchased sprouts—money literally down the drain that home growing eliminates.
Environmental Impact Reduction
Commercial sprout production involves significant environmental costs: industrial refrigeration, plastic packaging, transportation emissions, and water waste from industrial rinsing systems. Your countertop operation uses 100% of produced sprouts (no shipping damage waste), requires minimal water (2-3 tablespoons per rinse cycle), and generates zero packaging waste.
The carbon footprint comparison proves dramatic. Store sprouts might travel 500-1500 miles from farm to table, accumulating transportation emissions. Your kitchen-grown sprouts travel exactly zero miles, eliminating food mile impacts entirely. For environmentally conscious consumers, this factor alone justifies home sprouting.
Plastic Packaging Elimination
Each store package represents non-recyclable mixed materials (plastic clamshells with paper labels). Annual savings for a regular sprout consumer: 50-100 packages diverted from landfills. Over a decade, that’s 500-1000 containers you’ll never contribute to plastic pollution. Given that most sprouting kits use reusable glass and stainless steel, your environmental footprint shrinks with every batch.
Water Conservation
Though sprouting requires daily rinsing, total water consumption stays remarkably low. Each rinse uses approximately 1 cup of water, meaning 2 cups daily across 5 days = 10 cups (2.5 quarts) per batch. This produces 2-3 cups of sprouts. Compare this to commercial operations that use 5-10x more water per pound due to industrial washing requirements and processing loss.
Food Security and Resilience
Home sprouting creates food independence—you’re never dependent on supply chains, transportation systems, or grocery store inventory. During disruptions (weather events, pandemics, supply shortages), sprouters continue producing fresh, nutrient-dense food. One pound of seeds stored in your pantry represents insurance against food scarcity, sproutable on-demand regardless of external circumstances.
Supporting Sustainable Agriculture
Purchasing organic sprouting seeds from small-scale, sustainable farms supports agricultural practices that prioritize soil health, biodiversity, and chemical-free production. Your seed purchases, though modest individually, collectively encourage farmers to maintain organic certification and sustainable methods. This creates positive feedback loops in agricultural systems.
✨ Don’t Miss These Exclusive Deals!
🔍 Take your health journey to the next level with these carefully selected broccoli sprout growing kits. Click on any highlighted item to check current pricing and availability on Amazon. These tools will help you create cancer-fighting nutrition your family will benefit from for years to come!
❓ Frequently Asked Questions
❓ How long do broccoli sprouts take to grow?
❓ Can I grow broccoli sprouts without a special kit?
❓ How much sulforaphane is in homegrown broccoli sprouts compared to supplements?
❓ Are broccoli sprouts safe to eat raw every day?
❓ What's the difference between broccoli sprouts and broccoli microgreens?
Conclusion: Your Path to Daily Superfood Production
Growing broccoli sprouts at home represents one of the most powerful, cost-effective health decisions you can make. For less than the cost of a month’s vitamin supplements, you gain lifetime access to fresh, sulforaphane-rich nutrition that science consistently links to cancer prevention, cardiovascular protection, and enhanced detoxification.
The journey from curious beginner to confident sprouter takes just one successful batch. Those first vibrant green sprouts emerging from your kitchen counter create an undeniable sense of accomplishment—you’ve literally grown medicine in a jar. The daily ritual of rinsing and watching your crop develop becomes meditative, connecting you to your food in ways grocery shopping never can.
Whether you choose the budget-friendly Masontops Bean Screen to test the waters, the comprehensive Handy Pantry Complete Kit for guaranteed beginner success, or the professional YARRD 3-Tier System for maximum production, you’re investing in health that compounds over time. Every batch delivers nutrients that protect your cells, support your immune system, and help your body defend against environmental toxins.
The beauty of broccoli sprout growing kits lies in their simplicity—no gardening expertise required, no outdoor space needed, no expensive equipment necessary. Just seeds, water, and five minutes daily create a renewable source of one of Earth’s most concentrated superfoods. Your future self, protected by the cumulative effects of regular sulforaphane consumption, will thank you for starting today.
Remember, the best time to start sprouting was yesterday. The second-best time is right now. Choose your kit, order your seeds, and join the growing community of home sprouters taking control of their nutritional destiny, one fresh, crunchy batch at a time.
Recommended for You
- 7 Best Sprout Growing Kit Options for Fresh, Healthy Sprouts in 2026
- 7 Best Microgreens Growing Kit for Beginners 2026
- 7 Best Microgreens Growing Kit With Light 2026
Disclaimer: This article contains affiliate links. If you purchase products through these links, we may earn a small commission at no additional cost to you.
✨ Found this helpful? Share it with your friends! 💬🤗