
In This Article
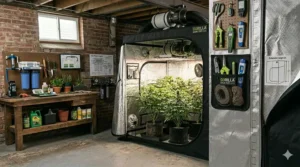
Picture this: you’re standing in your basement, surrounded by thriving plants that would never survive your local climate, and you realize the secret isn’t just the lights or nutrients—it’s the tent holding it all together. The gorilla 4×8 grow tent has become the gold standard for intermediate and advanced growers who’ve outgrown smaller setups but aren’t ready to convert an entire room into a grow space.
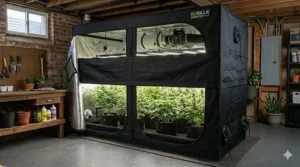
What makes the 4×8 footprint so special? It’s the sweet spot where commercial-grade features meet residential practicality. At 32 square feet, this configuration handles 12-18 plants comfortably while fitting through standard doorways and into most basements, garages, or spare rooms. According to controlled environment agriculture research from the University of Missouri Extension, maintaining precise environmental control in enclosed growing spaces dramatically improves yields compared to open-room setups—and that’s exactly what these tents deliver.
The Gorilla brand specifically earned its reputation by addressing what cheaper tents consistently fail at: durability under heavy equipment loads, true light-proofing without tape or modifications, and height flexibility that prevents you from scrambling to replace your entire setup when plants stretch taller than expected. But here’s what the product listings won’t tell you—not all 4×8 mylar grow tents are created equal, and even within Gorilla’s own lineup, there are trade-offs worth understanding before you spend anywhere from $300 to $700.
In this guide, I’m breaking down seven actual 4×8 options currently available, including multiple Gorilla variants and their closest competitors. You’ll see real specifications interpreted for practical growing scenarios, side-by-side comparisons that matter, and honest assessments of which tent suits your specific situation—whether you’re a medical grower maximizing personal harvests, a hobbyist scaling up, or someone who just wants their basement to stop smelling like a greenhouse.
Quick Comparison: Top 7 Large Rectangular Tent Options
| Model | Canvas Density | Frame Capacity | Height Range | Best For | Price Range |
|---|---|---|---|---|---|
| Gorilla Grow Tent Pro 4×8 | 1680D | 300 lbs | 6’11”-8’11” | Premium buyers, tall plants | $600-$700 |
| Gorilla Lite Line 4×8 | 600D | 150 lbs | 6’7″-7’7″ | Budget Gorilla quality | $400-$500 |
| Gorilla Shorty 4×8 | 1680D | 300 lbs | 4’11”-5’8″ | Low ceiling spaces | $500-$600 |
| Spider Farmer 8×4 | 1680D | 150 lbs | 80″ fixed | LED growers, value seekers | $250-$350 |
| AC Infinity CLOUDLAB 894 | 2000D | 110 lbs | 80″ fixed | Tech integration fans | $300-$400 |
| VIVOSUN S848 | 600D | 110 lbs | 80″ fixed | Entry-level large grows | $200-$280 |
| Mars Hydro 4×8 | 1680D | 270 lbs | 80″ fixed | Mid-range all-rounder | $280-$380 |
Looking at this comparison, the trade-offs become immediately clear. The Gorilla Pro’s 300-pound capacity isn’t just marketing—that’s the difference between confidently hanging two 600W HPS fixtures with hoods, a carbon filter, and ducting versus constantly worrying if your cheaper tent’s frame will buckle mid-cycle. Meanwhile, AC Infinity’s 2000D canvas might sound impressive until you realize their lower weight capacity means you’ll need lighter equipment anyway. The Lite Line and VIVOSUN options prove you don’t need premium everything if your setup runs LEDs and doesn’t require the tallest height extensions.
💬 Just one click — help others make better buying decisions too! 😊
Top 7 Gorilla 4×8 Grow Tent Models: Expert Analysis
1. Gorilla Grow Tent Pro 4×8 – The Industry Standard
The Gorilla Grow Tent Pro 4×8 remains the measuring stick against which all competitors are judged, and frankly, it’s not hard to see why once you understand what separates it from lookalikes. This isn’t just thick fabric and sturdy poles—it’s a complete rethinking of what a professional large-scale tent should handle.
The 1680D threaded canvas is genuinely 3-9x denser than budget tents, which translates to something critical: zero light leaks without modification. Those cheap 600D tents? You’ll be applying blackout tape to every seam and zipper after your first run because even pinhole leaks during dark cycles can trigger hermaphroditism in sensitive strains. The diamond reflective interior actually redistributes 30% more light toward lower canopy areas compared to standard mylar—this matters when you’re running 12-18 plants and the outer edges would otherwise get significantly less illumination.
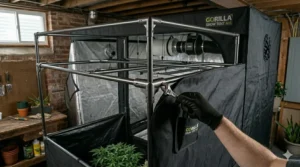
Here’s what growers consistently overlook until it’s too late: the all-steel interlocking frame with 300-pound capacity isn’t about bragging rights. When you’re suspending two quality LED fixtures (30-40 pounds each), a carbon filter (15-25 pounds), ducting hardware, and potentially training nets or SCROG setups, you’re easily approaching 120-150 pounds before adding any margin for safety. Cheaper frames with 110-pound ratings? They’ll hold… barely… until six months in when the corner joints start separating and you’re jerry-rigging support posts at 3 AM because you can’t risk a light crashing onto your plants.
The height adjustability (6’11” standard, extending to 7’11” with the included kit or 8’11” with the optional 2′ extension) solves a problem most first-time 4×8 buyers don’t anticipate. Sativa-dominant plants routinely stretch to 5-6 feet in veg/flower, and you need 18-24 inches of clearance above the canopy for proper light positioning and air circulation. Standard 6’7″ tents force you to supercrop aggressively or watch helplessly as tops burn against lights—the Gorilla Pro lets plants reach their genetic potential.
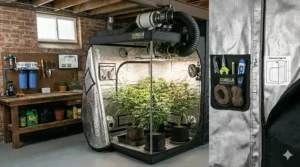
Customer feedback consistently praises the patent-pending infrared-blocking roof insert that keeps the tent’s exterior cool to the touch even under intense lighting—a huge deal if you’re in an apartment or shared space where heat signature matters. The EZ View windows and 360-degree wraparound access mean you’re not contorting yourself just to check plants or adjust equipment.
✅ Pros: Genuine commercial-grade durability, adjustable height prevents outgrowing the tent, superior light-proofing without modifications
✅ Best light-proof seal in the category
✅ Future-proof for equipment upgrades
❌ Cons: Premium price point, heavier to move once assembled
For growers running high-value genetics, planning multi-year use, or needing assurance their equipment won’t fail mid-cycle, this tent justifies the investment in the $600-$700 range. It’s what I’d buy if I could only own one tent for the next decade.
2. Gorilla Lite Line 4×8 – Budget Gorilla Quality
The Gorilla Lite Line 4×8 exists because Gorilla recognized not everyone needs aircraft-grade construction for successful grows. This isn’t a cheapened knockoff—it’s strategically simplified while keeping the features that actually matter for most home growers.
The 600D canvas (versus the Pro’s 1680D) represents the biggest compromise, but here’s the reality: it’s still significantly better than the 210-420D material on true budget tents. You’ll get adequate light-proofing with minimal additional work, and the fabric holds up fine under normal use. Where you notice the difference is long-term durability—the Lite Line might show wear after 5-7 years of continuous use versus the Pro’s 10+ year lifespan. For hobbyists planning to upgrade their setup eventually anyway, that’s acceptable.
The all-steel frame matches the Pro’s quality but drops weight capacity to 150 pounds. What this means practically: you can safely run LED fixtures (which weigh 60-80% less than equivalent HPS), a carbon filter, and standard ventilation. What you can’t do is stack heavy equipment or use massive old-school hoods. The height adjustability remains (6’7″ to 7’7″ with optional extension kit) but the extension isn’t included—you’ll pay extra if you need it.
The real genius of the Lite Line is recognizing that most growers have moved to LEDs and don’t need 300-pound ratings. If you’re running Spider Farmer, Mars Hydro, or AC Infinity lights, the Lite Line’s capacity is perfectly adequate. The same industrial-grade zippers, double-cinching duct ports, and tool pouches carry over from the Pro line.
Growers report this tent sets up faster than the Pro (lighter materials mean less wrestling during assembly) and still delivers professional results. The main complaints center on the non-included height extension and slightly less premium feel—neither of which affects plant health or yield.
✅ Pros: 60% of Pro cost with 80% of features, perfect for LED setups, still genuine Gorilla construction
✅ Steel frame quality matches premium models
✅ Smart compromise for budget-conscious quality seekers
❌ Cons: Height extension sold separately, thinner canvas shows age faster
In the $400-$500 range, this represents the best value-to-quality ratio for growers who’ve graduated from starter tents but aren’t ready to spend Pro money. It’s what I’d recommend to anyone asking “Do I really need the expensive Gorilla?”
3. Gorilla Shorty 4×8 – Low Ceiling Solution
The Gorilla Shorty 4×8 solves a specific problem that affects thousands of basement and attic growers: traditional tent heights simply won’t fit under 7-foot ceilings. At 4’11” standard height (expanding to 5’8″ with the included extension), this tent finally makes professional large-scale tent for low-clearance spaces viable.
Don’t mistake “shorty” for “inferior”—this uses the same 1680D canvas and 300-pound capacity frame as the Pro. Gorilla simply reconfigured the dimensions to prioritize horizontal space over vertical height. The engineering challenge here was maintaining structural integrity with shorter poles under heavy loads, and Gorilla nailed it with reinforced corner adapters that distribute weight more effectively than standard tents.
The practical application scenario is more specific than other models: if your basement ceiling measures 6’5″-7’0″, standard 6’11” tents either won’t fit or leave zero headroom for installation and maintenance. The Shorty gives you workable clearance while still providing 32 square feet of growing area. You’ll need to employ training techniques (LST, SCROG, topping) more aggressively to keep plants under 3’6″-4’0″, but that’s manageable for most strains and often produces bushier, higher-yielding plants anyway.
Indoor growing research from Ohio State University shows that controlled environment agriculture systems work effectively across various dimensions—vertical space is valuable but not strictly necessary when horizontal area and proper training compensate. The Shorty proves this principle.
The challenge most buyers face: mentally adjusting from “I want the tallest tent possible” to “I need the tent that fits my actual space.” If you’re working with low ceilings, the Shorty isn’t a compromise—it’s the only professional option that works without remodeling your grow area.
✅ Pros: Only premium low-height option at this size, same durability as full-height Pro, included extension kit
✅ 300-pound capacity in compact height
✅ Basement growers’ dream solution
❌ Cons: Requires more aggressive plant training, not suitable if you have standard ceiling height
Around $500-$600, the Shorty commands Pro-level pricing because it’s engineering-intensive and serves a specific market. For the right buyer, it’s worth every penny—for everyone else, it’s unnecessary.
4. Spider Farmer 8×4 Grow Tent – Value LED Specialist
The Spider Farmer 8×4 Grow Tent has become the go-to recommendation for growers who want semi-premium features without Gorilla pricing, and it succeeds by making smart cuts in the right places while maintaining quality where it counts.
The 1680D mylar canvas matches Gorilla Pro thickness, providing excellent light-blocking and durability. Spider Farmer’s diamond mylar interior delivers comparable reflectivity for even light distribution. The fixed 80″ height (6’8″) isn’t adjustable like Gorilla models, but here’s why that’s fine for most setups: modern LED fixtures produce less heat than older technology, eliminating the need for excessive overhead clearance. You get 5’6″-5’10” of usable plant height after accounting for lights and pots—plenty for 95% of strains with basic training.
The frame capacity drops to 150 pounds, which reveals Spider Farmer’s target buyer: LED growers. Their own SF4000, SE5000, and G5000 fixtures weigh 12-15 pounds each. Two lights plus a 15-pound carbon filter and ducting puts you around 60-80 pounds—comfortably under capacity with room for accessories. The steel frame uses interlocking poles similar to Gorilla but with slightly thinner gauge metal. It’s adequate for intended purpose, not overbuilt.
The enlarged observation window and waterproof floor tray are thoughtful additions—you can check plants without disturbing the environment, and the tray contains spills that would otherwise ruin flooring. The controller mounting hook anticipates you’re running Spider Farmer’s ecosystem (UIS control system), though it works fine with any brand.
Growers appreciate that Spider Farmer tents integrate seamlessly with their lighting systems, creating a cohesive setup where components are specifically designed to work together. The main trade-off versus Gorilla is longevity—expect 4-6 years of solid performance versus Gorilla’s near-decade lifespan. For growers who plan to upgrade or modify their setup every few years anyway, that’s a non-issue.
✅ Pros: Excellent value in $250-$350 range, 1680D canvas quality, perfect LED ecosystem integration
✅ Observation window adds convenience
✅ Smart weight capacity for modern equipment
❌ Cons: No height adjustment, frame lighter than premium options
This tent makes sense for anyone running or planning to run Spider Farmer LEDs, budget-conscious buyers wanting thick canvas, or growers who don’t need extreme durability.
5. AC Infinity CLOUDLAB 894 – Tech-Forward Option
The AC Infinity CLOUDLAB 894 represents the newest generation of professional large-scale tent thinking—less about brute-force durability, more about intelligent integration with modern growing technology. The 2000D mylar canvas is technically denser than Gorilla’s 1680D, but the real story is how AC Infinity reimagined what a multi-zone growing area should enable.
The lab-tested reflectivity isn’t just marketing—AC Infinity published independent test results showing their mylar configuration provides measurably higher PPFD uniformity across the growing area compared to standard diamond mylar. For LED growers trying to minimize hot spots and dead zones, this matters. The 1-inch pole diameter (thickest in class) uses a unique cross-brace design that achieves 110-pound capacity with less metal than competitors—modern engineering beating old-school overbuilding.
The game-changer is the future-ready controller mounting plate with integrated cable passthrough. AC Infinity clearly designed this tent assuming you’re running their UIS ecosystem: CLOUDLINE fans, IONFRAME lights, temperature/humidity controllers. The passthrough keeps cables organized while maintaining light-proof seals—something you usually jury-rig with tape and regret. The largest zippered observation window in the category (genuine improvement over small portholes) and the flush-mounted cable management system show attention to daily workflow details.
Here’s the strategic limitation: that 110-pound weight capacity reveals AC Infinity expects you’re using their equipment, which is intentionally lightweight. Their inline fans weigh 3-5 pounds versus 8-12 pounds for traditional models. Their LED fixtures run 12-18 pounds. If you own heavy legacy equipment, this tent won’t support it—but AC Infinity is betting (probably correctly) that serious growers are transitioning to modern, lighter gear anyway.
Reviews consistently praise the tent’s ease of setup and the way AC Infinity components click together like a well-designed ecosystem. The criticism centers on the weight capacity making it incompatible with older equipment, and the ecosystem lock-in—if you don’t want AC Infinity fans and controllers, you’re paying for features you won’t fully utilize.
✅ Pros: Highest canvas density (2000D), superior PPFD uniformity, best-in-class cable management
✅ Thickest poles (1″)
✅ Ecosystem synergy for AC Infinity users
❌ Cons: Lower weight capacity limits equipment flexibility, premium pricing for ecosystem value
In the $300-$400 range, this makes perfect sense if you’re already invested in AC Infinity products or planning a tech-forward grow. For everyone else, the ecosystem focus might feel limiting.
6. VIVOSUN S848 4×8 Grow Tent – Entry-Level Large Grows
The VIVOSUN S848 4×8 Grow Tent occupies the “good enough to get results without breaking the bank” territory, and there’s genuine value in understanding when budget options make strategic sense. This isn’t the tent you buy for a decade of hard use—it’s the tent you buy to scale up from smaller grows without gambling serious money before you know if larger operations suit your situation.
The 600D Oxford canvas represents the minimum viable thickness for serious growing. It blocks light adequately (though you might add tape to zipper areas as insurance), provides reasonable durability under normal use, and won’t disintegrate if you brush against it. The 100% reflective mylar interior works fine for even light distribution—you’re not losing measurable yield versus premium mylar. The practical difference shows up in longevity: this canvas might tear if you’re rough during maintenance, and it’ll show wear faster than 1680D options.
The frame’s 110-pound capacity is honest about its limitations—you can run two budget LED fixtures, a basic carbon filter, and ventilation without issues. Push beyond that, and you’re asking for trouble. The steel poles use simpler connectors than interlocking systems, which means assembly is faster but long-term joint integrity is lower. Growers report needing to retighten connections every 3-4 months.
The observation window, removable waterproof floor tray, and multiple duct ports show VIVOSUN understands what matters to growers. The included tool pouch and cable pass-throughs are legitimately useful. Where they cut costs is materials quality and construction precision—acceptable for hobbyists, potentially problematic for commercial-scale operations.
The honest assessment: this tent will successfully grow plants for 2-4 years with reasonable care. It won’t survive a decade of heavy use, won’t support the heaviest equipment, and might require minor repairs or modifications along the way. But it costs 60-70% less than premium options and delivers maybe 75-80% of the performance. That math works for specific buyers.
✅ Pros: Most affordable 4×8 option ($200-$280), adequate for LED setups, includes essential features
✅ Fast setup with simpler connectors
✅ Smart first large tent for testing scale
❌ Cons: Thinner canvas needs more careful handling, lower capacity limits equipment, shorter lifespan
I’d recommend this to growers scaling up from 2×4 or 4×4 tents who aren’t sure if 4×8 is their forever size, or hobbyists who prioritize initial cost savings over long-term durability.
7. Mars Hydro 4×8 Grow Tent – Mid-Range All-Rounder
The Mars Hydro 4×8 Grow Tent fills the “better than budget, more affordable than premium” slot with a clear value proposition: 1680D canvas quality and 270-pound capacity at mid-tier pricing. Mars Hydro built their reputation on no-nonsense equipment that works reliably without unnecessary bells and whistles, and this extended cultivation chamber follows that philosophy.
The 1680D tear-resistant canvas matches premium models in thickness and includes Mars Hydro’s double-stitched seams and heavy-duty SBS zippers—components that typically fail first on cheaper tents. The 98% reflective diamond mylar interior reportedly increases light intensity by 25% compared to standard mylar (Mars Hydro’s testing), which translates to better lower-canopy penetration in practice. The zipper flap overlay eliminates the most common light leak point without requiring tape modifications.
The 270-pound frame capacity sits between premium (300 lbs) and budget (110 lbs) ratings, and here’s why that matters: this tent confidently handles mid-range equipment from any manufacturer. Two 600W lights? No problem. Mix of LED and HPS? Covered. Heavy-duty carbon filter and commercial-grade ducting? Within capacity. Mars Hydro clearly designed this for growers who want flexibility without paying for maximum overkill.
The fixed 80″ height (6’8″) provides 5’6″-6’0″ of usable growing space depending on your equipment stack. Not adjustable like Gorilla, but taller than many competitors. The tent includes observation windows, multiple duct ports, and a heavy-duty floor tray. The metal corner adapters and poles avoid rust and paint-chipping issues that plague budget frames.
Mars Hydro’s customer support consistently earns praise—24-hour response times and technical guidance matter when you’re troubleshooting mid-grow. The tent’s designed to work particularly well with Mars Hydro lighting systems (TS3000, FC-E4800, FC4800) but isn’t locked into their ecosystem like some brands.
The realistic assessment: this tent performs like premium options in daily use but might show wear slightly faster. Expect 6-8 years of solid service versus Gorilla’s 10+. For most growers, that difference is negligible compared to the $200-$300 savings.
✅ Pros: Premium canvas at mid-range pricing, 270-lb capacity handles diverse equipment, excellent customer support
✅ No ecosystem lock-in
✅ Best balance of features and cost
❌ Cons: No height adjustment, not quite as overbuilt as top-tier options
In the $280-$380 range, Mars Hydro delivers what most growers actually need: reliable quality without paying for features they won’t use. It’s the Goldilocks choice—not the cheapest, not the most expensive, just right for serious hobbyists and small-scale commercial growers.
Setting Up Your 4×8 Grow Tent: The First 72 Hours Matter
The difference between a tent that performs flawlessly for years and one that becomes a frustration-fest often comes down to the first three days after assembly. Most guides skip this crucial period, assuming “follow the instructions” covers it—but reality is messier.
Hours 0-4: Strategic Assembly
Assemble in the final location, not elsewhere. Moving a fully assembled 4×8 tent through doorways and around corners ranges from difficult to impossible depending on your space. Clear 1-2 feet around the planned footprint—you’ll need access to all sides during setup and for ongoing maintenance.
Start with the frame fully assembled before adding the canvas. This lets you verify all poles connect securely and the structure stands square. If corner joints feel loose, apply threadlock compound (available at hardware stores) to the pins—this prevents connections from gradually loosening over months of use. Check diagonal measurements from corner to corner—they should match within an inch. If they don’t, your tent will never seal properly.
When pulling the canvas over the frame, work slowly and enlist help if available. Forcing zippers or fabric causes 90% of early tent failures. Begin at one corner and work methodically around the perimeter. Don’t fully zip anything until the entire canvas is positioned—this gives you flexibility to adjust as needed.
Hours 4-24: Equipment Integration and Light Testing
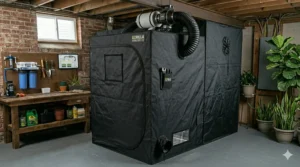
Install ventilation components first, before lights. Knowing your airflow works prevents discovering heat problems after plants are already in. Position inline fans outside the tent whenever possible—they generate vibration and heat you don’t want inside the growing environment. Use insulated ducting for noise reduction and thermal efficiency.
Light installation requires planning based on your configuration. For two-light setups in a 4×8, position them for 2×4 coverage zones with minimal overlap. Most growers hang lights too high initially—start at manufacturer’s recommended height then adjust based on plant response. Use adjustable ratchet hangers rated for 150+ pounds; the $8 ones that come with cheap lights will fail.
Run the system completely sealed (all vents closed, everything on) for 12 hours minimum. Check every zipper seam from outside with lights on and inside lights off. Any light leaks show up clearly and must be addressed now—not after discovering hermaphrodite plants six weeks into flower. Use reflective aluminum tape (not duct tape, which degrades) to seal problem areas.
Hours 24-72: Environmental Tuning and Calibration
With everything running, monitor temperature and humidity at three heights: floor level, mid-canopy (where plants will be), and light level. Significant variance between these measurements indicates airflow problems. A 6-inch inline fan should complete 1-2 full air exchanges per minute in a 4×8 tent—anything less means insufficient ventilation.
Test your dark period by running lights off for 12 hours while monitoring from outside. This reveals light leaks you might have missed during daytime checks and confirms your timer functions correctly. Verify your carbon filter eliminates odor even at peak demand—discover filtration problems now, not when neighbors complain.
Most first-time 4×8 growers underestimate the importance of these shakedown days. Discovering your tent leaks light during week four of flower, or that your ventilation can’t maintain proper temperature during peak summer heat, costs you an entire grow cycle. Invest three days upfront to prevent three months of problems.
4×8 Grow Tent vs. Open Room Growing: The Numbers Don’t Lie
The most common question from growers scaling up: “Why not just grow in the room instead of inside a tent?” The cost-benefit analysis reveals surprising answers that depend heavily on your specific situation.
Environmental Control Precision
According to controlled environment agriculture research from Cornell University, enclosed growing systems maintain temperature and humidity within ±2°F and ±5% RH respectively, while open rooms fluctuate ±8°F and ±15% RH under identical HVAC conditions. This precision directly impacts yield—research on hydroponics systems shows plants experiencing less environmental stress produce 15-20% more usable harvest by weight.
A 4×8 tent requires roughly 320-400 CFM of air exchange for proper ventilation. The same plants in an open 10×12 room need 600-800 CFM to achieve comparable air circulation. You’re paying to condition and exchange 3-4 times more air in an open room, which translates to higher electricity costs and less precise control.
Light Efficiency and Coverage
The reflective interior of a 4×8 mylar grow tent recovers 25-30% of light that would otherwise hit non-reflective walls and be wasted. In a 32-square-foot tent, two 600W LED fixtures provide adequate PPFD (photosynthetic photon flux density) across the entire growing area. The same plants in an open room require 800-1000W to achieve comparable PAR values because light disperses into the larger space without reflection back onto plants.
Odor and Security Containment
This consideration matters differently depending on your situation, but it’s worth examining objectively. A properly sealed tent with carbon filtration eliminates virtually 100% of odor when functioning correctly. Open-room grows with the same filtration achieve perhaps 70-85% reduction—the difference between “no odor detectable” and “noticeable if you know what you’re looking for.” In apartments, shared buildings, or any situation with neighbors nearby, this distinction has practical implications beyond growing preferences.
The Cost Reality Check
A quality 4×8 tent ($300-$600 depending on brand) plus appropriate ventilation and climate control represents $800-$1,200 all-in. Converting a 10×12 room to sealed grow space (proper ventilation, wall reflection, light-proofing, waterproofing) costs $2,500-$4,000 minimum when done correctly. The tent becomes cost-competitive or cheaper in virtually every scenario.
The exception: if you’re already operating in a dedicated grow room with proper infrastructure and plan to fill the entire space with plants, adding tents inside the room is redundant. But for most home growers, the tent’s combination of portability, containment, and environmental precision offers advantages that open-room growing can’t match without significant additional investment.
Common Mistakes When Buying Your First 4×8 Grow Tent
Watching growers repeat the same purchasing errors cycle after cycle reveals patterns worth breaking down before you spend your money.
Mistake #1: Choosing Size Based on Current Plans Instead of Growth Trajectory
First-time 4×8 buyers almost always plan to fill 60-70% of the space initially. Then three months later they wish they’d bought bigger because they underestimated how quickly they’d scale up. The reverse problem happens too—growers jump to 4×8 from a 2×2, then realize they don’t actually want to manage 16 plants and end up with expensive wasted space.
The solution: mentally plan for 18 months out, not three months. If you’re currently running 4-6 plants and contemplating expansion, the 4×8 makes sense. If you’re at 2-3 plants and mostly hypothetically curious about scaling, a 4×4 intermediate step might be smarter.
Mistake #2: Ignoring Weight Capacity Until Equipment Arrives
“The tent holds 110 pounds, my lights are 15 pounds each, that’s plenty of headroom!” Then you add the carbon filter (18 lbs), ducting and hardware (8 lbs), oscillating fans (6 lbs), and suddenly you’re at 70 pounds without accounting for safety margin or future additions. Frames rated at capacity don’t actually safely hold their maximum rating long-term.
The fix: calculate your full equipment weight including everything that hangs from the frame, then target a tent rated for at least 1.5x that number. If your gear totals 90 pounds, you want 135+ pound capacity minimum. This prevents the gradual frame bowing that leads to catastrophic failures six months in.
Mistake #3: Sacrificing Quality to Afford More Equipment Now
The thinking goes: “I’ll buy the $200 tent so I can afford better lights and ventilation today, then upgrade the tent later if needed.” This almost never works as planned. The cheap tent develops light leaks requiring constant maintenance, or the frame starts sagging, or zippers fail, and you end up buying a second tent anyway while still using the first one because you can’t afford downtime mid-grow.
Better approach: buy the best tent your budget allows first, even if it means running adequate lighting temporarily. The tent is your growing environment’s foundation—everything else depends on it functioning correctly. Upgrading from a 300W light to 600W costs $200-$300 and takes 10 minutes. Replacing a tent mid-grow is expensive, disruptive, and risks your entire crop.
Mistake #4: Assuming Brand Specifications Are Comparable
When tent A lists 1680D canvas and tent B lists 1680D canvas at half the price, first-time buyers assume they’re equivalent. They’re not. Canvas density measures thread count, not fabric quality. Cheap manufacturers use lower-grade threads to hit density numbers while providing inferior tear resistance and light-blocking. Premium brands use thicker individual threads that genuinely perform better.
The workaround: rely on comparative reviews and real-world testing over spec sheets. If a tent costs 40% less than competitors with “identical” specifications, those specifications aren’t actually identical where it matters.
Mistake #5: Neglecting Height Planning
Standard 80″ tents provide about 5’6″-6’0″ of usable growing height after accounting for lights, pots, and clearance. That’s adequate for most strains with training—until you run something with strong sativa genetics that wants to hit 5’+ even when topped. Then you’re supercropping aggressively or watching tops burn against lights.
The solution isn’t automatically buying the tallest tent—it’s matching height to your actual growing style. If you run indica-dominant hybrids with aggressive training, fixed-height tents work fine. If you prefer minimal plant manipulation or grow sativa-leaning genetics, prioritize adjustable-height tents even if they cost more.
Lighting and Ventilation for 4×8 Grow Tent Setup
The tent is the container, but lighting and airflow determine whether your plants thrive or survive. Getting this right the first time prevents the expensive trial-and-error most growers endure.
Lighting Configuration: Two Zones vs. Three
A 4×8 footprint naturally divides into two 2×4 sections or three narrower zones. Most growers run two lights positioned for 2×4 coverage each—this works well for uniform canopy heights and similar strains. The three-light configuration makes sense when you’re staging plants at different growth phases (early veg, late veg, flower) or running strains with significantly different light requirements.
For LED fixtures, target 35-40 watts per square foot for flowering. That’s 1120-1280 watts total, or 560-640 watts per light in a two-light setup. Current-generation LEDs (Samsung LM301H/B, Osram, or equivalent diodes) deliver better efficiency—you can run slightly lower wattage with comparable results. Older-generation LEDs or blurples need higher wattage to achieve the same PPFD.
HPS remains viable despite LED dominance, particularly in colder climates where the heat is beneficial. Two 600W HPS fixtures cover a 4×8 adequately but generate significant heat—plan for 600-800 CFM ventilation minimum. The weight consideration matters: two 600W HPS fixtures with hoods weigh 60-80 pounds versus 25-35 pounds for equivalent LED fixtures.
Ventilation: The Math That Actually Matters
Your 4×8 tent contains approximately 213 cubic feet (96″ x 48″ x 80″ = 30,720 cubic inches ÷ 1,728 = 213 CF). Standard practice calls for exchanging the entire volume 1-2 times per minute, meaning you need 213-426 CFM of exhaust capacity.
But that’s baseline—real-world requires accounting for carbon filter resistance (typically 15-25% airflow reduction), ducting friction (another 10-15%), and seasonal temperature demands. A 6-inch inline fan rated 400-450 CFM handles most 4×8 setups running LEDs. HPS lighting or hot climate operation pushes you toward 6-inch 600+ CFM or 8-inch 450+ CFM systems.
Position your intake passive (lower corners) and exhaust active (upper corner opposite side). This creates diagonal airflow across the canopy. Adding internal oscillating fans (2-3 in a 4×8) ensures air movement reaches all plant zones. Stagnant air pockets breed mold and pest problems even with proper ventilation.
Climate Control: Beyond Just Fans
Maintaining 68-78°F and 40-60% RH (vegetative) or 40-50% RH (flowering) requires more than ventilation in most climates. Inline duct fans can introduce cooler or warmer air from adjacent spaces, but you’re limited by your source air quality. Supplemental AC units or heaters become necessary in extreme climates.
The often-overlooked factor: negative pressure. Your tent should slightly pull inward when sealed and fans running—this prevents odor leaks and indicates proper ventilation balance. If tent walls push outward, you’re over-pressurizing (exhaust insufficient). If they collapse inward excessively, you’re pulling too hard (intake restricted).
Maximizing Yields: Training Techniques for 4×8 Grow Tents
The 32-square-foot footprint allows multiple training approaches that would be impractical in smaller tents. Understanding which techniques suit your situation prevents wasted effort and suboptimal harvests.
SCROG (Screen of Green) in 4×8 Format
SCROG works brilliantly in 4×8 tents because you can dedicate 2×4 zones to individual screens, allowing different training timings or strain-specific approaches. Install screens at 12-18 inches above pot height during early vegetation, then weave branches horizontally until achieving 70-80% screen coverage before flipping to flower.
The 4×8 advantage: you can run two separate screens with different strains or timing rather than being locked into single-canopy management. The challenge: reaching the back of a 4×4 section requires careful planning—install removable rear panels or work in sections to avoid literally climbing into the tent.
Sea of Green (SOG) vs. Traditional Training
SOG in a 4×8 means 16-24 plants in small containers (2-3 gallon), minimal vegetative time, focusing energy on single-cola development. This maximizes harvest frequency (shorter total cycle time) at the cost of higher plant count and more intensive daily maintenance.
The calculation: SOG typically yields 0.5-1.0 oz per plant from 20 plants = 10-20 oz per harvest at 10-12 week total cycle time. Traditional training with 8-12 plants yields 2-3 oz per plant = 16-36 oz per harvest at 14-16 week cycle time. SOG wins on harvest frequency, traditional training wins on single-harvest quantity.
LST (Low-Stress Training) for Space Optimization
4×8 tents tempt growers to maximize plant count, but LST proves that fewer, larger plants often outperform higher counts. Training 8-10 plants to fill the space via LST (bending and securing branches to create even canopy) produces comparable or better yields than 16-20 untrained plants while requiring less daily attention.
The technique matters: start LST early (3-4 weeks from seed), gently bend main stems to create horizontal growth, secure with soft ties to pot edges or anchor points. As side branches develop, train them outward too. The goal is creating a flat, even canopy that uses the entire 2×4 section per 4-5 plants.
Height Management: The 4×8 Challenge
Longer rectangular spaces create light intensity variance—plants near fixture centers receive more light than corner plants. Combat this by positioning taller plants toward peripheries and shorter plants toward centers, or by using training to maintain uniform canopy height across the entire 8-foot length. Adjust individual plant height by raising or lowering containers rather than trying to train everything to identical height.
Essential Accessories for Your 4×8 Grow Tent Setup
The tent, lights, and ventilation are your foundation, but specific accessories dramatically improve workflow and results. Having helped dozens of growers optimize their setups, these items consistently prove their value.
Programmable Controllers (The Single Best Upgrade)
Manual fan and light control works until your schedule conflicts with plant needs. A programmable controller (AC Infinity UIS, VIVOSUN GrowHub, Inkbird, or similar) automates ventilation based on temperature and humidity thresholds, coordinates light schedules, and prevents the “forgot to turn lights on/off” catastrophes that cost entire harvests.
In a 4×8 setup, automation matters more than smaller tents because you’re managing more plants with narrower environmental tolerances at scale. The $80-$150 for a quality controller returns value immediately in time savings and environmental consistency.
Trellis Netting and Support Systems
Even if you’re not running full SCROG, trellis netting supports heavy-flowering tops and keeps plants organized as they fill the space. Install one layer at 12-18 inches for lower canopy support, optionally a second layer at 24-30 inches for cola support during peak flowering. The $15-$25 for proper netting prevents the late-flower stem breaking that loses entire branches.
Hygrometers (Multiple Units)
One hygrometer at eye level doesn’t tell you what’s happening at canopy or root zone. Place 2-3 units (one near floor, one at mid-canopy, one at light height) to monitor microclimate variance. Temperature differences exceeding 5-8°F top-to-bottom indicate airflow problems. Humidity variance exceeding 10% suggests ventilation inadequacy. Quality digital units cost $12-$18 each—cheap insurance against environmental problems.
Trimming Scissors and Maintenance Tools Stored Inside
Keep dedicated pruning scissors, twist ties, spare hangers, and basic tools in the tent’s built-in organizer pouch. Most maintenance happens during daily checks when you’re already inside—having tools immediately available saves time and prevents tracking dirt from other areas into your growing space.
Runoff Trays and Water Management
For soil or coco growers, individual plant runoff trays prevent moisture accumulation in the main flood tray. For hydroponic setups, the tent’s included flood tray contains system leaks but isn’t typically deep enough for significant overflow—supplemental drainage planning prevents discovering water issues after damage occurs.
Thermometer Probe for Root Zone Temperature
Ambient air temperature and root zone temperature can differ by 5-10°F depending on pot size, medium, and location. Cannabis roots prefer 65-70°F—too warm and you risk root rot, too cold and nutrient uptake slows. A probe thermometer ($12-$20) placed in your medium provides data your ambient hygrometer can’t.
FAQ: Your 4×8 Grow Tent Questions Answered
❓ What size inline fan do I need for gorilla 4x8 grow tent?
❓ How many plants can I grow in a 4x8 grow tent professionally?
❓ Is 600D or 1680D canvas better for extended cultivation chamber durability?
❓ Can I run both LED and HPS lighting in the same 4x8 mylar grow tent?
❓ How do I prevent light leaks in multi-zone growing area setups?
Conclusion: Choosing Your Perfect 4×8 Grow Tent
The gorilla 4×8 grow tent market in 2026 offers genuine choices rather than marginal differences. The Gorilla Pro remains the uncompromising premium option for growers who want maximum durability and height flexibility. Spider Farmer delivers impressive value for LED-focused setups. AC Infinity appeals to tech-forward growers building integrated ecosystems. Mars Hydro occupies the sweet spot between performance and affordability.
Your decision ultimately hinges on three questions: What equipment are you running (weight considerations)? How long do you plan to use this setup (durability requirements)? What’s your realistic budget when accounting for full system costs (tent plus accessories)?
The encouraging news: every option reviewed here can produce excellent results. The expensive tent doesn’t grow better plants—it just makes the process easier, more predictable, and less prone to equipment-related failures. That’s worth paying for if you’re operating at scale or can’t afford crop-loss risk. It’s unnecessary if you’re willing to work around limitations and prioritize initial cost savings.
Whatever you choose, invest those first 72 hours in proper setup and environmental tuning. The tent is only as good as the controlled environment you create inside it. Get that right, and you’ll wonder why you didn’t scale to 4×8 sooner.
Recommended for You
- 7 Best 5×5 Grow Tent Setups for Maximum Yields (2026)
- 7 Best 4×4 Grow Tent Bundle Systems: Complete Guide 2026
- 7 Best Gorilla Grow Tent 4×4 Reviews – Top Picks 2026
Disclaimer: This article contains affiliate links. As an Amazon Associate, I earn from qualifying purchases. If you purchase products through these links, we may earn a small commission at no additional cost to you.
✨ Found this helpful? Share it with your friends! 💬🤗