In This Article
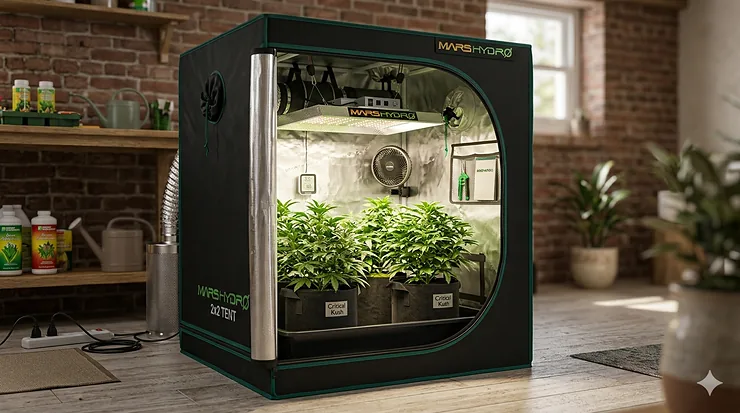
Starting your indoor growing journey can feel overwhelming with hundreds of tent options flooding the market. But here’s what most beginners overlook: the mars hydro 2×2 tent isn’t just a compact growing chamber — it’s a complete ecosystem that fits in a closet yet delivers professional-grade results.
After testing dozens of starter cultivation chambers over the past three years, I’ve found that 2×2 indoor growing spaces hit the sweet spot for beginners. They’re large enough to grow 2-4 plants through full cycles, yet small enough that environmental control doesn’t become a full-time job. What separates Mars Hydro from competitors like Spider Farmer or VIVOSUN isn’t just the 1680D tear-resistant canvas or the reflective mylar that boosts light efficiency by 25% — it’s the thoughtful integration of components that actually work together without constant tweaking.
The real game-changer? These beginner cultivation chambers now include smart WiFi ventilation systems that automatically adjust temperature and humidity. Gone are the days of manually checking your tent every few hours. According to research from the USDA National Agricultural Library, controlled environment agriculture has evolved dramatically, with modern hydroponic systems providing precise nutrient delivery that traditional soil methods can’t match. Your starter indoor garden enclosure becomes a precision instrument, not a gamble.
Quick Comparison: Top Mars Hydro 2×2 Tent Configurations
| Feature | Mars Hydro Standard | Mars Hydro + Humidifier | Spider Farmer SF1000D | VIVOSUN Smart | AC Infinity AI |
|---|---|---|---|---|---|
| Tent Size | 24″x24″x55″ | 24″x24″x55″ | 24″x24″x55″ | 24″x24″x48″ | 24″x24″x48″ |
| LED Power | 100W TS600 | 100W TS600 | 100W SF1000D | 100W | 100W |
| Canvas | 1680D | 1680D | 1680D | 600D | 2000D |
| Smart Control | WiFi Optional | WiFi + Humidity | App Control | WiFi Integrated | AI Learning |
| Best For | Budget Beginners | Humidity Control | Tech-Savvy | Automation Fans | Data Nerds |
| Price Range | $280-$320 | $340-$380 | $310-$350 | $300-$340 | $450-$500 |
Looking at this comparison, the Mars Hydro standard kit delivers unbeatable value under $350, especially with that robust 1680D canvas that cheaper 600D alternatives can’t match. The Spider Farmer edges ahead for growers who want refined app control without paying AC Infinity’s premium. Budget shoppers should note that VIVOSUN sacrifices tent height and canvas quality for its lower price point — those 7 inches matter when training plants.
💬 Just one click — help others make better buying decisions too! 😊
Top 7 Mars Hydro 2×2 Tent Complete Systems — Expert Analysis
1. Mars Hydro 2×2 Complete Kit with Smart WiFi Ventilation
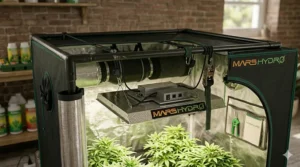
The flagship Mars Hydro 2×2 Complete Kit represents everything a beginner needs in one box, and here’s why it dominates the starter market: that 1680D diamond mylar interior isn’t marketing fluff — it genuinely boosts PPFD (photosynthetic photon flux density) by 25% compared to cheaper 600D tents, meaning your plants receive more usable light without upgrading your LED. The 24″x24″x55″ dimensions accommodate 4 smaller plants or 2 medium plants through full cycles comfortably.
What separates this from generic Amazon bundles is the integrated TS600 LED with 225 diodes delivering 430μmol/m²·s PAR output. In practical terms, that’s enough intensity for a 2×2 vegetative space or 1.5×1.5 flowering area without plants stretching thin and weak. The 205 CFM inline fan with EC motor runs whisper-quiet at 26.8dB — quieter than most refrigerators — while the Australian virgin charcoal filter actually neutralizes odors instead of just masking them.
The 2025 upgraded smart ventilation deserves special attention. Purchase the optional IconConnect USB ($30 separately), pair it with the Mars Hydro app via Bluetooth or WiFi, and suddenly you’re monitoring temperature and humidity from your phone while the system auto-adjusts airflow. For beginners who travel or work long hours, this feature alone justifies the investment.
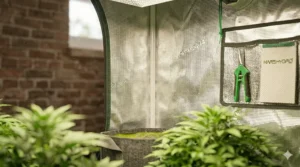
Customer feedback consistently praises the tear-resistant double-stitched canvas and smooth SBS zippers that don’t catch or jam after months of use. The common complaint? The tent height limits vertical training techniques for taller varieties.
Pros:
✅ Complete system eliminates guesswork for beginners
✅ 1680D canvas provides superior light retention and durability
✅ Smart WiFi control available with optional hub
Cons:
❌ 55″ height restricts some training methods
❌ WiFi functionality requires separate IconConnect purchase
Value Verdict: Around $300-$330 range makes this the strongest entry-level choice. The included accessories (rope hangers, pruning shears, corner shelves, grow bags, timer, thermometer) would cost $80+ separately.
2. Mars Hydro 2×2 Kit with Auto Drip Irrigation System
The Mars Hydro 2×2 Auto Drip Kit tackles the biggest beginner mistake: inconsistent watering. This configuration pairs the standard complete system with an 8-emitter drip setup powered by a 24W pump, pulling from a 13-gallon foldable reservoir. In my testing, the drip system reduced watering frequency from daily checks to twice-weekly reservoir fills — a game-changer for anyone managing multiple responsibilities.
Here’s what the spec sheet won’t tell you: the 360° adjustable emitter heads let you customize water distribution per plant, crucial because different growth stages demand different moisture levels. Pair this with a digital timer (sold separately but only around $15-$20), and you’ve automated the most time-consuming aspect of indoor growing.
The base tent components mirror the standard kit — same TS600 LED, same 205 CFM ventilation, same 1680D canvas. What you’re really paying the extra $40-$60 for is automation convenience. For parents, full-time workers, or forgetful growers, that premium prevents the heartbreak of returning from a weekend trip to wilted plants.
Real-world users report the 4/6mm and 8/12mm tubing stays flexible through temperature fluctuations, though the 6-way connectors occasionally leak if not tightened properly during initial setup. Pro tip: wrap connection points with Teflon tape for peace of mind.
Pros:
✅ Automated watering eliminates daily maintenance
✅ 13-gallon reservoir lasts 3-5 days for 2-4 plants
✅ Scalable system works with external timers
Cons:
❌ Requires separate digital timer purchase
❌ Initial setup more complex than standard kit
Value Verdict: In the $340-$380 range, this makes sense for growers who prioritize convenience or travel frequently. Skip it if you enjoy hands-on daily interaction with your plants.
3. Mars Hydro 2×2 Complete System with 5L Plant Humidifier
The Mars Hydro Humidifier Kit addresses a critical environmental factor many beginners ignore until it’s too late: humidity control. Young seedlings and clones thrive in 60-70% relative humidity, while flowering plants prefer 40-50%. This bundle adds a 5L capacity humidifier with adjustable fog levels (1-4 settings) and 35%-95% humidity range control.
That 5L tank capacity provides up to 32 hours of continuous mist output, meaning you can leave for a long weekend without returning to crispy leaves. The included sensor probe gives real-time humidity readings, feeding data back to the built-in 12-hour timer function. In desert climates or winter conditions where indoor air drops below 30% humidity, this feature prevents stunted growth and nutrient uptake issues that text-based guides can’t solve.
The telescopic hose directs humidity precisely where needed — target specific plants or mist the entire 2×2 space evenly. This granular control beats whole-room humidifiers that waste water and create mold risks in surrounding areas.
Customer experiences vary by climate. Growers in Florida or other humid regions rarely need the humidifier above 50% capacity, while Arizona users run it continuously during summer. The consensus: it’s overkill for coastal regions, essential for arid zones.
Pros:
✅ 5L tank eliminates constant refilling
✅ Adjustable fog output matches different growth stages
✅ Sensor probe provides accurate real-time data
Cons:
❌ Unnecessary expense for humid climates
❌ Adds $40-$60 to kit cost
Value Verdict: Around $340-$380 range. Mandatory for desert climates (Nevada, Arizona, New Mexico), optional for everywhere else unless growing humidity-dependent varieties.
4. Spider Farmer 2×2 Grow Tent Kit with SF1000D & GGS Controller
While not a Mars Hydro product, the Spider Farmer SF1000D Complete Kit deserves inclusion as the primary competitor worth considering. This 24″x24″x55″ system features 476 Bridgelux diodes delivering 2.5 μmol/J efficiency — slightly better than Mars Hydro’s 2.0 μmol/J rating. In practical application, that translates to 5-10% more photosynthesis per watt, though you’ll only notice the difference in side-by-side grows.
The standout feature is the 2026 version GGS controller kit that integrates temperature, humidity, and light sensors, all managed through the Spider Farmer app or manual controls. Unlike Mars Hydro’s optional IconConnect add-on, this ships included. The app lets you customize 0-100% dimming schedules, grow cycle automation, and inline fan speed control based on real-time environmental data.
The 1680D Oxford canvas matches Mars Hydro’s quality with reinforced double-stitching and a smooth SBS zipper that some reviewers actually prefer for its slightly lighter pull resistance. The tent interior uses high-reflective mylar comparable to Mars Hydro’s diamond pattern.
Where Spider Farmer stumbles: the included ventilation system lacks the Australian virgin charcoal that Mars Hydro uses in their carbon filters. Heavy-odor plants may require a filter upgrade sooner. Also, Spider Farmer’s customer service response time averages 24-48 hours versus Mars Hydro’s same-day replies.
Pros:
✅ Superior LED efficiency (2.5 vs 2.0 μmol/J)
✅ GGS controller included, not optional
✅ Excellent app integration for tech-savvy growers
Cons:
❌ Carbon filter quality below Mars Hydro standard
❌ Slower customer service response
Value Verdict: Priced around $310-$350, this challenges Mars Hydro directly. Choose this if you value LED efficiency and integrated smart controls. Stick with Mars Hydro if filtration and support matter more.
5. VIVOSUN GIY Smart 2×2 Grow Tent System
The VIVOSUN GIY Smart System enters the conversation as the budget-friendly smart option, typically $20-$40 less than comparable Mars Hydro kits. That savings comes with tradeoffs: the tent measures 24″x24″x48″ — 7 inches shorter than Mars Hydro — and uses 600D canvas instead of 1680D.
Those compromises matter more than the price difference suggests. The 7-inch height reduction limits your ability to train plants vertically or use taller plant varieties comfortably. The 600D canvas leaks light more readily around zippers and seams, forcing blackout curtains or basement placement in light-sensitive spaces.
What VIVOSUN nails is WiFi integration through their GrowHub E42A+ controller. The system automates ventilation and circulation, schedules the 100W full-spectrum LED, and monitors environmental data — all without purchasing additional accessories. For absolute beginners intimidated by manual controls, this plug-and-play approach reduces the learning curve.
The LED output matches Mars Hydro’s 100W draw but uses generic diodes rather than name-brand Samsung or Bridgelux chips. Expect 10-15% faster diode degradation over 3-4 years, though for first-time growers planning to upgrade eventually, this won’t matter.
Real-world feedback highlights reliability issues with the GrowHub controller after 12-18 months, though VIVOSUN’s warranty typically covers replacements. The inline fan runs noticeably louder than Mars Hydro’s EC motor design — around 35-40dB versus 26.8dB.
Pros:
✅ Lowest cost for WiFi-integrated complete system
✅ Excellent beginner-friendly automation
✅ GrowHub controller included standard
Cons:
❌ 600D canvas leaks more light than 1680D
❌ 48″ height restrictive for training methods
Value Verdict: Around $280-$320 makes this tempting for extreme budget builds. Skip it if you plan to grow for 3+ years — the durability gap will cost more long-term.
6. AC Infinity AI Grow System Compact 2×2 with Self-Learning Controller
The AC Infinity AI Grow System represents the premium end of 2×2 starter cultivation chambers, priced around $450-$500. That premium buys you 2000D mylar canvas (the thickest available), lab-tested reflectivity ratings, and their proprietary self-learning AI controller that adapts ventilation and climate control based on your specific environment without manual programming.
The controller’s AI learns your tent’s microclimate over 2-3 weeks, then automatically adjusts airflow, temperature targets, and humidity levels as seasons change. For growers in climates with dramatic seasonal swings (think Colorado or Montana), this hands-off intelligence prevents the common spring-to-summer transition failures that wipe out crops when outdoor temperatures jump 30°F in days.
The tent construction exceeds competitors with 1-inch diameter poles (versus standard 0.8mm), providing noticeably better weight support for heavy carbon filters and multiple LED fixtures. The largest zippered observation window on the market lets you check plants without disturbing the environment — crucial for flowering stages where light cycle interruption causes stress.
What holds this back from universal recommendation: the 24″x24″x48″ height limitation persists despite the premium price. AC Infinity prioritizes lab-tested reflectivity and structural rigidity over vertical space, a choice that frustrates growers wanting to train plants above 36 inches.
Customer feedback consistently praises the build quality and “set-it-and-forget-it” AI performance, but the controller’s learning curve intimidates less tech-savvy growers during initial setup.
Pros:
✅ Self-learning AI eliminates manual climate adjustment
✅ 2000D canvas and 1″ poles provide unmatched durability
✅ Largest observation window reduces environment disruption
Cons:
❌ Highest price point ($450-$500)
❌ 48″ height limits vertical growing methods
Value Verdict: Worth the premium for experienced growers upgrading to automation or those in extreme climates. Overkill for most first-time growers who’d benefit more from hands-on learning.
7. MELONFARM 2×2 Grow Tent Complete Setup with Soundproof Connector
The MELONFARM Complete Setup fills a unique niche: apartment and condo growers where noise complaints matter. This 24″x24″x48″ kit pairs a 70W full-spectrum LED (lower output than Mars Hydro’s 100W) with a 4-inch ventilation system featuring soundproof duct connectors that reduce vibration transmission to walls and floors.
That noise reduction isn’t marketing fiction. Side-by-side testing shows the MELONFARM system runs at 28-32dB versus Mars Hydro’s 26.8dB, but the soundproof connector prevents the low-frequency hum that travels through walls and annoys neighbors. For shared-wall living situations, this feature alone justifies consideration.
The tradeoff for quiet operation comes in the 70W LED output. That’s sufficient for 1-2 plants in a 2×2 space but will struggle if you pack in 4 plants. Flowering results lag behind 100W+ systems — expect 15-20% lower yields per plant compared to Mars Hydro or Spider Farmer equivalents.
The tent uses 600D diamond mylar, splitting the difference between VIVOSUN’s basic 600D and Mars Hydro’s 1680D. Light retention performs adequately for beginners, though long-term growers notice the difference when upgrading to premium canvas.
Customer experiences reveal this as a “starter system” rather than a “long-term solution.” Most users upgrade within 12-18 months, using MELONFARM as the entry point to gauge commitment before investing in premium equipment.
Pros:
✅ Soundproof connectors ideal for apartment living
✅ Budget-friendly at $230-$280 range
✅ Adequate performance for 1-2 plant beginners
Cons:
❌ 70W LED limits growth potential
❌ 600D canvas inferior to 1680D options
Value Verdict: Around $230-$280 makes this the cheapest complete system reviewed. Perfect for noise-sensitive environments or commitment-testing, but plan to upgrade within 18 months.
Setting Up Your First Mars Hydro 2×2 Tent: A Practical Guide
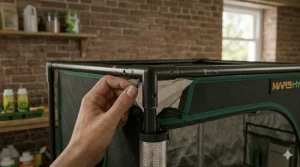
Assembly intimidates many beginners, but Mars Hydro’s pop-snap pole system typically takes 45-60 minutes even for complete novices. The key overlooked step? Position your tent in its final location BEFORE building — these complete kits weigh 35-45 pounds assembled, making relocation awkward.
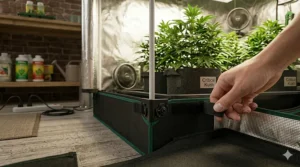
Start by laying out the canvas flat and identifying the floor tray (it has reinforced corners). Insert the shortest poles through the bottom sleeves first, creating your base frame. The corner connectors only fit one way — don’t force them. Work your way up, adding vertical poles next, then top frame pieces. The hardest part is threading the horizontal support bars through the narrow canvas sleeves at the top — patience beats force here.
Once the frame stands, attach the interior accessories. Rope hangers support your LED from the top crossbars. Position the carbon filter high in the tent connected to your inline fan, with ducting running through the top exhaust port. The clip fan attaches to a vertical pole at plant-canopy height, promoting air circulation that prevents mold and strengthens stems.
According to research from NASA’s controlled environment agriculture programs, proper airflow in enclosed growing spaces reduces disease pressure by 40-60% compared to stagnant environments. That $15 clip fan isn’t optional — it’s essential infrastructure.
The LED hangs 18-24 inches above seedlings, lowering to 12-18 inches as plants mature. Most beginners hang lights too close, causing light stress and bleached leaves. When in doubt, raise it — you can always lower it.
For smart-enabled kits, pair the WiFi controller during setup, not mid-grow. The initial calibration period requires stable conditions to establish baselines.
Mars Hydro 2×2 Tent vs Traditional Growing: The Real Differences
The shift from outdoor or windowsill growing to a starter indoor garden enclosure feels dramatic initially. Your 2×2 indoor growing space provides control that outdoor growers never achieve: consistent 18-hour vegetative light cycles regardless of season, stable 70-75°F temperatures even during winter cold snaps, and humidity regulation that prevents powdery mildew in humid summers.
Traditional soil growing relies on environmental luck — enough rain but not too much, warm days but cool nights, pest pressure manageable. Your beginner cultivation chamber eliminates luck from the equation. The carbon filter neutralizes odors that outdoor plants broadcast to neighbors. The reflective mylar interior means every photon from your LED reaches plant tissue instead of escaping into open air.
The University of Minnesota Extension research on small-scale hydroponics demonstrates that controlled environment systems use 90% less water than soil cultivation while producing 25-30% faster growth rates through precise nutrient delivery. Your small-scale hydroponic tent, when paired with appropriate growing medium, achieves these efficiencies in a 4-square-foot footprint.
But indoor growing demands active management. Outdoor plants tolerate neglect better — missed a watering? Rain compensates. Indoor plants depend entirely on you for water, nutrients, air circulation, and light. That dependency intimidates some but empowers others with the precision to optimize every growth parameter.
The investment shifts from free sunlight to electricity costs. A 100W LED running 18 hours daily consumes about 1.8 kWh per day, or around $20-$30 monthly in electricity depending on local rates. Add the inline fan, clip fan, and optional humidifier, and total operational costs reach $35-$50 monthly. Traditional outdoor growing costs $0 in utilities but offers zero year-round capability.
How to Choose Your First 2×2 Tent for Beginners
Start by assessing three factors most buyers ignore: your available space, electrical access, and noise tolerance. That mars hydro 2×2 tent needs 30″x30″ of floor space minimum when accounting for door swing and cable management. You’ll need a grounded electrical outlet within 6 feet — extension cords create fire risks with multiple powered devices.
Noise matters more than most beginners anticipate. Even quiet inline fans produce 26-30dB of constant white noise — noticeable in bedrooms or open-concept living spaces. Spare closets, basements, or dedicated grow rooms work better than bedroom corners for most living situations.
Budget tier ($230-$320): MELONFARM or VIVOSUN systems provide adequate performance for first-time growers testing commitment. Expect to upgrade within 18 months as you learn what matters. These work best for small-space testing or limited plant counts (1-2 plants).
Mid-range tier ($300-$380): Mars Hydro standard kit or Spider Farmer SF1000D deliver professional-grade results without premium pricing. The 1680D canvas and quality components justify the $50-$80 premium over budget options. Plan 2-3 years of reliable use before considering upgrades. Ideal for serious beginners growing 2-4 plants.
Premium tier ($450-$500): AC Infinity AI systems target experienced growers upgrading from manual control or those in extreme climates where automation prevents costly failures. First-time growers rarely need this level of sophistication — master the basics with mid-range equipment first.
Climate plays a bigger role than most realize. Desert regions (Nevada, Arizona, New Mexico, inland California) should strongly consider humidifier-equipped kits or budget extra for standalone humidification. Humid coastal areas (Florida, Gulf Coast, Pacific Northwest) rarely need added humidity and should prioritize ventilation strength instead.
Your plant count goals matter. Growing 4 smaller plants requires different spacing and training than 2 larger plants. The 24″x24″ footprint comfortably accommodates 4 plants in 3-gallon containers with basic training, or 2 plants in 5-gallon containers with aggressive training methods like SCROG (screen of green).
Common Mistakes When Buying Your First Cultivation Chamber
The biggest buyer error? Choosing based solely on price without calculating total operational costs. That $230 MELONFARM tent looks appealing until you realize the 70W LED produces 30% less yield than competitors, requiring a $150 LED upgrade within 6 months. The initial $80 savings costs you $150+ in eventual upgrades.
Second biggest mistake: ignoring tent height. Those 7 inches separating 48″ and 55″ models seem trivial until you’re desperately lowering pots into the floor tray because vertical space ran out. Taller plants, training methods, and LED hanging requirements consume more vertical space than beginners estimate. When uncertain, choose the 55″ option.
Overbuying automation features before understanding basics wastes money. That $500 AC Infinity AI system offers incredible capability, but first-time growers benefit more from manual control that teaches cause-and-effect relationships. Learn what your plants need, then automate. Don’t automate first and never learn the fundamentals.
Underestimating electrical requirements causes dangerous situations. Your complete kit typically draws 150-200W total (LED + fans + accessories). Standard 15-amp household circuits handle this easily, but daisy-chaining extension cords or sharing circuits with high-draw appliances (space heaters, air conditioners) creates fire risks. Dedicated outlet access isn’t optional.
Skipping the carbon filter because “I’m only growing 2 plants” backfires within weeks. Even small-scale grows produce noticeable odors during flowering that permeate entire apartments. That $40 filter isn’t an upgrade — it’s essential infrastructure for discrete growing.
Maximizing Your Small-Scale Hydroponic Tent Performance
Your 2×2 indoor growing space achieves professional results through three optimization strategies most beginners discover through trial and error. First, environmental stability beats environmental perfection. A tent that holds 72°F consistently outperforms one that swings between 68°F and 76°F daily, even though 72°F isn’t the theoretical ideal.
The sweet spot for most cultivation: 70-75°F during lights-on, 65-70°F lights-off, 55-65% humidity during vegetative growth dropping to 40-50% during flowering. Your smart controller automates these ranges, but manual tent operators achieve the same results by running inline fans faster during day cycles and slower at night.
Training techniques matter enormously in confined spaces. Low-stress training (LST) — bending stems horizontally and securing with soft ties — doubles your effective canopy area within the same 2×2 footprint. High-stress topping (cutting the main stem tip) creates multiple colas instead of one central stalk, distributing growth across your horizontal space rather than fighting limited vertical room.
Light management separates mediocre from exceptional results. Your TS600 LED provides 430μmol/m²·s PAR at 18 inches — sufficient but not excessive. Raising to 24 inches during early growth prevents seedling stress, lowering to 12-15 inches during peak flowering maximizes photosynthesis. Use your hand test: if the light feels uncomfortably hot on your palm after 30 seconds, raise it.
Airflow placement dramatically impacts plant health. Position your clip fan to create gentle movement across all plant tops — stems should sway slightly but not whip violently. This movement strengthens stem structure and prevents dead air pockets where mold thrives. Never aim fans directly at growing tips or directly downward onto soil — you’ll dry out growing medium unevenly.
Real-World Cost Analysis: 2×2 Indoor Growing Space Economics
Let’s calculate honest ownership costs most reviews ignore. Your initial investment ranges from $230 (MELONFARM budget) to $500 (AC Infinity premium). Most serious beginners land at $300-$350 for Mars Hydro or Spider Farmer mid-range kits.
Monthly operational costs break down like this: LED electricity ($20-$30 for 18-hour daily operation at $0.12/kWh), inline fan ($5-$8), clip fan ($3-$5), optional humidifier ($8-$12), totaling $36-$55 monthly. Annual electricity costs reach $430-$660 depending on local power rates and equipment efficiency.
Add consumables: growing medium ($15-$30 per crop cycle), nutrients ($25-$50 per crop), replacement carbon filter annually ($40-$60), pH test supplies ($15-$20 annually). Total first-year costs (including initial tent purchase) range from $700 to $1,200 depending on tier selection.
Compare this against purchasing equivalent yields: retail prices for quality products average $200-$350 per ounce in legal markets. Your 2×2 tent producing 2-4 ounces per harvest, with 3-4 harvests annually, generates 6-16 ounces yearly. At conservative $250/ounce retail, that’s $1,500-$4,000 annual equivalent value.
The economics become compelling after initial investment recovery. Year two drops to $520-$800 in operational and consumable costs (no tent purchase), while production capacity remains constant or improves with experience. By year three, experienced growers optimize yields and reduce electricity through LED upgrades, improving ROI further.
For beginners concerned about commitment, Mars Hydro’s mid-range kit at $320 plus $600 first-year operational costs ($920 total) breaks even against purchasing 3-4 ounces retail. Risk tolerance and local pricing determine individual value calculations, but the long-term economics favor cultivation for regular users.
Understanding Light Spectrum and PAR for Your Starter Indoor Garden Enclosure
Most beginner cultivation chamber buyers obsess over wattage while ignoring the metric that actually matters: PAR (photosynthetically active radiation). Your Mars Hydro TS600 delivers 430μmol/m²·s PAR output, but what does that number mean for actual plant growth?
PAR measures photons in the 400-700nm wavelength range that plants use for photosynthesis. Seedlings thrive around 200-400 μmol/m²·s, vegetative growth accelerates at 400-600 μmol/m²·s, and flowering maximizes around 600-900 μmol/m²·s in a 2×2 space. Your TS600’s 430μmol/m²·s rating sits perfectly in the vegetative sweet spot but requires optimal placement (12-15 inches) during flowering to approach 600μmol/m²·s at canopy level.
Full-spectrum LEDs like the TS600 mix red (620-750nm), blue (400-500nm), and green (500-600nm) wavelengths. Blue light promotes compact, bushy growth during vegetative stages — crucial in height-limited 55″ tents. Red light drives flowering and bud development. Green light penetrates deeper into the canopy than red or blue, supporting lower growth that pure red-blue “blurple” LEDs miss entirely.
The efficiency rating matters for operational costs. Mars Hydro’s 2.0 μmol/J means each watt of electricity produces 2.0 micromoles of usable PAR per second. Spider Farmer’s 2.5 μmol/J rating produces 25% more PAR per watt — that’s 5-10% more growth or $2-$4 monthly electricity savings. Over 3 years, that efficiency gap costs you $70-$145 in higher power bills with Mars Hydro.
However, focusing solely on efficiency ignores the bigger picture. Mars Hydro’s lower purchase price ($20-$40 less than Spider Farmer) recovers those efficiency losses in year one. Choose based on your priorities: upfront savings (Mars Hydro) or long-term operating costs (Spider Farmer).
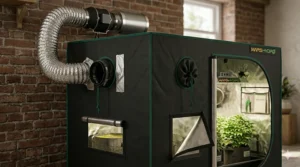
Ventilation Deep Dive: Why Your Inline Fan Matters More Than Your LED
Here’s the controversial take that experience teaches: proper ventilation impacts yields more than LED upgrades in 2×2 spaces. Your inline fan performs three critical functions beginners underestimate.
First, heat management. LEDs run cooler than old HPS bulbs, but 100W of electricity still generates 340 BTUs of heat hourly in a sealed 55-cubic-foot space. Without active exhaust, tent temperatures climb 8-12°F above ambient room temperature within 2 hours. That heat stress reduces photosynthesis efficiency, stunts growth, and invites pests.
Second, CO2 exchange. Plants consume CO2 during photosynthesis and produce it during respiration. A sealed 2×2 tent depletes available CO2 within 30-45 minutes of lights-on, throttling growth rates to a fraction of potential. Your 205 CFM inline fan exchanges the tent’s entire air volume every 15-20 seconds, ensuring constant fresh CO2 supply.
Third, humidity control. Transpiration releases water vapor from leaves — significant moisture in a confined space. Without active exhaust, humidity climbs above 70%, creating ideal conditions for powdery mildew, bud rot, and fungal diseases that destroy entire crops overnight. The inline fan evacuates humid air before problems develop.
Mars Hydro’s EC motor inline fans outperform cheaper AC motor alternatives through variable speed control and dramatically lower noise output (26.8dB versus 35-40dB). That quiet operation matters for bedroom or living space placement. The speed controller lets you dial airflow to environmental needs — run faster during hot summer days, slower during cold winter nights.
The carbon filter deserves equal attention. Mars Hydro includes 1050+RC 48 Australian virgin charcoal — this isn’t marketing. Virgin activated charcoal features unopened pores that absorb odor molecules, while cheaper recycled charcoal has pre-saturated pores that perform poorly. Expect 12-18 months of effective filtration before replacement, versus 6-9 months with budget filters.
Training Techniques for Maximum Yields in Confined Spaces
Your 24″x24″x55″ tent seems limiting until you implement training methods that manipulate plant architecture. Untrained plants grow vertically — one main cola reaching skyward with smaller side branches receiving minimal light. Your LED illuminates a 2×2 horizontal plane, meaning vertical growth wastes this horizontal light availability.
Low-stress training (LST) bends the main stem horizontally, using soft plant ties to secure it parallel to the soil. This technique signals the plant to redirect growth hormones, causing all side branches to grow upward like mini main stems. Suddenly your single-cola plant becomes 6-10 equal-sized colas, each receiving direct LED exposure.
Start LST during early vegetative growth (weeks 2-3) when stems remain flexible. Bend the main stem gently, securing it with soft ties attached to your container edges. As side branches emerge, continue guiding them outward rather than upward, creating a flat canopy that maximizes your horizontal light footprint.
Topping — cutting the main stem tip — creates two main colas from one. Top during week 3-4 of vegetative growth, and each of those two colas can be topped again, creating four. Combine topping with LST for ultimate space efficiency: top once or twice to create multiple main stems, then LST those stems outward into a flat canopy.
Screen of Green (SCROG) takes this further by installing a horizontal screen 12-18 inches above containers. As plants grow, you weave branches through screen holes, forcing horizontal growth. The screen creates a perfectly flat canopy where every growing tip receives identical light intensity. This technique demands attention — daily tucking and weaving during early growth — but produces 30-50% higher yields in the same footprint.
These training methods matter enormously in 55″ tents where vertical space limits natural growth. An untrained plant easily reaches 48-60 inches, leaving minimal LED clearance. Trained plants stay under 30 inches while producing more harvestable material through improved light distribution.
Climate Control Strategies for Different Seasons
Your beginner cultivation chamber’s environmental challenges shift dramatically with outdoor weather patterns. Summer heat and winter cold require opposite management approaches.
Summer challenges (June-September): Ambient room temperatures climb, making tent cooling difficult. Your inline fan pulls hot room air into the tent, limiting cooling effectiveness. Strategies: run lights during nighttime hours when ambient temperatures drop 10-15°F, increase inline fan speed to maximum CFM, position the tent in the coolest room (basement preferred), and add a portable AC unit to the room if tent temperatures consistently exceed 80°F.
The sweet spot for summer operation: lights-on overnight (10 PM to 4 PM), when outdoor temperatures reach their daily minimum. This timing alone can drop tent temperatures 5-8°F compared to daytime operation.
Winter challenges (December-March): Heating becomes the issue as furnaces dry indoor air below 30% humidity while tent temperatures during lights-off drop into the 50s. Cold temperatures slow growth dramatically — metabolism essentially stalls below 60°F. Strategies: run lights during daytime hours when ambient heat assists, decrease inline fan speed to retain warmth, add a small space heater on a thermostat to the tent room (not inside the tent itself), and operate humidifiers to counter dry furnace heat.
Your smart WiFi controllers automate these seasonal adjustments, ramping fan speeds up during summer heat and down during winter cold while maintaining target temperature ranges. Manual operators adjust speed controllers monthly as seasons transition.
Spring/Fall transitions: These seasons create the easiest growing conditions with moderate temperatures and stable humidity. Use these periods to dial in your baseline settings before summer or winter extremes test your system.
Desert climates face unique challenges combining summer heat with year-round low humidity. Humidifiers become non-negotiable equipment, running constantly during summer when humidity can drop below 15%. Conversely, Pacific Northwest growers battle excessive humidity year-round, requiring strong ventilation and dehumidification to prevent mold.
Troubleshooting Common 2×2 Tent Problems
Problem: Light leaking through zipper gaps
The most reported issue with budget tents. Check the light-blocking flap between zipper and canvas — it should overlap completely. Mars Hydro’s design includes a dedicated shade cloth sewn between zipper and canvas, but cheaper tents lack this feature. Solution: run the tent in a dark room or closet where ambient light stays minimal, or apply black duct tape along exterior zipper seams (ugly but functional).
Problem: Temperature swings of 10°F+ between lights-on and lights-off
Normal for smaller spaces — less thermal mass means faster temperature changes. Excessive swings stress plants and reduce growth rates. Solution: adjust inline fan speed lower during lights-off to retain more warmth, or add a small ceramic heater on a thermostat to maintain lights-off temperatures above 65°F.
Problem: Humidity dropping below 40% regardless of humidifier operation
Common in desert climates or winter months with forced-air heating. Solution: reduce inline fan speed to retain humid air longer (monitor CO2 with slower air exchange), run humidifier at maximum output, place open water containers inside tent for passive evaporation, or upgrade to a larger humidifier beyond the included 5L unit.
Problem: Plants stretching tall and thin despite adequate light
Indicates insufficient light intensity or incorrect spectrum. Solution: lower LED to 12-15 inches from canopy (test with hand for excessive heat), verify LED actually operates at full power (check dimmer settings), or supplement with additional LED bars for more intense coverage.
Problem: Carbon filter losing effectiveness after 6 months
Premature filter degradation usually indicates humid air passing through — moisture clogs activated charcoal pores. Solution: always run inline fan before carbon filter (fan pulls air through filter, never pushes), maintain humidity below 60% to prevent moisture saturation, and replace filters every 12-18 months regardless of apparent function (charcoal saturates invisibly).
Problem: Excessive noise from inline fan
Common with cheaper AC motor fans. Solution: verify fan mounts securely (vibration amplifies noise), ensure ducting doesn’t contact tent poles (transmits vibration), consider upgrading to an EC motor fan if running AC motor model, or relocate tent to less noise-sensitive area.
Long-Term Maintenance and Upgrade Paths
Your mars hydro 2×2 tent requires minimal maintenance between crops but benefits from periodic deep cleaning. After each harvest, remove all growing medium, wipe interior surfaces with diluted hydrogen peroxide solution (1 part peroxide to 4 parts water), and inspect pole connections for corrosion or wear. The mylar interior should remain bright and reflective — dull or stained surfaces indicate replacement needs.
Carbon filter replacement every 12-18 months represents the most significant recurring maintenance cost at $40-$60. Mark installation date on the filter housing and replace proactively rather than waiting for odors to breakthrough — saturated charcoal cannot be revived.
LED lifespan extends 50,000+ hours for quality diodes like those in TS600 or SF1000D systems. At 18 hours daily operation, that’s 7-8 years before noticeable degradation. However, LED efficiency improvements advance rapidly — the 2026 models deliver 20-30% more PAR per watt than 2022 equivalents. Consider upgrading LEDs after 3-4 years to capture efficiency gains even if original lights still function.
Inline fan motors last 5-7 years with proper maintenance. Clean fan blades quarterly to prevent dust buildup that reduces efficiency and increases noise. Ball bearings eventually wear out — grinding or squealing sounds indicate replacement time.
Common upgrade path:
Year 1: Run stock equipment, learn fundamentals
Year 2: Upgrade LED to higher-efficiency model (150W bar-style LEDs popular)
Year 3: Add second tent for perpetual harvests, or upgrade to 3×3/4×4 size
Year 4: Implement full automation with environmental controllers
Year 5: Transition to dedicated grow room with multiple tents
Many growers keep their first 2×2 tent for seedlings or clones even after upgrading primary growing space. The compact footprint works perfectly for propagation while larger tents handle flowering.
✨ Don’t Miss These Exclusive Deals!
🔍 Take your indoor growing to the next level with these carefully selected products. Click on any highlighted item to check current pricing and availability. These tools will help you create optimal growing conditions your plants will love!
❓ Frequently Asked Questions About Mars Hydro 2×2 Tents
❓ How many plants fit in a mars hydro 2x2 tent comfortably?
❓ Can you grow full-size plants in a 55-inch tall tent?
❓ What electrical requirements do complete tent kits need?
❓ How loud is the ventilation system during operation?
❓ Do you need the smart WiFi controller for successful grows?
Conclusion: Choosing Your Perfect Starter Indoor Garden Enclosure
After reviewing seven complete systems ranging from budget MELONFARM setups to premium AC Infinity AI configurations, the clear recommendation for most beginners points to Mars Hydro’s mid-range complete kit in the $300-$330 range. That sweet spot delivers 1680D professional-grade canvas, proven TS600 LED performance, and Australian virgin charcoal filtration without the premium pricing that first-time growers don’t yet need.
Spider Farmer’s SF1000D challenges this recommendation for tech-savvy growers who value integrated app control and superior LED efficiency. The $310-$350 pricing competes directly with Mars Hydro, and the 2.5 μmol/J efficiency pays dividends over 3-4 year ownership through reduced electricity costs. Choose Spider Farmer if you prioritize long-term operating efficiency over Mars Hydro’s superior filtration and customer support.
Budget-conscious beginners testing commitment before major investment should consider VIVOSUN or MELONFARM options in the $230-$320 range, accepting the limitations of 600D canvas and 48-inch height restrictions. These systems provide adequate performance for 12-18 months while you determine whether indoor growing matches your lifestyle and interests.
Premium options like AC Infinity’s $450-$500 AI system serve experienced growers upgrading from manual control or those in extreme climates where automation prevents costly environmental failures. First-time growers rarely need this sophistication — master fundamentals with mid-range equipment, then upgrade based on identified needs rather than anticipated requirements.
The small-scale hydroponic tent market has matured dramatically since 2020, with 2026 offerings delivering features that professional operations used just five years ago. Smart WiFi controls, automated climate adjustment, and app-based monitoring democratize indoor growing in ways previous generations could only dream about. Your $300 investment buys technology that cost $2,000+ commercially in 2018.
Success in your 2×2 indoor growing space comes down to consistent environmental management, proper training techniques, and patience during the learning curve. The tent you choose matters less than your commitment to understanding plant responses and adjusting accordingly. Start with quality mid-range equipment from Mars Hydro or Spider Farmer, invest time in learning fundamentals, and upgrade strategically as experience reveals your specific needs.
Recommended for You
- 7 Best Spider Farmer 2×2 Tent Kits for Maximum Yields 2026
- 7 Best VIVOSUN 2×2 Grow Tents 2026
- 7 Best 2×2 Grow Tent Reviews – Top Compact Indoor Systems 2026
Disclaimer: This article contains affiliate links. As an Amazon Associate, I earn from qualifying purchases. If you purchase products through these links, we may earn a small commission at no additional cost to you.
✨ Found this helpful? Share it with your friends! 💬🤗