
In This Article
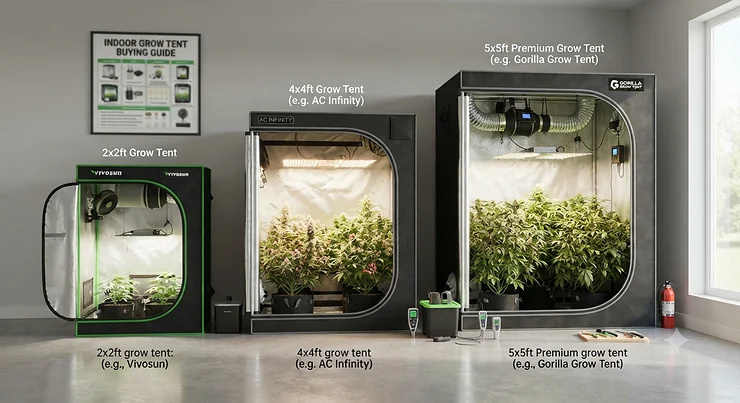
Here’s the thing nobody tells you before your first indoor grow: the tent matters more than the light. You can drop $400 on the fanciest LED on the market, and it still won’t save you if your grow tent buying guide research skipped over light leaks, a wobbly frame, or a zipper that gives out in month three. A grow tent is a collapsible, light-sealed enclosure with a reflective interior and ventilation ports, built to give plants a controlled indoor climate without turning your spare bedroom into a greenhouse experiment gone wrong. That’s it. Simple concept, wildly different execution depending on who made it.
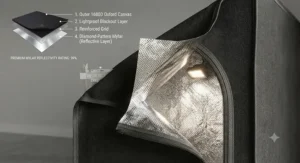
This grow tent buying guide exists because most “best of” lists online just regurgitate Amazon bullet points with zero actual analysis of who should buy what. We’re doing this differently: real products, real specs, real aggregated reviewer sentiment, and honest commentary on where each tent shines and where it cuts corners. Light behaves in predictable, measurable ways once it hits a plant canopy, and understanding how indoor plants actually use light will change how you think about tent reflectivity long before you think about bulbs.
Whether you’re outfitting your first 2×2 closet setup or upgrading to a serious 4×4 flower room, the products below cover budget, mid-range, and premium tiers, with honest pros and cons for each.
Quick Comparison Table
| Tier | Product | Size | Price Range | Best For |
|---|---|---|---|---|
| Premium | AC Infinity CLOUDLAB 844 | 4×4 | $190-$210 | Serious growers who never want to think about light leaks again |
| Premium | Gorilla Grow Tent Pro 4×4 | 4×4 (height-adjustable) | $200-$410 | Tall plants and multi-tier setups |
| Mid-Range | Spider Farmer 4×4 | 4×4 | $110-$150 | Best value-to-quality ratio in the 4×4 class |
| Mid-Range | Mars Hydro 4×4 | 4×4 | $130-$190 | Growers annoyed by pinhole light leaks on cheaper tents |
| Budget | VIVOSUN S448 | 4×4 | $95-$130 | First-time 4×4 growers on a tight budget |
| Budget | VIVOSUN S224 | 2×2 | $50-$75 | Small-space growers or a single plant |
| Budget | TopoLite | 2×2 | $40-$65 | The absolute cheapest way to get started |
Looking at the spread above, the jump from budget to mid-range buys you thicker canvas and a sturdier frame, while the leap into premium mostly buys you peace of mind around light-tightness and long-term durability. Notice that three of the seven tents share the same 4×4 footprint — that’s not an accident, since 4×4 is the sweet spot most home growers eventually land on. If your space or plant count doesn’t call for a full 4×4, the two 2×2 options below cost a fraction of the price without sacrificing the fundamentals.
💬 Bookmark this table now — you’ll want to scroll back to it once you’ve read the full breakdowns below.
Top 7 Grow Tents: Expert Analysis
1. AC Infinity CLOUDLAB 844 — thickest canvas and steel poles on the market
Right out of the gate, the standout here is the sheer overbuilt-ness of it — this tent feels like it was designed by someone who’d already been burned by a cheaper one. The 2000D Oxford canvas is roughly three times denser than the 600D fabric found on entry-level tents, and the 22mm steel poles (nearly double the diameter of standard 18mm poles) mean you can hang a heavy LED, an inline fan, and a carbon filter without the frame bowing under the load. What most buyers overlook about this model is the controller mounting plate with a lightproof cable passthrough — a small detail that keeps cords from creating a pinhole leak, which is exactly the kind of thing that ruins a flowering cycle if a stray beam of light hits your plants during their dark period.
Reviewers consistently report that the SBS zippers glide smoothly even after months of daily use, and the observation window is genuinely the largest in its class, so you can check on your grow without cracking the tent open and disturbing the internal climate. This is the pick for growers who’ve already been through a flimsy tent once and don’t want a repeat. Budget-conscious beginners, on the other hand, may find the price tag hard to justify for a first attempt.
Pros:
- ✅ 2000D canvas blocks essentially all external light
- ✅ Reinforced 22mm poles hold heavier equipment loads
- ✅ Largest observation window for low-disturbance monitoring
Cons:
- ❌ Priced well above entry-level 4×4 tents
- ❌ Overkill for casual, low-equipment setups
At around $190-$210, the AC Infinity CLOUDLAB 844 is priced like a long-term investment rather than a starter purchase, and reviewers who’ve run it for multiple grow cycles generally agree it earns that price back in avoided replacements.
2. Gorilla Grow Tent Pro 4×4 — height-adjustable frame for tall canopies
The party trick of this tent is right there in the name — the patented height-adjustable frame extends the standard footprint up to 8’11” with an optional 2-foot extension kit, which matters enormously the moment you grow a sativa-leaning strain or a tomato variety that just refuses to stay short. The 1680D canvas is roughly three to nine times denser than the thin fabric on budget tents, and the 300 lb hanging capacity on the poles means even a full commercial-style lighting rig won’t strain the frame.
Here’s what the spec sheet won’t tell you, but longtime growers note in forums: the EZ View windows are large enough to genuinely function as secondary access points, not just peepholes, which speeds up daily inspections considerably. Based on the spec comparison with the CLOUDLAB, Gorilla’s poles are slightly thinner (19mm vs. 22mm), but the height flexibility is a feature AC Infinity doesn’t offer at all. This tent is built for growers who expect to scale up their setup over time rather than lock into one fixed configuration.
Pros:
- ✅ Height-adjustable up to 8’11” with extension kits
- ✅ 300 lb pole rating handles heavy commercial equipment
- ✅ Lifetime frame warranty backs long-term durability claims
Cons:
- ❌ Height extension kits sold separately, adding to total cost
- ❌ Premium pricing puts it near luxury-tier territory
Priced anywhere from $200 for the base version up to $400+ for the fully-loaded Pro configuration, the Gorilla Grow Tent Pro 4×4 rewards growers who plan to keep upgrading their setup rather than buy once and forget it.
3. Spider Farmer 4×4 — best balance of price and build quality
This is the tent that quietly outperforms its price point, and that’s precisely why it shows up on so many mid-range shortlists. The 1680D thickened mylar canvas puts it in territory usually reserved for tents costing 30-40% more, while the included hook for controller mounting and multiple ventilation port sizes show a level of thoughtfulness that budget brands routinely skip. Reviewers consistently note that the enlarged viewing window and waterproof floor tray feel genuinely upgraded compared to what Spider Farmer offered just a couple of years ago.
Based on aggregated forum sentiment comparing Spider Farmer against AC Infinity and VIVOSUN side by side, the canvas thickness on this tent edges out both competitors at a similar price, even though the steel poles run slightly thinner than AC Infinity’s reinforced frame. What that means in practice: if your equipment load is moderate (a single LED, one inline fan, one filter), you’ll never notice the pole difference. If you’re stacking heavier gear, it’s worth stepping up a tier.
Pros:
- ✅ 1680D canvas outperforms most tents in this price bracket
- ✅ Controller hook and multiple port sizes add real convenience
- ✅ Waterproof floor tray simplifies spill cleanup
Cons:
- ❌ Poles are noticeably thinner than premium-tier competitors
- ❌ Smaller accessory ecosystem than AC Infinity or VIVOSUN
At roughly $110-$150, the Spider Farmer 4×4 delivers close to premium-tier canvas quality without the premium-tier price, making it the pick for growers who want quality without paying for a brand name.
4. Mars Hydro 4×4 — zipper flap design eliminates pinhole leaks
The number one complaint across budget and mid-range grow tents is pinhole light leaking through the zipper seam, and this tent addresses that head-on with an exclusive shade cloth stitched between the zipper and the canvas. It’s a small manufacturing decision with an outsized payoff: no more discovering a thin line of light sneaking in during flower and wondering if it’s already stressed your plants. The 1680D Oxford fabric is double-stitched and tear-resistant, and the metal frame with corner adapters assembles with pop-snap fittings rather than fiddly screws.
What most buyers overlook about this model is that the reflective mylar lining isn’t just cosmetic — Mars Hydro’s own testing claims a 10-15% improvement in light utilization compared to a non-reflective interior, and while manufacturer figures should always be taken with a grain of salt, the general principle (reflective walls redirect wasted light back onto the canopy) lines up with basic photometry. Reviewers frequently mention that assembly takes under 20 minutes even for first-timers.
Pros:
- ✅ Zipper flap design specifically targets pinhole light leaks
- ✅ Pop-snap assembly is faster than screw-based competitors
- ✅ Sturdy metal poles resist rust and paint chipping over time
Cons:
- ❌ Ventilation tube fittings can be tight during first setup
- ❌ Included tool holder feels like an afterthought
Sitting in the $130-$190 range depending on bundle, the Mars Hydro 4×4 is the smart pick for growers who’ve been burned by light leaks before and want a tent engineered specifically to prevent that exact failure.
5. VIVOSUN S448 — proven reliability with a massive review base
Sometimes the best endorsement isn’t a spec sheet — it’s tens of thousands of people who bought the same product and didn’t return it. The VIVOSUN S448 backs that up with one of the largest review pools of any grow tent on Amazon, and the aggregated sentiment across those reviews skews heavily toward durability given the price. The 600D Oxford canvas is thinner than the 1680D options above, but VIVOSUN compensates with a 340g high-density fabric weight and double-stitched seams that reviewers say hold up for multiple grow cycles without visible wear.
Here’s the honest trade-off: this is a basic-tier tent in VIVOSUN’s own lineup, meaning it skips some of the refinements found on the brand’s Pro line, like the 1-inch poles or extra hanging bars. What most buyers overlook is that for a single moderate-wattage LED setup, the standard poles here (rated to hold up to 100 lbs on the top bar) are plenty — you only run into trouble if you’re hanging heavier commercial fixtures.
Pros:
- ✅ Massive verified review base backs up durability claims
- ✅ 340g fabric weight beats typical 600D competitors
- ✅ Tool-free corner connectors speed up assembly
Cons:
- ❌ 600D canvas is thinner than 1680D mid-range competitors
- ❌ Top bar’s 100 lb rating limits heavier equipment loads
At around $95-$130, the VIVOSUN S448 remains the default recommendation for anyone building a first 4×4 grow tent buying guide shortlist on a modest budget.
6. VIVOSUN S224 — best compact tent for tight spaces
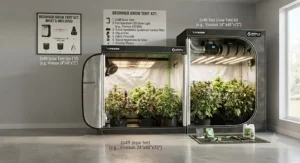
Not everyone needs a 4×4 footprint, and pretending otherwise is how people end up with an oversized tent crammed awkwardly into a closet. The VIVOSUN S224 measures a modest 24″x24″x48″, built for exactly one or two plants from seedling through flower, and it shares the same 600D Oxford canvas and 100%-reflective mylar walls as its larger 4×4 sibling. The observation window and removable floor tray carry over too, so you’re not sacrificing functionality just because the footprint shrank.
Based on the spec comparison with the larger S448, the smaller frame actually makes the thinner canvas less of a concern — shorter pole spans flex less under load regardless of material thickness. This tent works especially well as a dedicated seedling or clone tent even for growers who already run a bigger flowering tent elsewhere, since keeping vegetative growth separate from a flowering light cycle prevents accidental light contamination.
Pros:
- ✅ Compact footprint fits closets, corners, and small rooms
- ✅ Same reflective mylar and light-blocking zippers as larger models
- ✅ Ideal secondary tent for seedlings or clones
Cons:
- ❌ Only accommodates 1-2 plants comfortably
- ❌ Top bar weight capacity limits larger light fixtures
Priced around $50-$75, the VIVOSUN S224 is the practical choice for apartment growers, hobbyists testing the waters, or anyone running a multi-tent operation who needs a dedicated small space.
7. TopoLite — lightest price tag for first-time growers
If your entire motivation right now is “I want to try this without spending real money,” the TopoLite exists for exactly that moment. At 24″x24″x48″, it uses 600D canvas, a diamond mylar interior, and a steel support structure that assembles without tools — and reviewers who’ve run it for a season or two describe it as surprisingly capable for the price, with minimal reported light leakage. The wide ducting ports accommodate larger inline fans than you’d expect from a tent this cheap, which is a genuinely useful design choice for future upgrades.
Reviewers consistently note the same weak point, though: the frame and canvas don’t have the multi-year longevity of pricier options, with some describing pulled threads or pole wear after extended heavy use. Honest framing here matters — this isn’t a tent you buy expecting five years of service. It’s a tent you buy to find out if indoor growing is something you actually want to commit to before spending real money on the category.
Pros:
- ✅ Lowest price point of any tent on this list
- ✅ Wide ducting ports support larger fans than expected
- ✅ Tool-free setup takes minutes for total beginners
Cons:
- ❌ Frame and canvas show wear faster than pricier competitors
- ❌ Growing space runs smaller than the stated dimensions suggest
At roughly $40-$65, the TopoLite is the lowest-risk way to test whether indoor growing is a hobby worth investing in further.
Practical Usage Guide: Setting Up Your Tent Right the First Time
Getting a grow tent out of the box is the easy part — most kits assemble in 15-30 minutes with pop-snap poles and a printed diagram. Where people actually go wrong is in the first 30 days after that. Skipping a light-leak check is the single most common mistake: after assembly, zip the tent shut, turn off the room lights at night, and sit inside for two full minutes to let your eyes adjust before looking for stray light at the seams and zippers.
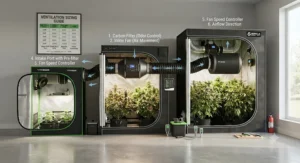
Ventilation setup trips up almost as many beginners. Your inline fan should create negative pressure inside the tent (slightly sucking the walls inward), which pulls fresh air through the intake ports rather than pushing stale air out inefficiently. Mount your carbon filter close to the fan, not far from it, to avoid unnecessary duct runs that reduce airflow efficiency. On maintenance: wipe down the mylar walls every two to three weeks to keep reflectivity high, since dust genuinely does reduce light bounce over time, and empty the floor tray after every watering session rather than letting runoff sit and invite mold.
✨ Ready to build out your full setup? Check current pricing on the tent that fits your space before your next grow cycle starts.
Real-World Scenario: Which Tent Fits Which Grower
Picture three different people shopping this grow tent buying guide right now. First, there’s the apartment-dwelling beginner with a spare closet and a strict “don’t let my roommates notice” budget — for them, the TopoLite or VIVOSUN S224 makes sense, since either fits a tight footprint and keeps the financial risk low while they figure out if they even enjoy the hobby.
Second, there’s the intermediate grower who’s outgrown a 2×2 and wants to run 4-6 plants through a full veg-to-flower cycle in a spare bedroom. This is squarely Spider Farmer 4×4 or Mars Hydro 4×4 territory — both offer 1680D canvas and legitimate mid-range durability without premium pricing, and the choice between them often comes down to whether pinhole-leak prevention (Mars Hydro’s specialty) or overall canvas feel (Spider Farmer’s edge) matters more to that specific grower.
Third, there’s the serious hobbyist running commercial-grade lighting and climate equipment who needs a frame that won’t sag under 40+ lbs of hanging gear. That’s where the AC Infinity CLOUDLAB 844 and Gorilla Grow Tent Pro 4×4 earn their higher price tags, with the deciding factor usually being whether that grower values fixed maximum light-blocking (CLOUDLAB) or long-term height flexibility (Gorilla).
What Size Grow Tent Do You Need?
A 2×2 grow tent suits one to two plants or a dedicated seedling/clone station, a 3×3 handles two to four plants comfortably, and a 4×4 — the most popular size among home growers — supports four to eight plants depending on training method. Anything larger typically requires more serious ventilation and electrical planning than a first-time grower needs to take on.
The math behind this comes down to canopy spread per plant and airflow volume, not guesswork. A single untrained plant in a 3-gallon pot typically spreads to 2-3 feet wide by the time it flowers, which is why cramming four plants into a 2×2 space almost always ends in canopy competition and poor light penetration to lower branches. Also factor in ceiling height: most standard 4×4 tents stand 80 inches tall, but once you account for the light fixture, hanging hardware, and the plant’s own height, usable vertical grow space often ends up 12-18 inches shorter than the tent’s total height.
Size Selection Criteria: Matching Tent to Space
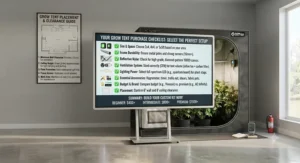
Before falling in love with a specific product, measure your actual space — floor footprint, ceiling clearance, and door swing all matter more than most buyers realize until they’re standing there with an assembled tent that doesn’t fit through the doorway. Here are the size selection criteria that actually move the needle:
Plant count and training style come first: a sea-of-green setup with many small plants needs different square footage than a single large plant grown with heavy topping. Second, consider equipment stacking — a fan, filter, and light all need vertical room inside the tent, not just canopy space. Third, factor in walk-around access; a 4×4 tent against a wall only gives you three accessible sides, which matters when you’re pruning or training plants regularly. Reviewers who upsized from a 2×2 to a 4×4 consistently report that the extra room for equipment, not just plants, was the bigger quality-of-life improvement.
Material Quality Assessment: What Canvas Denier Actually Means
Denier measures the linear mass density of the fabric fibers — in plain terms, a higher number means thicker, heavier, more tear-resistant canvas. Budget tents like the TopoLite and VIVOSUN S224 typically use 600D fabric, mid-range tents like Spider Farmer and Mars Hydro step up to 1680D, and premium options like the AC Infinity CLOUDLAB 844 push to 2000D. On paper, this means a 2000D tent is roughly three times denser than a 600D tent, which translates into real-world differences in tear resistance, light-blocking, and how the fabric holds up against repeated zipper stress over dozens of grow cycles.
Here’s what the spec sheet won’t tell you: denier alone doesn’t guarantee light-tightness — stitching quality, zipper design, and seam construction matter just as much. That’s why a well-built 1680D tent like Mars Hydro 4×4 with its zipper flap design can out-perform a poorly-stitched 2000D competitor on light leakage specifically, even though the raw fabric number is lower. When assessing material quality, look at the whole construction, not just the denier figure printed on the listing.
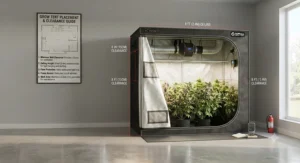
Feature Prioritization: What’s Worth Paying For
Not every feature on a spec sheet deserves equal weight in your decision, and feature prioritization is where a lot of buyers waste money on bells and whistles they’ll never use. Light-blocking construction (canvas density plus zipper sealing) should top your list every time — a beautiful tent that leaks light during your dark cycle can stress photoperiod plants into stress responses that tank yield. Frame strength ranks second, especially if you’re running anything heavier than a single lightweight LED.
Lower on the priority list: observation windows, tool bags, and cosmetic extras like colored zippers. They’re nice conveniences, not deciding factors. Reviewers across every price tier consistently rank light-sealing and frame durability as the features they’d never compromise on again, while cosmetic add-ons rarely get mentioned in long-term reviews at all — which tells you plenty about what actually matters two years into ownership.
How to Choose a Grow Tent: 7 Expert Criteria
- Match tent size to your actual plant count and space, not an aspirational future setup you might build someday.
- Check canvas denier and construction quality together — a well-stitched 1680D tent can outperform a poorly-built 2000D one.
- Verify pole material and weight rating against the total weight of your planned lights, fans, and filters.
- Confirm ceiling clearance by measuring your actual room, not just the tent’s listed height.
- Prioritize zipper and seam design since that’s where the vast majority of light leaks originate.
- Count ventilation ports and make sure sizes match your inline fan and ducting diameter.
- Budget for accessories separately — tents rarely include a light, fan, or filter, so factor that into your total cost.
Grow Tent vs Open Room Setup
A dedicated grow tent creates a sealed, controllable microclimate, while an open room setup — a corner of a basement or garage without any enclosure — leaves temperature, humidity, and light control almost entirely to the ambient conditions of the larger space. Proper indoor temperature and humidity management becomes dramatically harder without walls to contain it, since heat and moisture simply diffuse into the rest of the room instead of staying where your plants can use them.
The practical difference shows up fastest with odor and light control: a reflective, sealed tent traps smell for filtration and blocks light bleed that could otherwise disturb a photoperiod cycle from a stray hallway light. An open room setup can work for growers with an entire dedicated space they can climate-control independently, but for anyone sharing a home with other people, a tent is close to non-negotiable rather than optional.
Common Mistakes When Buying a Grow Tent
The most frequent mistake is buying based on floor footprint alone while ignoring ceiling height, only to discover the light and hanging hardware eat up more vertical space than expected. A close second is underestimating airflow needs — pairing an undersized fan with a larger tent leaves stagnant air pockets that invite mold, especially in humid climates.
Buyers also commonly skip checking pole weight ratings against their actual equipment list, then wonder why the frame sags six months in. And a surprising number of first-time buyers ignore return policies and warranty terms entirely, which matters more with grow tents than most home goods since manufacturing defects (a bent pole, a faulty zipper) sometimes only show up after the first full assembly and disassembly cycle.
Long-Term Cost & Maintenance
| Tier | Price Range | Typical Lifespan | Est. Cost Per Year |
|---|---|---|---|
| Budget (600D) | $40-$130 | 1-2 grow seasons | $30-$65 |
| Mid-Range (1680D) | $110-$190 | 3-5 grow seasons | $25-$45 |
| Premium (1680D-2000D) | $190-$410 | 5+ grow seasons | $30-$60 |
Looking at the numbers, budget tents aren’t necessarily cheaper over a multi-year horizon once you account for how often they need replacing — a $50 tent replaced every season can cost more annually than a $200 tent that lasts five years. That said, for a grower who isn’t sure they’ll stick with the hobby, minimizing upfront cost with a budget tier like the TopoLite still makes rational sense despite the higher long-run cost per year.
Safety and Ventilation Compliance Guide
Indoor grow setups run more electrical load than most rooms are designed for — lights, fans, humidifiers, and heat mats often stack onto a single outlet, which is exactly the scenario that causes problems. The Consumer Product Safety Commission specifically warns that overloaded extension cords and power strips cause thousands of residential fires every year, and a grow tent packed with equipment is a textbook example of the kind of setup that needs dedicated, properly-rated circuits rather than daisy-chained cords.
Beyond electrical safety, proper exhaust ventilation matters for more than just temperature control — it also manages CO2 depletion inside a sealed tent, since plants under intense lighting consume available CO2 faster than a stagnant tent can replenish it without active airflow. A recent peer-reviewed study on lighting and plant growth efficiency reinforces that light intensity only translates into growth when paired with adequate environmental support systems — meaning your ventilation setup isn’t a nice-to-have, it’s load-bearing for whatever your lighting budget bought you.
Problem → Solution Guide
Problem: Light leaking through zipper seams. Solution: prioritize tents with a zipper flap or shade-cloth design like the Mars Hydro 4×4, and apply black gaffer tape as a stopgap fix on existing tents.
Problem: Frame sagging under equipment weight. Solution: check pole weight ratings before buying, and if you’re already over capacity, add a support bar or step up to a heavier-duty tent like the Gorilla Grow Tent Pro 4×4.
Problem: Musty odor escaping the tent. Solution: verify your carbon filter is properly sized for your fan’s CFM rating and that ducting runs are as short as possible to maintain suction.
Problem: High humidity causing mold risk. Solution: increase exhaust fan runtime, add a small dehumidifier inside larger tents, and empty floor trays after every watering.
Problem: Tent won’t fit through a doorway once assembled. Solution: measure doorway width before purchase, or plan to assemble the tent frame inside the room rather than moving it fully built.
Frequently Asked Questions
❓ What size grow tent do I need for 2 plants?
❓ Can I put a grow tent in a closet?
❓ How much does a good grow tent cost?
❓ Do grow tents need a hole in the ceiling?
❓ What's the best grow tent for beginners?
Conclusion
If there’s one takeaway from this entire grow tent buying guide, it’s that the “best” tent isn’t a single universal answer — it’s whichever one matches your actual space, plant count, and equipment plans. For raw grow tent recommendations by budget: go with the TopoLite or VIVOSUN S224 if you’re testing the waters, the Spider Farmer 4×4 or Mars Hydro 4×4 if you’re building a real mid-range setup, and the AC Infinity CLOUDLAB 844 or Gorilla Grow Tent Pro 4×4 if you’re not interested in ever thinking about your tent again.
When it comes down to which grow tent to buy for your specific situation, revisit the size and material sections above before you check out — the denier rating and pole strength matter more long-term than any single bonus feature. Every tent on this list has real reviewer data behind it, and none of them are guesses.
Recommended for You
- 7 Best Grow Tent Air Purifier Picks for 2026
- 6 Inch Carbon Filter: 7 Best Picks to Kill Grow Tent Odor in 2026
- Activated Carbon Filter Tent: 7 Picks That Actually Kill Smell (2026)
Disclaimer: This article contains affiliate links. As an Amazon Associate, I earn from qualifying purchases. If you purchase products through these links, we may earn a small commission at no additional cost to you.
✨ Found this helpful? Share it with your friends! 💬🤗
