
In This Article
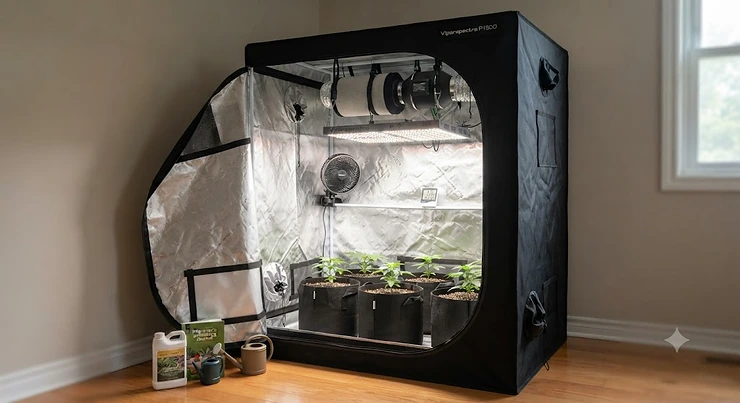
A grow tent for beginners is a light-proof, reflective fabric enclosure — usually built around a steel pole frame — that lets you control light, airflow, humidity, and temperature for indoor plants in a space as small as a closet corner. Instead of guessing whether your window gets enough sun, you build the entire environment yourself.
Here’s the thing nobody tells you before you start Googling “grow tent for beginners” at 11 p.m.: the tent itself is the easy 20% of the decision. The hard 80% is picking a light that won’t cook your seedlings, a fan that won’t sound like a leaf blower in your bedroom closet, and a ventilation setup that doesn’t turn your spare room into a sauna. I’ve spent the last few weeks pulling apart spec sheets, cross-referencing them against real owner feedback on retailer and forum threads, and comparing seven actual products you can buy right now — not hypothetical “best in class” placeholders.
A grow light is what actually does the heavy lifting inside that tent, and understanding how it pairs with tent size before you buy saves you from the single most common beginner mistake: undersizing the light for the footprint. We’ll get into exactly how to avoid that. First, let’s look at where the seven kits in this guide land relative to each other.
Quick Comparison: Grow Tent For Beginners at a Glance
If you’ve got sixty seconds and just want the shortlist, here it is. Every product below gets its own deep dive further down, but this table exists so you can narrow things down before you commit to reading 4,000 more words about carbon filters.
| Pick | Footprint | Standout Trait | Price Range | Best For |
|---|---|---|---|---|
| AC Infinity CLOUDLAB 642 | 2×4 ft | 2000D canvas, 22mm steel poles | $150-$190 | Zero light-leak reliability |
| Gorilla Grow Tent Lite Line | 4×4 ft | Tool-free expandable frame | $200-$260 | Growers who might upsize plants later |
| VIVOSUN Smart Grow Tent Kit | 2.7×2.7 ft | WiFi app climate automation | $300-$420 | Hands-off, phone-controlled growing |
| Spider Farmer 2x2x5 Kit | 2×2 ft | Bridgelux quantum board LED | $210-$270 | LED quality on a mid-range budget |
| Mars Hydro 4×2 Kit | 4×2 ft | Complete accessories, low entry cost | $110-$150 | Absolute lowest financial risk |
| VIVOSUN S425 | 2×4 ft | Most affordable full-size footprint | $130-$170 | Budget buyers who still want 2×4 space |
| Yield Lab 2-in-1 Kit | Dual chamber | Separate veg and flower zones | $160-$210 | Growers who want two stages running at once |
Looking at the spread here, the pattern is pretty predictable once you see it laid out: canvas thickness and frame steel gauge climb with price, while the actual “does it work for a first-timer” gap between the cheapest and priciest options is smaller than the dollar difference suggests. The VIVOSUN Smart Grow Tent Kit is the outlier — you’re paying a real premium for automation, not for a fundamentally better tent. If this is genuinely your first grow tent for beginners setup and you’re not sure you’ll stick with the hobby, the Mars Hydro 4×2 Kit or VIVOSUN S425 let you test the waters without much financial risk.
🌱 Ready to stop reading and start growing? Tap any highlighted pick above to check current availability and pricing before it changes.
Top 7 Grow Tent Kits for Beginners: Expert Analysis
I’m covering budget, mid-range, and premium picks here, plus one lesser-known option that doesn’t get talked about enough. Every product includes real specs, an honest read on who it actually suits, and aggregated sentiment pulled from what current owners and reviewers are saying — not invented testimonials.
1. AC Infinity CLOUDLAB 642 — thickest canvas for zero light leaks
The 642 leans hard into one thing: keeping light exactly where it belongs. That single-minded focus shows up everywhere in the build.
At 48″ x 24″ x 72″, this 2×4 footprint uses 2000D waterproof oxford canvas — nearly double the thickness of the 1680D fabric most competitors use — paired with 22mm steel poles rated to hold roughly 150 pounds at the intersecting joints. In practice, that means you can hang a heavier LED fixture, a 4-inch or 6-inch inline fan, and a carbon filter simultaneously without the frame sagging or bowing, which is a real failure point on cheaper 16mm-pole tents. Based on the build spec, this tent is aimed squarely at someone who wants to buy once and not think about frame integrity again for years.
Reviewers consistently single out the double-cinching duct ports and the inner ribbon-stitched zipper seal as the reason this tent runs noticeably darker inside than the sub-$100 alternatives — a detail that matters more than it sounds, since stray light during the dark cycle can stress photoperiod-sensitive plants. Owners also note the included floor tray and tool bag save an extra purchase most beginners don’t think to budget for.
Pros:
- ✅ 2000D canvas blocks light better than nearly any tent in this price bracket
- ✅ 22mm poles support heavier lights and filters without sagging
- ✅ Controller mount plate keeps cable clutter outside the tent
Cons:
- ❌ Single footprint size means less flexibility if you want to scale up
- ❌ No light or fan included — this is a tent-only purchase
Expect this tent alone to land in the $150-$190 range depending on current promotions. For a grower who plans to keep this same tent for multiple years and just swap lights as budget allows, the value case here is strong.
2. Gorilla Grow Tent Lite Line 4×4 — tool-free frame that grows with you
Gorilla built its reputation on frames that don’t buckle, and the Lite Line brings that same engineering down to a friendlier price.
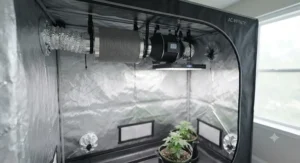
The 4’x4’x6’7″ footprint uses a 210D canvas — lighter than Gorilla’s flagship 1680D Heavy Duty line, but paired with the identical interlocking steel pole system, which means the structural reliability doesn’t get watered down even though the fabric does. What most buyers overlook about this model is the height-adjustable design: an optional extension kit stretches the ceiling from 6’7″ up to 7’7″, which matters enormously once you’re training taller plants or hanging a bulkier LED fixture with more clearance underneath it.
Aggregated owner sentiment on Gorilla’s Lite Line is consistently favorable around the tool-free assembly and the 360-degree zippered access, though a handful of reviewers mention the lighter 210D fabric shows more wear at the seams after a couple of years of heavy use compared to the thicker Heavy Duty tents.
Pros:
- ✅ Same steel frame engineering as Gorilla’s premium line
- ✅ Height-extendable for taller plants later in the grow
- ✅ Wide 360-degree door access for easy maintenance
Cons:
- ❌ Extension kit for extra height sold separately
- ❌ Thinner 210D canvas than Gorilla’s flagship fabric
Price typically sits in the $200-$260 range for the 4×4 configuration. If you suspect you’ll want more vertical room down the line, this is the pick that avoids buying a second tent in year two.
3. VIVOSUN Smart Grow Tent Kit 2.7×2.7 — WiFi control for hands-off growing
This is the kit for someone who wants to check on their plants from a phone at work instead of running home to check a thermometer.
The 2.7×2.7 ft footprint bundles a tent with a WiFi-enabled controller that automates fan speed and light scheduling based on live temperature and humidity readings. Here’s what the spec sheet won’t tell you outright: automation like this genuinely does reduce the day-to-day guesswork that trips up new growers, since the app nudges fan speed up before you’d even notice the tent creeping toward uncomfortable humidity. That said, this convenience is layered on top of a fairly standard tent build — you’re paying primarily for the smart controller ecosystem.
Reviewers who tested the VIVOSUN and Spider Farmer smart kits side-by-side note that VIVOSUN’s app has matured into one of the more stable options in the category, in contrast to some budget brands where buggy companion apps generate more frustration than help.
Pros:
- ✅ App-based automation removes manual fan and light adjustments
- ✅ Real-time temperature and humidity monitoring from your phone
- ✅ Mature, stable app compared to many budget-brand competitors
Cons:
- ❌ Meaningful price premium over non-smart kits of similar tent quality
- ❌ Smaller 2.7×2.7 footprint limits plant count versus 4×4 options
This kit generally runs in the $300-$420 range depending on bundle contents. If automation genuinely reduces your stress level enough to keep you engaged with the hobby, that’s a real value — but a beginner on a tight budget can get equivalent grow results with a $150 kit and a $15 mechanical timer.
4. Spider Farmer 2x2x5 Grow Tent Kit — quantum board LED at a fair price
Spider Farmer built its name on LED quality, and this kit is where that reputation actually shows up in the box.
The bundled SF1000D uses Bridgelux diodes in a quantum board configuration, which spreads light more evenly across the canopy than the single-strip or clustered-diode LEDs found in many budget kits — practically, that means fewer dim corners and less need to constantly rotate plants for even growth. The dimmable driver lets you dial intensity down for seedlings and ramp it up through veg and flower, which is a feature that’s genuinely useful rather than a marketing checkbox.
Owner sentiment across gardening forums and retailer reviews consistently praises the light output relative to price, with the ventilation system’s noise level frequently called out as minimal — a meaningful point for anyone growing in a bedroom or apartment.
Pros:
- ✅ Quantum board LED delivers more even canopy coverage than strip lights
- ✅ Dimmable driver adjusts intensity across growth stages
- ✅ Quiet ventilation system suited to indoor living spaces
Cons:
- ❌ 2×2 footprint caps you at roughly 1-2 mature plants
- ❌ Taller tent height requires slightly more ceiling clearance than compact kits
Expect a price range around $210-$270 for the complete kit. For a beginner who cares more about light quality than automation, this is arguably the strongest dollar-for-dollar pick on this list.
5. Mars Hydro 4×2 Advanced Grow Tent Kit — complete accessories at the lowest entry cost
Mars Hydro built its budget-segment dominance on one formula: 1680D canvas quality at prices that undercut nearly everyone.
This 4×2 kit ships with an observation window, removable floor tray, tool bag, double zippers, and multiple ventilation ports — essentially the full accessory list you’d expect on a tent twice the price. Based on the spec comparison, the 1680D canvas here actually outperforms some competitors’ pricier tents, since Mars Hydro has leaned on manufacturing scale rather than premium materials to hit its price point. What most buyers overlook is that “budget” here doesn’t mean “flimsy” — it means fewer bells and whistles, not weaker core construction.
Reviewers consistently frame this as the smart first purchase for someone who isn’t certain indoor growing will stick as a hobby, since it delivers legitimate 1680D build quality without the financial commitment of premium tents.
Pros:
- ✅ 1680D canvas quality rivals tents costing significantly more
- ✅ Full accessory bundle included at a genuinely low price point
- ✅ Multiple ventilation ports support proper airflow setup
Cons:
- ❌ Frame uses thinner poles with lower total weight capacity
- ❌ Fewer premium touches like reinforced zipper seals
Price typically clusters around $110-$150 for the complete kit — among the lowest true entry points on this list. If your main goal is testing whether you enjoy indoor growing before investing further, this is the lowest-risk starting point here.
6. VIVOSUN S425 2×4 Grow Tent — the most affordable full-size footprint
If a 2×2 tent feels cramped but a premium 2×4 feels like overkill for a first attempt, the S425 splits the difference on price.
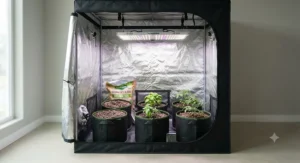
At 48″x24″x60″, this tent gives you meaningfully more usable floor space than compact 2×2 options while staying priced closer to entry-level tents than to premium 2×4 builds like the AC Infinity CLOUDLAB. The observation window and included floor tray cover the essentials, and the reflective mylar interior does the job of maximizing whatever light you pair with it. Here’s what matters in practice: a 2×4 footprint at this price point lets a beginner grow 2-4 small plants without stepping up to premium-tent spending before they know if they’ll stick with the hobby.
Aggregated reviews frequently describe this as the go-to recommendation for growers who want more space than a 2×2 tent without paying premium-tent prices, though a few owners mention the included zipper hardware feels less substantial than Gorilla or AC Infinity equivalents.
Pros:
- ✅ Full 2×4 footprint at a price closer to compact tent pricing
- ✅ Reflective mylar interior maximizes whatever light you pair with it
- ✅ Observation window lets you check plants without opening the tent
Cons:
- ❌ Zipper hardware feels less premium than higher-tier competitors
- ❌ Tent-only purchase — light, fan, and filter sold separately
This one generally runs $130-$170 for the tent alone. Pair it with a modest LED and a 4-inch inline fan and you’ve got a complete, legitimate 2×4 setup for well under $300 total.
7. Yield Lab 2-in-1 Grow Tent Kit — dual chambers for running two stages at once
This is the pick most “best of” lists skip entirely, and that’s a genuine oversight for beginners planning ahead.
The 2-in-1 design splits into two connected chambers, letting you run vegetative growth in one side while flowering happens in the other — a setup that experienced growers eventually build anyway, just usually with two separate tents. Getting there in one purchase from day one means you never outgrow this kit the way you might outgrow a single-chamber 2×2. Each chamber includes its own viewing window and flood tray, and the steel pole connector frame matches the rigidity found in single-chamber tents at this price.
Review sentiment on this kit skews toward growers who specifically searched for a way to avoid buying a second tent later, with the smell-proof seal construction getting consistent mentions as reliable for odor-sensitive living situations.
Pros:
- ✅ Dual chambers let you run veg and flower stages simultaneously
- ✅ Avoids the need to buy a second tent as you scale up
- ✅ Smell-proof seal construction suited to apartments and shared homes
Cons:
- ❌ Total footprint is larger than a single tent, requiring more floor space
- ❌ Managing two climates at once adds a learning curve for absolute beginners
Expect this kit in the $160-$210 range. For anyone who already knows they’ll want to keep a continuous grow cycle going rather than one batch at a time, this solves a problem before it exists.
Grow Tent Setup Guide: Step-by-Step Installation for Day One
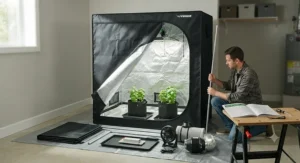
Nobody tells you this part, so I will: the tent itself takes fifteen minutes to assemble. The other four hours of your first day go to everything around it. Here’s the actual step-by-step installation sequence that avoids the mistakes that trip up nearly every first-timer.
First, assemble the frame on the floor before standing it up — trying to build a Gorilla or AC Infinity frame vertically is how poles end up crooked. Second, hang the canvas over the frame and zip every duct port shut except the ones you’re actively using; an open unused port is a light leak and an airflow leak at the same time. Third, mount your inline fan on the exhaust port pulling air out, not pushing air in — beginners get this backwards more often than you’d expect, and it inverts your entire airflow logic. Fourth, hang your light at the manufacturer’s recommended starting height, typically 18-24 inches above seedlings, and set a mechanical or app-based timer before you ever plug in the light. Fifth, run the tent empty for 24-48 hours, watching temperature and humidity settle, before you introduce a single plant. That empty run-in period catches problems — a fan wired backwards, a light hung too low, a zipper leaking light — before they cost you a seedling.
Common first-30-days mistakes worth naming directly: overwatering because the soil looks dry on top while staying wet underneath, hanging the light too close out of impatience, and skipping the humidity dome on seedlings because it feels like an unnecessary extra step. Each one is fixable, but each one also compounds if you don’t catch it in week one.
✨ Don’t Miss These Exclusive Deals!
🔍 Take your grow tent for beginners setup to the next level with the picks above. Click any highlighted product to check current pricing and availability before you build.
Real-World Scenarios: Matching a Starter Package to Your Life
Specs only mean so much until you match them against an actual living situation. Here are three profiles that map cleanly onto the products above.
The apartment dweller with a spare closet and a strict no-smell, no-noise policy from roommates is best served by the Spider Farmer 2x2x5 Kit or the Yield Lab 2-in-1 Kit — both keep footprint modest while prioritizing quiet ventilation and, in Yield Lab’s case, smell-proof seals. The budget-first tester who genuinely doesn’t know if this hobby will stick past one harvest cycle should start with the Mars Hydro 4×2 Kit, since it delivers real 1680D build quality without locking in hundreds of dollars before you know your own commitment level. And the planner who already knows they want a continuous rotation of plants at different growth stages — rather than one batch, harvest, wait, repeat — should skip straight to either the Yield Lab 2-in-1 Kit or budget for a second tent down the line, because retrofitting a single-chamber setup into a dual-stage operation later usually costs more than buying the right starter package the first time.
If none of those quite fits, the honest fallback is the VIVOSUN S425: a full 2×4 footprint, a moderate price, and enough flexibility to suit almost any first-year grower who hasn’t settled into a specific style yet.
Problem → Solution: Fixing the 5 Mistakes That Kill First Grows
Every one of these problems shows up in beginner forum threads on a weekly basis, and every one has a specific, fixable cause.
Problem: humidity swings wildly between 40% and 80%. This almost always traces back to an inline fan that’s either undersized for the tent volume or running on a fixed speed instead of a controller-based ramp. The VIVOSUN Smart Grow Tent Kit solves this natively through its app; on a manual tent, add a simple humidity controller between your fan and its power source.
Problem: seedlings stretching tall and thin (legginess). This is a light-distance problem nearly every time — the fixture is hung too far above the canopy. Drop the light to the manufacturer’s recommended seedling-stage height and the stretching stops within days.
Problem: musty odor even with a carbon filter installed. Usually the filter is undersized for the fan’s CFM rating, or ducting has a kink restricting airflow through the media. Match filter and fan CFM ratings exactly, and keep ducting runs as straight as possible.
Problem: visible light leaking from zipper seams during the dark cycle. Budget tents with single-stitched zippers are the usual culprit. The AC Infinity CLOUDLAB 642‘s ribbon-stitched inner seal exists specifically to solve this; on cheaper tents, a strip of light-blocking tape along seams is a reasonable stopgap.
Problem: frame sagging under the weight of light plus fan plus filter. This is a pole-gauge issue — 16mm poles simply weren’t built for that combined load. Either redistribute weight across more hanging points or upgrade to a tent with 20mm+ poles like the Gorilla Lite Line or AC Infinity CLOUDLAB.
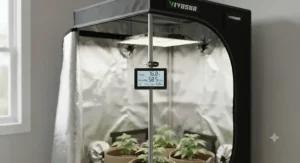
How to Choose a Complete Grow Tent Kit
A complete grow tent kit bundles the tent, light, and inline fan together so every component is pre-matched for CFM, wattage, and footprint — eliminating the compatibility guesswork of buying pieces separately. Here’s the reasoning process worth walking through before you buy one:
- Start with available floor space, not desired plant count. A 2×2 footprint fits comfortably in most closets; a 4×4 needs a dedicated room corner.
- Match light wattage to footprint, not to marketing claims. A 2×2 tent rarely needs more than 100-150 actual watts of quality LED, regardless of what an inflated “equivalent wattage” label suggests.
- Confirm the fan’s CFM rating suits your tent’s cubic footage, factoring in a roughly 20-25% reduction for ducting and filter resistance.
- Check pole gauge and weight rating against the total hanging weight of your intended light, fan, and filter combined.
- Decide whether automation matters enough to pay for it, since smart controllers add real cost without changing plant biology.
- Verify canvas denier (600D, 1680D, or 2000D) against how long you expect to keep this specific tent before upgrading.
- Read recent owner reviews for the exact SKU, since manufacturers sometimes swap components between production runs.
Beginners consistently underestimate how much daily light dose actually matters here — the University of Minnesota Extension’s guide to indoor plant lighting is a genuinely useful primer if you want the underlying science before committing to a specific wattage.
Ventilation Configuration That Keeps Your Tent Alive
Ventilation configuration is where more beginner grows quietly fail than any other single factor, mostly because airflow problems don’t announce themselves the way a dead plant does — they show up gradually as mold, stunted growth, or pest pressure.
The core setup is simple in concept: an inline fan mounted on an exhaust port pulls hot, humid air out through a carbon filter, while a passive intake port (or a second, smaller fan) lets cooler ambient air in to replace it. The math that matters is CFM — cubic feet per minute — which should roughly match your tent’s total cubic footage divided by the number of minutes you want for a full air exchange, typically once every 1-3 minutes for active grows. A 2×4 tent at 6 feet tall has roughly 48 cubic feet of volume, so a fan rated around 100-150 CFM after accounting for ducting resistance and filter drag is a reasonable starting point.
Humidity control ties directly into this. The U.S. Environmental Protection Agency’s guidance on controlling indoor moisture recommends keeping relative humidity below 60%, ideally in the 30-50% band — advice built for homes generally, but it applies with equal force inside a sealed grow tent, where mold risk climbs fast once humidity creeps past that range. Running your exhaust fan on a humidity-triggered controller, rather than a fixed timer, is the single upgrade that solves the most ventilation headaches at once.
🌬️ Getting airflow dialed in changes everything — check current inline fan and filter combos above before your next grow.
Lighting Placement Guide: Hang Height, PPFD, and Photoperiod
A lighting placement guide really comes down to three interlocking variables: how far the light hangs above the canopy, how intense that light is at leaf level, and how many hours per day it runs.
Hang height controls intensity more dramatically than most beginners expect, because light intensity falls off with the square of distance — moving a light from 12 inches to 24 inches above the canopy doesn’t halve the intensity reaching the plant, it roughly quarters it. Most quality LED panels list a recommended hang height for each growth stage, typically 18-24 inches for seedlings and 12-18 inches once plants are established in vegetative growth. Reviewers across the LED kits in this guide consistently note that following the manufacturer’s stated hang height, rather than eyeballing “close enough,” is the single biggest factor separating good yields from mediocre ones.
Photoperiod — the number of light hours per day — is the piece beginners most often set once and forget, which mostly works fine, but it’s worth knowing that most vegetative-stage plants want 14-18 hours of light, while many flowering-stage plants shift to a strict 12-hour cycle. Michigan State University’s floriculture extension resources on daily light integral frame this well: it’s not just instantaneous brightness that matters, but the total light delivered across a full day, and that total is what actually drives growth quality more than any single spec-sheet wattage number.
Grow Tent For Beginners for Small Spaces (Apartments & Closets)
If your available space is a closet, a corner of a bedroom, or a spare bathroom, the calculus shifts noticeably compared to someone with a dedicated grow room. Noise becomes a bigger factor than raw yield potential — a 6-inch inline fan running at full speed genuinely sounds like a small vacuum, so a kit like the Spider Farmer 2x2x5 with a quieter, appropriately-sized fan matters more here than in a garage setup where noise is a non-issue. Odor control climbs in priority too, which is exactly why the Yield Lab 2-in-1 Kit‘s smell-proof seal construction gets called out specifically by apartment growers in review threads.
Vertical clearance is the other constraint people forget to measure. A 6-foot-tall tent needs roughly 7-8 feet of total ceiling clearance once you account for the light fixture, hanging hardware, and the inline fan mounted at the top — a detail that rules out low-ceiling basements and short closets more often than tent footprint does. Measure your actual ceiling height before your tent height, not after.
Grow Tent For Beginners vs Open-Room Growing
The comparison beginners actually need to make isn’t between tent brands — it’s between using a tent at all versus just growing in an open spare room.
| Factor | Grow Tent | Open Room |
|---|---|---|
| Light containment | Near-total with quality canvas | Light bleeds throughout the space |
| Climate control | Sealed environment, precise CFM airflow | Depends on whole-room HVAC |
| Pest/odor control | Contained within tent walls | Spreads through the house |
| Upfront cost | $110-$400+ depending on kit | Often near $0 if space exists |
| Best For | Any first-time indoor grower | Growers with a fully dedicated, sealed room already |
The upfront cost gap looks like it favors open-room growing, but that’s misleading once you factor in what an open room actually requires to match a tent’s performance: dedicated climate control, blackout curtains or wall treatments for light containment, and a way to manage odor across an entire room instead of a sealed few square feet. For nearly every beginner without a fully dedicated grow room already built out, a $110-$260 tent kit ends up cheaper and dramatically simpler than retrofitting an open space to do the same job.
Common Mistakes When Buying Your First Grow Tent
The pitfalls here repeat constantly across beginner forums, and nearly all of them are avoidable with five minutes of planning before checkout.
Buying a tent size based on wishful thinking rather than measured floor space is the most common one — people buy a 4×4 for a corner that only fits a 3×3, then fight the tent’s footprint for months. Choosing a light by watts alone, without checking actual PPFD output, is a close second; wattage tells you power draw, not light delivered to the canopy. Skipping the CFM-to-filter match is another frequent miss, leading to either weak odor control or a fan straining against too much resistance. Buying tent, light, and fan from three different sizing philosophies — rather than a matched complete kit — creates compatibility headaches that a bundled kit avoids by design. And finally, ignoring pole weight ratings until the frame is already sagging under a heavy LED and filter combo is a mistake that’s completely preventable by checking the spec sheet first.
Long-Term Cost & Maintenance: What Year One Really Costs
The sticker price on any of these seven kits is only the entry fee. Here’s what ongoing costs actually look like across a full year of growing.
| Cost Category | Typical Range (Year One) | Notes |
|---|---|---|
| Electricity (LED + fan) | $60-$150 | Varies by wattage and daily runtime hours |
| Carbon filter replacement | $30-$60 | Media typically lasts 12-18 months |
| Nutrients/soil amendments | $40-$100 | Depends on grow medium chosen |
| Replacement bulbs/parts | $0-$50 | Modern LEDs rarely need replacement in year one |
Electricity is the largest recurring line item by far, and it scales directly with LED wattage and daily photoperiod hours — a reason the Mars Hydro and VIVOSUN S425 budget kits carry a real ongoing advantage over higher-wattage premium setups, beyond just their lower upfront price. Carbon filter media is the maintenance item beginners most often forget to budget for entirely, and skipping replacement once odor control starts failing is a false economy that undermines the whole ventilation setup discussed earlier.
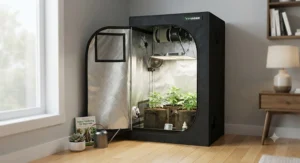
Frequently Asked Questions
❓ How big of a grow tent should a beginner start with?
❓ Do grow tents smell outside the tent?
❓ How much does a complete beginner grow tent kit cost?
❓ Can a grow tent fit in an apartment closet?
❓ How long do grow tents typically last?
Conclusion
Picking a grow tent for beginners really comes down to being honest about three things: your actual available floor space, how much you’re willing to spend before you know if this hobby sticks, and how much hands-on tinkering you want to do versus how much you want an app to handle for you. The Mars Hydro 4×2 Kit and VIVOSUN S425 cover the low-risk end genuinely well. The AC Infinity CLOUDLAB 642 and Gorilla Grow Tent Lite Line reward anyone planning to keep the same tent for years. The VIVOSUN Smart Grow Tent Kit earns its premium if automation is worth real money to you, and the Spider Farmer 2x2x5 Kit quietly delivers the best light-quality-per-dollar on this whole list. The Yield Lab 2-in-1 Kit solves a problem — running two growth stages at once — before you even know you’ll need it solved.
None of these are wrong choices. They’re just built for slightly different versions of the same beginner, and matching your actual situation against the profiles above beats guessing based on star ratings alone.
✨ Ready to Build Your First Grow Tent Setup?
🔍 Check current pricing on any pick above before starting your first indoor garden — availability and promotions shift often, so confirm details at checkout.
Recommended for You
- Grow Tent Buying Guide 2026: 7 Tents That Won’t Let You Down
- 7 Best Grow Tent Air Purifier Picks for 2026
- 6 Inch Carbon Filter: 7 Best Picks to Kill Grow Tent Odor in 2026
Disclaimer: This article contains affiliate links. As an Amazon Associate, I earn from qualifying purchases. If you purchase products through these links, we may earn a small commission at no additional cost to you.
✨ Found this helpful? Share it with your friends! 💬🤗
