In This Article
Ever stared at wilted grocery store greens and wondered if there’s a better way? I’ve been there, friend. That moment when you realize you’re paying premium prices for vegetables that lose nutrients by the hour during transport. That’s when I discovered the game-changing world of countertop microgreens kit systems, and honestly? It revolutionized my approach to fresh greens.
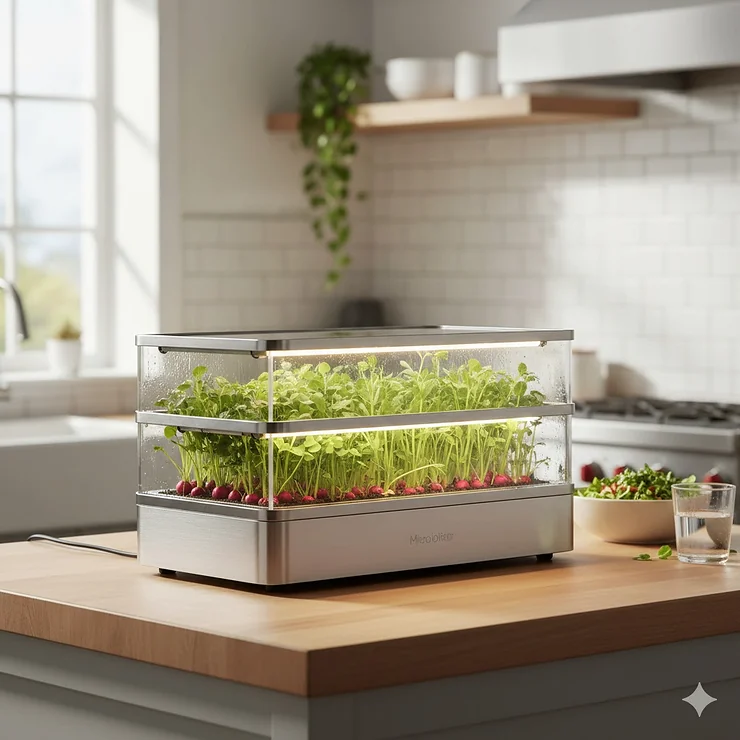
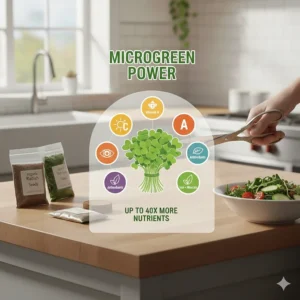
Here’s the beautiful truth: you don’t need a backyard, greenhouse, or even a green thumb to grow nutrient-dense superfoods right on your kitchen counter. A countertop microgreens kit brings the farm to your fingertips in just 7-10 days, delivering greens that pack up to 40 times more vitamins and minerals than their mature counterparts. We’re talking about a compact growing system that fits in spaces smaller than your coffee maker while producing enough greens to elevate every meal.
Whether you’re working with a tiny apartment-friendly gardening setup, looking for a kitchen counter garden solution, or simply tired of paying $5 for a handful of grocery store microgreens that go bad in two days, this guide breaks down everything you need to know. I’ve tested these systems, talked to urban gardening solution enthusiasts, and compiled real user experiences to help you choose the perfect minimal space required setup for your lifestyle.
Quick Comparison Table
| Product | Type | Price Range | Growing Method | Best For |
|---|---|---|---|---|
| ZestiGreens Self-Watering Kit | Hydroponic | $37.95-$39.95 | Self-watering | Beginners |
| Hamama Growing Kit | Seed Quilts | $19.95 | Water-only | Ease of use |
| Back to the Roots Ceramic Kit | Soil-based | $49.99 | Traditional soil | Aesthetics |
| Chef’n Microgreens Grower | Basic Tray | $15-$20 | Soil or hydroponic | Budget-conscious |
| Wooden Countertop Planter Kit | Soil-based | $25-$35 | Wonder Soil | Gift giving |
| Deluxe Microgreens Kit | Dual system | $45-$60 | Soil & hydroponic | Variety seekers |
| Sproutlet 3-Pack | Self-watering | $35-$40 | Hydroponic mats | Multi-location |
💬 Just one click – help others make better buying decisions too! 😊
✨ Don’t Miss These Exclusive Deals!
🔍 Take your indoor gardening to the next level with these carefully selected products. Click on any highlighted item to check current pricing and availability. These tools will help you create authentic nutrition-packed greens your family will love!
Top 7 Countertop Microgreens Kit: Expert Analysis
1. ZestiGreens Self-Watering Microgreens Growing Kit
If you’re searching for the ultimate small space microgreens solution that practically grows itself, the ZestiGreens Self-Watering Kit deserves serious consideration. This innovative system eliminates the guesswork with its hydroponic insert and elegant bamboo surround that looks stunning on any countertop.
Key Specifications:
- Dimensions: 12″ x 6″ reusable tray
- Growing method: Hydroponic (no soil required)
- Harvest time: 7-10 days
- Price: $37.95-$39.95
What sets ZestiGreens apart is the thoughtful design that addresses common beginner mistakes. The hemp grow mats provide consistent moisture distribution, while the blackout felt lid creates optimal germination conditions. Users consistently report harvest success rates above 90%, with the included Red Garnet Amaranth and Superfood Mix (Broccoli, Kale, Kohlrabi, Arugula & Cabbage) producing vibrant, flavorful greens.
Customer feedback highlights the convenience factor. One reviewer mentioned harvesting crisp microgreens weekly without any soil mess, while another appreciated the detailed 16-page illustrated grow guide that walks you through each step. The bamboo frame adds a premium aesthetic that doesn’t scream “science experiment” on your counter.
✅ Pros:
- Zero mess, no soil required
- Self-watering design reduces daily maintenance
- Beautiful bamboo aesthetic
❌ Cons:
- Higher upfront cost than basic trays
- Replacement grow mats needed for each crop
2. Hamama Microgreens Growing Kit
The Hamama Microgreens Growing Kit revolutionizes countertop gardening with their patented Seed Quilt technology. This apartment-friendly gardening system strips microgreens cultivation down to its absolute essence: just add water once, and you’re done. No daily misting, no complicated schedules, just foolproof growing.
Key Specifications:
- Seed Quilt technology (pre-seeded mats)
- Price: $19.95 per kit
- Non-GMO, mostly organic seeds
- Works in low light conditions
What makes Hamama special? The Seed Quilts eliminate seed distribution headaches entirely. Each mat comes pre-measured with the perfect density of seeds embedded in coconut fiber and felt. Users rave about the 30-second setup and the fact that even notorious plant-killers achieve success. The company backs this confidence with a “Guaranteed to Grow” promise and responsive Grow Coach support.
Real-world performance shows Hamama excels in minimal space required scenarios. One user grows three trays simultaneously on a small kitchen windowsill, rotating harvests for continuous supply. The subscription model ($19 for 3 Seed Quilts monthly) ensures you never run out, though some users note recent quality inconsistency with newer batches being more tightly glued.
✅ Pros:
- Absolute easiest setup (30 seconds)
- Works in low-light environments
- Compostable, eco-friendly materials
❌ Cons:
- Ongoing cost for Seed Quilt refills
- Some quality control issues reported
- Cannot reuse with your own seeds
3. Back to the Roots Organic Microgreens Grow Kit with Ceramic Planter
For those who value aesthetics alongside functionality, the Back to the Roots Ceramic Kit transforms your urban gardening solution into a stylish kitchen decor element. This kit combines USDA Certified Organic credentials with a gorgeous white ceramic planter that you’ll actually want to display.
Key Specifications:
- Ceramic planter with grow trays
- Price: $49.99 (3-pack kit)
- Includes: Rainbow Mix, Mighty Mix, and Broccoli varieties
- Made in Utah, USA
Back to the Roots built their reputation on quality, and this kit delivers. The expanding soil discs transform from compact pucks into nutrient-rich growing medium with just water. Each variety pack includes compostable grow trays, tray covers, and comprehensive instructions backed by Green-Thumb Text Support.
Users appreciate the complete ecosystem approach. The ceramic planter features a plastic liner preventing water damage to countertops, while the soil-based method provides traditional growing security. Customer reviews consistently mention the superior taste and texture compared to hydroponic varieties. One home chef noted that the microgreens maintain crunch even three days after harvest when refrigerated properly.
The #GrowOneGiveOne program adds social impact – share your growing success photo, and they donate a kit to a classroom of your choice.
✅ Pros:
- Premium ceramic aesthetics
- USDA Certified Organic
- Complete kit with multiple varieties
❌ Cons:
- Higher price point
- Heavier shipping weight
- Soil creates slight mess during setup
4. Chef’n Microgreens Grower
Sometimes simplicity wins, and the Chef’n Microgreens Grower proves this principle beautifully. This streamlined white tray system offers maximum flexibility for experimental growers who want to try different seeds, substrates, and techniques without breaking the bank.
Key Specifications:
- Compact windowsill-friendly size
- Price: $15-$20
- Compatible with various seed types
- Easy to clean (dishwasher safe)
The Chef’n system strips microgreens growing to its essentials: a well-designed tray with drainage, a clear humidity lid, and step-by-step instructions. What you gain is complete freedom to source your own seeds, experiment with soil versus hydroponic methods, and customize density to your preferences.
This kitchen counter garden tool excels for budget-conscious gardeners willing to handle seed sourcing. Users report success with broccoli, kale, arugula, chia, and mustard varieties. The compact footprint fits on standard windowsills, making it ideal for truly minimal space required situations. Cleanup takes seconds – either wipe down with a wet cloth or run through the dishwasher.
The downside? You’re responsible for everything beyond the tray. Expect to research optimal seed quantities, growing mediums, and harvest timing. But for hands-on learners, this educational aspect becomes a feature, not a bug.
✅ Pros:
- Lowest price point
- Complete flexibility with seeds
- Dishwasher-safe convenience
❌ Cons:
- Requires separate seed/soil purchase
- No detailed growing instructions
- Learning curve for beginners
5. Organic Microgreens Growing Kit with Beautiful Wooden Countertop Planter
The Wooden Countertop Planter Kit delivers Instagram-worthy aesthetics paired with genuine growing performance. This complete package includes everything needed for your first two crops, making it the perfect gift for health-conscious friends or a stylish addition to your own compact growing system.
Key Specifications:
- Beautiful wooden planter box
- Price: $25-$35
- Includes Wonder Soil, seeds, spray bottle
- Over 8,000 seeds for 2 crops
What makes this kit special is the attention to detail. The wooden box brings rustic charm to modern kitchens, while the plastic liner protects surfaces from moisture. Wonder Soil technology creates an engaging experience – watching the compressed soil expand feels almost magical. The kit includes both Sunflower microgreens (the most popular variety) and a Mixed Salad blend featuring Broccoli, Kale, Kohlrabi, Arugula, and Red Acre Cabbage.
Customer experiences vary widely. Successful growers rave about the sweet flavor of sunflower microgreens and the fast growth (ready in under 3 weeks). Others struggled with germination rates, reporting only a handful of seeds sprouted despite following instructions. The manufacturer offers responsive customer service and refill kits with pre-measured soil and seeds.
This system works best for visual learners who appreciate watching the full growth process from soil expansion to seed germination to harvest. The wooden planter is genuinely attractive enough to keep on display continuously.
✅ Pros:
- Beautiful wooden design
- Complete kit includes everything
- Refill kits available for sustainability
❌ Cons:
- Inconsistent germination rates reported
- Wonder Soil can be messy
- Value concerns from some users
6. Deluxe Microgreens Growing Kit
For serious enthusiasts ready to explore both soil and hydroponic methods, the Deluxe Microgreens Kit from Handy Pantry offers unmatched versatility. This comprehensive system lets you discover which varieties thrive in which growing conditions while providing enough supplies for extended experimentation.
Key Specifications:
- Dual growing system (soil & hydroponic)
- Price: $45-$60
- Includes: 10 growing trays, grow pads, soil bricks
- 12+ seed varieties including specialty options
This kit recognizes a crucial truth: some seeds prefer soil (sunflower, pea, cilantro) while others excel hydroponically (broccoli, cabbage, kohlrabi, kale). The comprehensive seed selection includes hard-to-find varieties like Sango Radish, TatSoi, and Basil microgreens. You receive 10 trays (5 with holes for hydroponic, 5 solid for soil), coconut coir bricks, pH test strips, and detailed instructions for both methods.
Users appreciate the educational journey this kit provides. One reviewer mentioned discovering that their family prefers the flavor of soil-grown pea shoots but loves the cleanliness of hydroponic radish. The variety allows you to grow different flavors and colors simultaneously, creating visually stunning and nutritionally diverse harvests.
The learning curve is steeper than simpler kits, but the payoff comes in understanding the nuances of microgreens cultivation. This knowledge translates to better long-term results and the ability to troubleshoot issues independently.
✅ Pros:
- Both growing methods included
- Extensive seed variety
- Educational value for serious growers
❌ Cons:
- Higher price point
- Can feel overwhelming for beginners
- Requires more storage space
7. Sproutlet Microgreen Grow Kit – 3-Pack
The Sproutlet 3-Pack solves the “one tray isn’t enough” problem right out of the gate. This eco-friendly system provides three complete growing stations, enabling continuous harvest rotations that keep fresh greens on your table every single day.
Key Specifications:
- Three complete growing trays with domes
- Price: $35-$40
- Self-watering compostable grow mats
- Includes 15 grow mats and 2 seed packets
What makes Sproutlet compelling is the rotation strategy it enables. Start one tray every 3-4 days, and you’ll achieve a continuous harvest cycle where you’re cutting fresh greens daily. The self-watering design eliminates the daily misting routine, while the compostable grow mats align with sustainable living values.
Customer feedback emphasizes the clean, tidy growing experience. The mess-free system appeals to apartment dwellers and those with limited cleaning tolerance. The included organic microgreen seeds get you started immediately, though you’ll want to purchase additional varieties as you discover preferences.
The compact growing system design stacks efficiently when not in use, addressing storage concerns in small kitchens. Multiple users report success placing trays in different rooms – one in the kitchen window, one in the office, one in the dining area – distributing fresh greens throughout their home.
At under $15 per tray, the 3-pack offers excellent value for the quality provided. The only limitation is the ongoing need for grow mat replacements, though these remain affordable and are properly compostable.
✅ Pros:
- Three trays enable rotation strategy
- Affordable per-tray cost
- Truly eco-friendly materials
❌ Cons:
- Replacement mats needed
- Limited seed variety included
- Plastic trays (though recyclable)
What Is Countertop Microgreens Kit?
A countertop microgreens kit is a self-contained growing system designed to cultivate young vegetable greens on your kitchen counter or windowsill. These compact growing systems typically include growing trays, humidity covers, growing medium (soil or hydroponic mats), seeds, and instructions for producing nutrient-dense microgreens in 7-21 days without requiring outdoor space, special lighting, or extensive gardening knowledge.
Why Countertop Microgreens Kit Are Worth Your Investment
The Nutrition Revolution Happening in Your Kitchen
Let’s talk numbers that’ll make nutritionists weep with joy. According to research published in the National Institutes of Health, microgreens can offer potential solutions to chronic diseases including malnutrition, cardiovascular diseases, obesity, diabetes, cancer, and neurodegenerative disorders due to their rich phytochemical and nutrient content. We’re not talking about marginal improvements here – we’re talking about game-changing nutritional density.
Studies comparing microgreens to mature greens report that nutrient levels in microgreens can be up to nine times higher than those found in mature greens, and they contain a wider variety of polyphenols and other antioxidants than their mature counterparts. That tiny handful of broccoli microgreens? It’s delivering more vitamins, minerals, and health-promoting compounds than a full plate of mature broccoli florets.
The implications for daily nutrition are profound. Instead of choking down three cups of salad to meet your vegetable requirements, you can sprinkle a handful of microgreens onto your morning eggs, lunch sandwich, and dinner bowl. You’re hitting nutritional targets while actually enjoying the concentrated flavors these young greens provide.
Space Efficiency That Defies Logic
I’ve visited apartments where the kitchen barely fits a human, yet the residents produce enough microgreens weekly to eliminate grocery store greens purchases entirely. How? A countertop microgreens kit occupies less real estate than a toaster while producing yields that seem mathematically impossible.
Consider the math: a standard 10″ x 20″ tray can produce 8-12 ounces of microgreens per harvest. At grocery store prices ($4-6 per ounce), that’s $32-72 worth of produce from a footprint smaller than a laptop. In apartments where every square inch counts, this minimal space required approach transforms previously unusable counter space into nutritional production facilities.
The vertical stacking potential amplifies this further. Many systems allow stacking during germination phases, meaning you can have 3-4 crops in various growth stages occupying the counter space of a single tray. This efficiency makes microgreens cultivation practical even in studio apartments, dorm rooms, or RVs.
Economic Sense That Compounds Over Time
Let’s run the realistic numbers on a typical urban gardening solution investment. Most quality countertop microgreens kits cost $20-60 upfront. Seeds run about $10-15 per variety (lasting 10-20 crops). Growing medium costs $5-10 per crop cycle depending on your system.
Compare this to purchasing equivalent microgreens from stores or farmers markets:
- Store-bought microgreens: $5-8 for 1-2 ounces
- Weekly consumption for one person: 4-8 ounces
- Monthly cost: $80-160
Your homegrown equivalent costs roughly $3-5 per crop in consumables once you have the kit. That’s $12-20 monthly for the same volume. The break-even point hits within 30-45 days, and every harvest afterward represents pure savings.
But the economics improve further when you consider that homegrown microgreens last longer. Store-bought varieties often arrive 2-3 days post-harvest and wilt within 3-4 days. Your countertop harvest stays fresh 7-10 days when stored properly, eliminating the waste factor that makes grocery greens even more expensive per actually-consumed ounce.
The Freshness Factor Changes Everything
There’s a moment – usually around your third or fourth homegrown harvest – when you’ll bite into a store-bought microgreen and think, “Wait, when did these start tasting like cardboard?” That’s not a change in the store’s quality. That’s your palate adjusting to what fresh actually means.
Microgreens are harvested between 7-21 days depending on variety, and are treasured for their densely packed nutrients, concentrated flavors, immaculate and tender texture, as well as their vibrant colors. When you cut microgreens 30 seconds before adding them to your meal, you’re experiencing peak flavor and nutrition that simply cannot exist in transported produce.
The enzyme activity in freshly cut microgreens creates flavor compounds that dissipate within hours of harvest. The vibrant colors you see? Those anthocyanins and carotenoids are at maximum concentration. The crisp texture? Cell walls haven’t begun the wilting process that starts immediately post-harvest.
This freshness extends shelf life dramatically when you do need to store harvests. Properly washed and stored homegrown microgreens maintain quality for 7-10 days versus the 2-4 days typical for store-bought varieties. You’re eliminating both waste and those frustrating moments when you discover your $8 clamshell of greens has turned to slime.
Types of Countertop Microgreens Kit Systems
Hydroponic Microgreens Systems
Hydroponic systems grow microgreens without soil, using water and growing mats to support seed germination and growth. These apartment-friendly gardening options deliver the cleanest growing experience with zero dirt, minimal mess, and often faster germination rates. The self-watering designs maintain consistent moisture levels, eliminating the daily misting hassle that defeats many beginners.
ZestiGreens and Hamama represent premium hydroponic approaches, using hemp mats and seed quilts respectively. These materials provide structural support while wicking moisture evenly to developing roots. The result? Uniform growth without the hot spots and dry patches common in manual watering approaches.
Hydroponic systems excel for:
- Small space microgreens cultivation in apartments
- Varieties like broccoli, kale, cabbage, and radish
- Growers prioritizing cleanliness and ease
- Those wanting set-it-and-forget-it reliability
The trade-offs include ongoing costs for replacement mats and slightly higher upfront investment. However, users consistently report that the time savings and reduced failure rates justify the premium.
Soil-Based Growing Kits
Soil systems use traditional growing mediums like coconut coir, peat moss, or potting soil to support microgreens development. These kitchen counter garden approaches appeal to traditionalists and those seeking the flavor profiles that only soil cultivation can provide.
Back to the Roots and the Wooden Planter Kit exemplify quality soil-based options. The expanding soil discs make setup engaging and surprisingly clean – compact pucks transform into fluffy growing medium with just water. While you will encounter some dirt, it’s far less messy than conventional gardening.
Soil-based systems shine for:
- Larger seed varieties (sunflower, pea, cilantro)
- Maximum flavor and nutrition seekers
- Those comfortable with traditional gardening
- Growers wanting the most affordable per-crop costs
The main considerations are the slight mess factor during setup and harvest, plus the need to dispose of used soil properly. Many cities accept spent coconut coir in green waste bins, making this more sustainable than it first appears.
Hybrid Systems for Maximum Flexibility
Deluxe kits like Handy Pantry’s offering recognize that different seeds have different preferences. These comprehensive compact growing systems include both hydroponic trays and soil options, letting you optimize each variety for its ideal growing conditions.
The learning curve steepens with hybrid systems, but so does your understanding of microgreens cultivation. You’ll discover that radishes explode hydroponically while pea shoots develop superior sweetness in soil. This knowledge transforms you from kit-follower to confident grower who can troubleshoot issues and maximize quality.
Hybrid systems work best for:
- Serious enthusiasts planning long-term cultivation
- Those wanting diverse flavor and texture profiles
- Experimental growers who enjoy optimization
- Families consuming significant microgreens volumes
The investment scales accordingly, both in money and storage space. Expect to dedicate drawer or cabinet space to supplies, though the payoff comes in unmatched versatility.
How to Choose Countertop Microgreens Kit
1. Assess Your Available Space Honestly
Measure your actual countertop real estate before falling in love with a system. That 12″ x 20″ tray might look compact online, but in a studio apartment kitchen, it could monopolize your entire prep area. Consider vertical dimensions too – systems with domes need clearance above, while stacked growing requires height most cabinets can’t accommodate when stored inside.
Think beyond just the growing tray. Where will you store seeds? Growing medium? Backup trays? The best minimal space required solution accounts for the entire cultivation ecosystem, not just the active growing footprint.
2. Match Growing Method to Your Lifestyle
Hydroponic systems favor busy professionals who want to add water once and return in 7 days to harvest. Soil-based approaches suit those comfortable getting slightly dirty and who enjoy the hands-on growing process. If you travel frequently, self-watering hydroponic options make most sense. If you’re home daily and enjoy tending plants, soil systems provide more touchpoints and engagement opportunities.
Your tolerance for mess matters here. Hydroponic systems deliver laboratory cleanliness. Soil approaches bring the garden indoors (in the best way, but still). Be honest about which scenario aligns with your personality and kitchen standards.
3. Consider Your Consumption Volume
Growing one tray weekly produces about 8-12 ounces of microgreens – enough for 2-3 people consuming them several times weekly. Serious smoothie enthusiasts or families of 4+ need multi-tray systems or larger formats. Calculate your realistic consumption, then size your urban gardening solution accordingly.
Remember that successful harvests breed increased consumption. That salad you used to skip? Suddenly it’s appealing when you can top it with fresh-cut greens you grew yourself. That sandwich seems incomplete without a handful of peppery radish microgreens. Account for this growth in your planning.
4. Evaluate Seed Sourcing Preferences
Pre-packaged systems like Hamama offer convenience at the cost of variety and ongoing expense. Open systems like Chef’n provide freedom to experiment with specialty varieties but require you to source and measure seeds correctly. Consider whether you want curated simplicity or adventurous experimentation.
Some kits include several crops’ worth of seeds, while others provide just one starter variety. Calculate the true startup cost including additional seed purchases if needed. Quality organic microgreens seeds run $8-15 per variety, with each packet producing 10-20 harvests depending on density.
5. Factor in Long-Term Cost of Ownership
The $20 basic kit seems attractive until you calculate replacement costs. Hydroponic systems need new grow mats ($2-5 per crop). Soil systems require growing medium ($3-8 per crop). Seed quilt systems charge $6-7 per harvest. None of these costs are prohibitive, but they accumulate differently.
Calculate your cost-per-ounce for the first year of use. Include the kit cost, consumable replacements, and seeds. Compare this to your current spending on greens. Most quality systems achieve break-even within 2-3 months of regular use, with pure savings afterward.
6. Weigh Aesthetic Integration Seriously
If your kitchen counter is visible to guests or you value design cohesion, aesthetics matter more than you might think. The wooden planter or ceramic options from Back to the Roots integrate beautifully into modern or rustic kitchens. Standard plastic trays work fine functionally but announce “science project” to anyone who sees them.
Consider your tolerance for visible growing setups. Some people love the conversation starter aspect of countertop gardens. Others prefer discrete growing in less-visible locations. Neither approach is wrong – just ensure your choice aligns with your comfort level.
7. Research Replacement Part Availability
Nothing’s more frustrating than loving a system only to discover the manufacturer discontinued the specific grow mats or seed quilts your kit requires. Before purchasing, verify that replacement consumables are readily available through Amazon, the manufacturer’s website, or third-party suppliers.
Some systems use proprietary components (Hamama’s Seed Quilts) while others work with standard supplies available anywhere (Chef’n’s tray accepts any seeds and soil). Proprietary can mean better results but creates dependency. Universal compatibility means freedom but requires more decision-making.
Setting Up Your Countertop Microgreens Kit
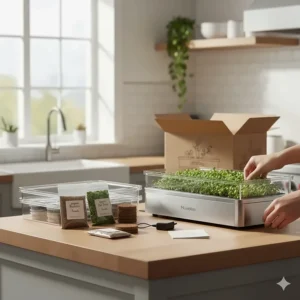
Initial Setup and Preparation
Unpack your kit and inventory components before starting. Rinse reusable trays with warm water and mild soap, even if new – manufacturing residue can inhibit germination. Locate your chosen growing spot, ideally near a window for natural light, though most varieties tolerate low-light conditions.
Read instructions completely before beginning. Yes, I know it’s tempting to dive in, but microgreens cultivation has specific timing windows. Understanding the full process before starting prevents common mistakes like overwatering during germination or harvesting too early.
Gather additional supplies: a spray bottle for misting, a sharp knife or scissors for harvesting, and storage containers for finished greens. Having everything ready streamlines the process and increases success rates.
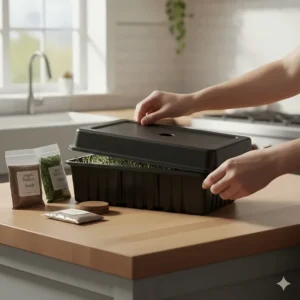
The Germination Phase (Days 1-3)
This initial phase determines success or failure, yet it’s remarkably simple. For soil-based systems, hydrate your growing medium according to instructions – usually soaking compressed discs or moistening coconut coir to damp-sponge consistency. Spread evenly in your tray, creating a level surface without compacting.
Distribute seeds evenly across the surface. Density matters: too sparse yields disappointing harvests; too dense creates mold risks. Most kits include measurement guidelines, but general rules suggest covering about 50-75% of the soil surface. Some varieties like sunflower need soil covering; others like broccoli grow beautifully uncovered.
Cover your tray with the provided dome or a dark cloth. Darkness during germination triggers root development and stronger stems. Place in a warm location (65-75°F ideal) and resist checking constantly. Trust the process.
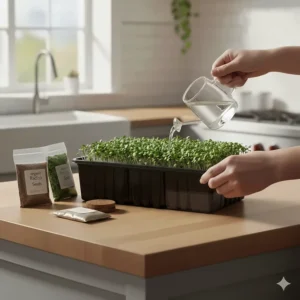
For hydroponic systems, place your pre-seeded mat or distributed seeds on the growing pad, add water to the fill line, and cover. The self-watering mechanism handles moisture distribution.
Active Growth Phase (Days 4-7)
Once seeds germinate and you see sprouting (usually day 2-3), remove blackout covers and move trays to their growing location. Microgreens need some light but don’t require intense direct sun. A bright windowsill or room with good natural light works perfectly. LED grow lights help in winter or darker locations but aren’t mandatory.
Monitor moisture daily. Soil should remain damp but not waterlogged – like a wrung-out sponge. Hydroponic systems maintain this automatically, but check water levels every 2-3 days. Mist soil-based systems gently if the surface dries out.
Watch for warning signs. Yellow stems indicate insufficient light. Fuzzy white growth could be beneficial root hairs (normal) or mold (problematic). Root hairs disappear when misted; mold doesn’t. Falling over seedlings suggest overwatering or insufficient air circulation.
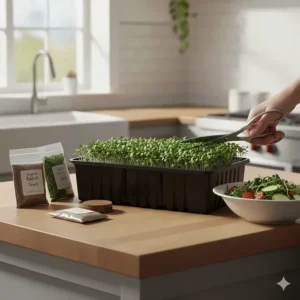
Harvest Window (Days 7-14)
Most varieties reach harvest stage when true leaves appear above the initial cotyledons. Taste-testing determines optimal harvest timing – preferences vary from mild (younger) to intense (more mature). The beautiful aspect? You can’t really “miss” the harvest window. A few extra days won’t ruin your crop.
Harvest using clean, sharp scissors or a knife. Cut just above the soil line or growing mat, gathering greens with one hand while cutting with the other. Work in small sections rather than trying to cut everything at once.
Rinse harvested microgreens gently in a salad spinner or colander. Dry thoroughly – excess moisture reduces storage life. Store in airtight containers lined with paper towels, refrigerated. Properly stored greens maintain peak quality for 7-10 days.
Common Mistakes to Avoid
Overwatering – The #1 Killer
More microgreens crops fail from overwatering than all other causes combined. That dense mat of fallen, slimy seedlings? Classic overwatering symptom. Microgreens need moisture, not submersion. The soil should feel damp when touched but never soggy.
Learn the difference between surface dryness and actual dryness. Top half-inch might look dry while the bottom remains perfectly moist. Before adding water, press gently into the soil and check moisture levels below the surface.
For self-watering systems, follow fill-line guidelines religiously. More water doesn’t equal faster growth – it equals dead crops. Trust the engineering.
Insufficient Air Circulation
Stagnant air creates perfect mold conditions. While you don’t need a fan blowing directly on trays, ensure your growing location has some air movement. Avoid completely enclosed cabinets or boxes. If growing in winter with closed windows, consider a small fan running nearby (not directly on the greens).
Proper spacing between trays helps when growing multiple batches. Stack trays during germination if needed, but separate them once growth begins. Each tray needs access to air from all sides.
Harvesting Too Early or Too Late
The eager harvester cuts at day 5, disappointed by tiny, flavorless sprouts. The procrastinator waits until day 18 and gets tough, bitter greens. The sweet spot usually falls between days 7-12, varying by variety.
Learn to read your plants. When cotyledons (seed leaves) fully unfold and turn dark green, you’re in the harvest window. The appearance of true leaves (second set, different shape than cotyledons) signals prime time. Some prefer harvesting just before true leaves for maximum tenderness; others wait for full true leaf development for concentrated flavor.
Using Poor Quality Seeds
Dollar store seeds might work for mature vegetables, but microgreens cultivation demands high germination rates. Poor seeds create patchy growth with disappointing yields. Invest in quality organic seeds from reputable suppliers – both in vitro and in vivo studies have shown that microgreens have anti-inflammatory, anti-cancer, anti-bacterial, and anti-hyperglycemia properties, but these benefits depend on strong, healthy plants from quality genetics.
Purchase seeds labeled specifically for microgreens or sprouting. Standard garden seeds may have chemical treatments unsuitable for consumption at immature stages. Organic certification adds cost but ensures seed purity.
Neglecting Cleanliness
Reusing trays without proper cleaning invites disease. Wash all components thoroughly between crops using mild soap and hot water. Pay special attention to corners and crevices where organic matter accumulates. Consider occasional bleach solution sanitization (1 tablespoon per gallon water, followed by thorough rinsing).
Clean your cutting tools between varieties to prevent cross-contamination. Store seeds in cool, dry locations in sealed containers. These simple hygiene practices prevent 90% of disease issues.
Nutritional Benefits Backed by Science
Vitamin and Mineral Density That Defies Logic
Red beet microgreens were richest in organic acids, particularly citric acid and flavonoids, supporting antioxidant activity and potential anti-inflammatory effects, while black radish microgreens showed the highest DPPH antioxidant capacity and phenolic content. These aren’t marginal nutritional improvements – we’re seeing order-of-magnitude increases in key nutrients compared to mature vegetables.
Studies show that microgreens can help manage Type 2 diabetes, protect vision, reduce risk of heart disease, anemia, cancer and Alzheimer’s disease. The concentrated phytochemicals in these tiny greens punch far above their weight class.
Consider the practical implications. Instead of forcing down massive salad portions to meet nutritional requirements, you achieve equivalent or superior nutrient intake from a handful of microgreens. For people struggling to consume adequate vegetables, this concentration factor offers a genuine solution.
Antioxidant Powerhouses
The DPPH capacity determined in six plant species ranged from 70.13 to 83.32%, with black radish showing the highest antioxidant activity, attributed to elevated levels of phenolic and flavonoid compounds. These antioxidant levels exceed most mature vegetables, delivering cell-protecting compounds that combat oxidative stress and chronic disease.
The variety-specific benefits mean you can target nutritional goals. Need eye health support? Healthline reports that lutein found in spinach, broccoli, dandelion and cress microgreens may improve or prevent age-related macular disease. Concerned about iron deficiency? Fenugreek microgreens have the highest levels of iron among microgreens varieties.
Specific Varieties and Their Benefits
Broccoli microgreens contain sulforaphane, a compound researched extensively for cancer prevention properties. Cleveland Clinic health experts note that adding Brassicaceae microgreens to a balanced diet may help prevent, block or possibly reverse cancer growth, with this family of microgreens especially useful in preventing colon cancer.
Sunflower microgreens excel in mineral content. Sunflower microgreens had the highest calcium and fumaric acid levels, indicating benefits for bone health and energy production.
Pea shoots provide different nutritional advantages. Pea microgreens excelled in phosphorus and copper concentrations, crucial for bone and cardiovascular health.
This variety-specific nutritional profile means you can rotate crops to create a comprehensive nutrient spectrum, ensuring you’re not just eating greens but strategically supporting different health systems.
Best Microgreens Varieties for Beginners
Radish – The Fast and Forgiving Champion
If you’ve never grown microgreens before, start with radish. This variety forgives beginner mistakes while delivering impressive results in just 6-8 days. The peppery flavor adds kick to sandwiches and salads without overwhelming dishes.
Radish microgreens tolerate temperature fluctuations, forgive minor watering inconsistencies, and germinate reliably even with mediocre technique. The visual appeal – vibrant green stems topped with pink or purple cotyledons – makes them Instagram-worthy right out of the tray.
Multiple radish varieties exist: Daikon (mild), Red Rambo (spicy), and Sango Purple (sweet with bite). Experiment to find your preference, but any radish variety succeeds for beginners.
Broccoli – Nutritional Powerhouse with Reliable Results
Broccoli microgreens combine beginner-friendliness with serious nutritional credentials. They grow slightly slower than radish (10-12 days) but deliver concentrated sulforaphane and vitamins. The mild, slightly sweet flavor appeals even to vegetable-resistant family members.
These greens thrive in both hydroponic and soil systems, making them perfect for testing your chosen setup. Dense, even growth creates satisfying harvests that visually validate your efforts.
The one caution: broccoli seeds are tiny, making even distribution challenging initially. Practice your seeding technique, and don’t stress about perfect spacing. Even imperfect distribution produces usable harvests.
Sunflower – Big Seeds, Big Results
Sunflower shoots deliver dramatic impact with minimal skill requirements. Large seeds are easy to handle and distribute evenly. The nutty, sweet flavor and substantial texture make these favorites for salads and sandwiches.
Growing time extends to 10-14 days, but the payoff is impressive. Large, meaty cotyledons and crunchy stems create volume that makes harvests feel substantial. Many growers consider sunflower their gateway to microgreens obsession.
One technical note: sunflower microgreens require soil covering. After distributing seeds, sprinkle a thin layer of growing medium over them. This prevents shells from sticking to cotyledons and encourages stronger stem development.
Pea Shoots – Sweet Success
Pea shoots produce sweet, tender greens that convert even microgreens skeptics. The mild flavor works universally – from smoothies to stir-fries. Kids especially enjoy the natural sweetness.
These larger seeds handle easily and germinate reliably. Growing time runs 10-14 days, producing substantial harvests with impressive visual appeal. The tendrils and leaves create texture variety absent from other microgreens.
Pea shoots prefer soil-based growing, thriving in coconut coir or quality potting mix. They’re less successful hydroponically, so choose them if you’ve selected a soil-based kit.
Creative Ways to Use Microgreens
Breakfast Transformations
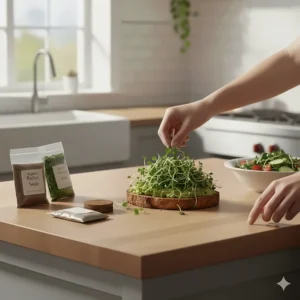
Scrambled eggs become restaurant-quality dishes with a handful of mixed microgreens folded in during the final 30 seconds of cooking. The residual heat wilts greens slightly while preserving nutrients and creating visual appeal that turns weekday breakfast into something special.
Avocado toast reaches new heights topped with radish or mustard microgreens. The peppery bite balances the avocado’s richness while adding textural contrast and vibrant color. Finish with a squeeze of lemon and flaky salt.
Smoothies hide nutritional powerhouses in plain sight. Blend a handful of mild varieties (sunflower, pea shoots) into your usual recipe. You won’t taste them, but you’ll gain concentrated vitamins without the smoothie turning swamp-green.
Lunch Innovations
Sandwiches transform from fuel into food when you substitute iceberg lettuce for microgreens. The concentrated flavors mean you need less volume while gaining more nutrition. Try broccoli microgreens on turkey sandwiches, radish on grilled cheese, or mixed varieties on tuna melts.
Grain bowls become Instagram-worthy with microgreens garnishes. The color contrast against quinoa or brown rice creates visual appeal while the varied textures prevent bowl monotony. Mix varieties for complexity – sweet pea shoots, spicy radish, earthy broccoli.
Wraps gain structural integrity and flavor from microgreens. Unlike full-size lettuce leaves that create soggy situations, microgreens add crunch and flavor without excess moisture that degrades wrap integrity.
Dinner Elevation
Top soups with microgreens immediately before serving. The gentle heat wilts them slightly while preserving nutrients. Pea shoots on pea soup creates elegant simplicity. Radish microgreens on potato soup adds bite. Sunflower shoots on tomato soup provides nutty contrast.
Pizza gets gourmet treatment with post-bake microgreens. Remove pizza from oven, add microgreens, and serve immediately. The residual heat wilts them perfectly while keeping nutrients intact. Arugula microgreens particularly excel here.
Pasta dishes gain complexity from microgreens additions. Toss a generous handful into hot pasta during the final plating. They’ll wilt slightly while maintaining structure and delivering fresh flavor that balances rich sauces.
Snacks and Appetizers
Hummus becomes party-worthy topped with microgreens. The visual appeal upgrades presentation while the flavors complement Mediterranean profiles. Mix varieties for color diversity.
Deviled eggs gain sophistication with microgreens garnishes. The classic preparation gets modern appeal and nutritional enhancement without changing the beloved flavors.
Cheese boards transform into conversation pieces with microgreens clusters. Arrange varieties around cheeses, creating edible garnishes that guests actually eat rather than pushing aside like parsley.
Troubleshooting Common Growing Problems
Mold Development
White fuzzy growth sends beginner growers into panic mode, but hold on – it might not be mold at all. Many microgreens develop fine white root hairs that resemble mold. The test: mist with water. Root hairs disappear temporarily; mold doesn’t.
Actual mold appears fuzzy and spreads across soil surface or climbing stems. Causes include poor air circulation, overwatering, or contaminated seeds. Solutions involve increasing airflow, reducing moisture, and ensuring growing area cleanliness.
Prevention beats treatment. Space seeds appropriately – overcrowding invites mold. Maintain proper ventilation. Use quality seeds from reputable sources. Keep growing areas clean between crops.
Leggy, Pale Seedlings
Tall, thin stems with pale color indicate insufficient light. While microgreens tolerate low light better than mature plants, they still need adequate illumination for chlorophyll production and structural strength.
Move trays closer to windows or add supplemental lighting. Even a simple LED grow bulb in a desk lamp improves results dramatically. The investment ($15-25) pays dividends in crop quality.
During winter or in dark apartments, consider this limitation when planning. Choose varieties tolerating lower light (radish, broccoli) over those demanding more (sunflower, pea).
Slow or Uneven Germination
Patchy germination frustrates beginners, but causes are usually correctable. Old seeds lose viability – check expiration dates and source fresh varieties. Incorrect temperature prevents germination in some seeds. Most microgreens prefer 65-75°F.
Uneven moisture distribution creates random germination patterns. Ensure growing medium is uniformly damp before seeding. Hydroponic self-watering systems prevent this issue.
Some varieties naturally germinate slower than others. Sunflower takes 3-4 days versus radish’s 1-2 days. Patience prevents premature troubleshooting when nothing’s actually wrong.
Yellowing Leaves
Yellow cotyledons or leaves indicate nutrient deficiency, but here’s the secret: microgreens don’t need fertilizer. They grow on stored seed energy. Yellowing usually signals either insufficient light or harvest time approaching.
Check lighting first. Move trays to brighter locations. If greens are approaching 14+ days old, yellowing might just mean they’ve exhausted seed nutrients and you should harvest now.
True nutrient deficiency in microgreens is rare unless you’re attempting to grow them beyond their natural cycle. Harvest when recommended rather than trying to extend growing periods.
FAQ
❓ How long does it take to grow microgreens in a countertop microgreens kit?
❓ Can you reuse soil or growing mats from a countertop microgreens kit?
❓ Do countertop microgreens kit work in apartments with low natural light?
❓ How much do replacement supplies cost for a countertop microgreens kit?
❓ Are microgreens from a countertop microgreens kit as nutritious as store-bought?
Conclusion: Your Path to Countertop Microgreens Success
We’ve covered substantial ground, from the science-backed nutritional benefits to the practical details of system selection and daily growing practices. The core truth remains beautifully simple: a countertop microgreens kit transforms your kitchen into a nutrition production facility requiring minimal space, modest investment, and surprisingly little effort once you master the basics.
The seven systems reviewed here represent different philosophies and price points, but all deliver on the fundamental promise: fresh, nutrient-dense greens year-round regardless of your living situation, climate, or gardening experience. ZestiGreens excels for hands-off convenience, Hamama delivers foolproof simplicity, Back to the Roots offers premium aesthetics, while budget options like Chef’n prove that effective growing doesn’t demand significant investment.
Your success depends less on choosing the “perfect” kit and more on matching a system to your specific situation. Apartment dwellers prioritizing minimal space required solutions will thrive with compact hydroponic options. Families consuming significant volumes need multi-tray systems or larger formats. Experimenters and enthusiasts gain more from versatile kits allowing both soil and hydroponic methods.
The nutritional science supporting microgreens cultivation is compelling and growing. These aren’t just trendy garnishes – they’re concentrated nutrition bombs delivering up to 40 times the vitamins and minerals of mature vegetables in compact packages your body can actually consume daily. The potential health impacts, from diabetes management to cancer prevention, justify attention from anyone serious about preventive health.
Starting your countertop microgreens journey requires approximately $20-60 upfront, 10 minutes of weekly active time, and willingness to learn from occasional failures. The payoff includes thousands of dollars saved over time, dramatically improved nutrition, and the satisfaction of growing your own food regardless of season or space constraints.
The question isn’t whether countertop microgreens cultivation makes sense – the economics, nutrition, and practicality are beyond debate. The question is which system fits your life, and when you’ll order it. Every day you wait is another day purchasing expensive store greens that wilt within 48 hours while your bare counter space sits unused.
Choose your kit, start your first crop, and prepare to discover why the urban gardening solution revolution isn’t just changing what we eat – it’s transforming where and how we source nutrition in the 21st century.
Recommended for You
- 7 Best Microgreens Kit Gift: Health Meets Sustainability (2026)
- 7 Best Alfalfa Sprout Growing Kits 2026: Expert Reviews
- 7 Best Commercial Microgreens Growing Kits for Restaurants 2026
Disclaimer: This article contains affiliate links. If you purchase products through these links, we may earn a small commission at no additional cost to you.
✨ Found this helpful? Share it with your friends! 💬🤗