In This Article
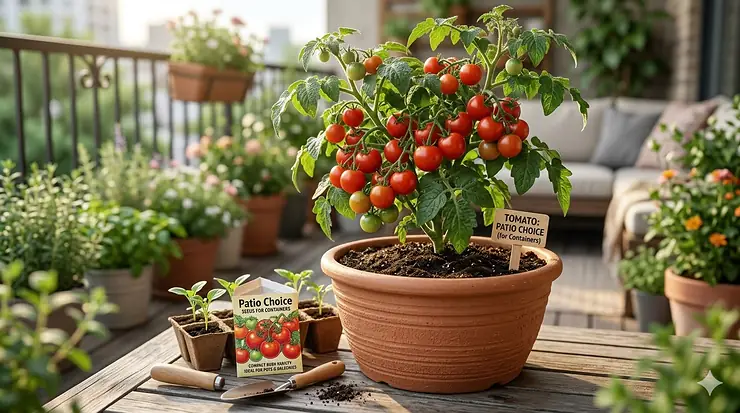
Picture this: stepping onto your balcony on a warm summer morning, plucking a sun-warmed cherry tomato from a plant thriving in a container no bigger than a paint bucket. That’s not fantasy—that’s what tomato seeds for containers make possible, even if you live in a high-rise apartment.
I’ve been growing tomatoes in containers for over a decade, transforming cramped patios into productive mini-farms. What started as an experiment with one sad-looking plant has evolved into a yearly ritual that feeds my family fresh tomatoes from May through October. The secret? Choosing the right seeds designed specifically for container life.
Unlike their sprawling garden cousins that demand acres of space and elaborate staking systems, tomato seeds for containers produce compact plant varieties that flourish in pots, buckets, and even hanging baskets. These patio cherry tomatoes and dwarf tomato varieties don’t just survive in containers—they actually thrive there, producing yields that rival traditional garden plots.
Whether you’re working with a 6-inch windowsill pot or a spacious balcony garden, this guide reveals exactly which seeds deliver the best vegetables for pots. You’ll discover determinate tomato seeds that stop growing at manageable heights, compact plant varieties that produce abundantly without taking over your space, and balcony garden seeds specifically bred for container success. By the end, you’ll know precisely which varieties to plant and how to coax maximum harvests from minimal square footage.
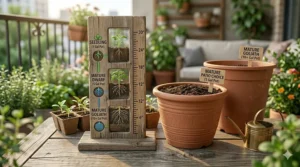
Quick Comparison Table: Top 7 Container Tomato Seeds at a Glance
| Product | Plant Height | Days to Maturity | Fruit Size | Best For | Price Range |
|---|---|---|---|---|---|
| Sweet Yards Organic Variety Pack | 2-4 feet | 60-80 days | Mixed sizes | Variety seekers | $15-$20 |
| Containers Choice Red F1 | 18-24 inches | 70 days | 6 oz | Small patios | $8-$12 |
| Silvery Fir Tree | 24 inches | 55-60 days | 2-3 inches | Cold climates | $6-$9 |
| Seed Needs Tiny Tim | 12-18 inches | 60 days | 1 inch | Windowsills | $5-$8 |
| Patio Princess Hybrid | 18-24 inches | 65-68 days | 4-5 oz | Balconies | $10-$15 |
| Mountain Princess Heirloom | 3-4 feet | 68 days | 8 oz | Larger containers | $8-$12 |
| 1,500+ Seeds Variety Pack | Varies | 60-85 days | Mixed | Bulk growers | $12-$18 |
💬 Just one click – help others make better buying decisions too! 😊
Top 7 Tomato Seeds for Containers: Expert Analysis 🏆
1. Sweet Yards Organic Tomato Seeds Variety Pack
If you can’t decide which variety to grow, this 12-pack eliminates the guesswork. Sweet Yards Organic Tomato Seeds Variety Pack brings together heirloom favorites including Yellow Pear, Sweetie Cherry, Roma, and Black Krim—all certified organic and packaged for the 2026 season.
Key Specifications:
- 12 individual seed packets with distinct varieties
- Certified organic and non-GMO
- High germination rates for 2026
- Includes both determinate and indeterminate types
Customers rave about the variety this pack offers, with one reviewer noting how having multiple types solved her succession planting challenges. The premium packaging includes detailed planting instructions and resealable zippers for seed storage.
Pros:
✅ Incredible variety in one purchase
✅ Organic certification provides peace of mind
✅ Perfect for experimenting with different flavors
Cons:
❌ Not all varieties are dwarf types
❌ Higher initial cost than single packets
Price: $15-$20
2. Containers Choice Red F1 Hybrid Tomato Seeds
Bred specifically for container life, Containers Choice Red F1 Hybrid delivers exactly what its name promises. This determinate variety produces 6-ounce oblate fruits on compact plants with distinctive rugose leaves that signal disease resistance.
Key Specifications:
- Dwarf plant reaching only 18-24 inches
- 300mg packet containing approximately 70 seeds
- True determinate growth habit
- 70 days to maturity
The beauty of this F1 hybrid lies in its space efficiency. According to Penn State Extension research, compact determinates like this perform exceptionally in containers because they don’t require extensive support systems. Gardeners report that three plants fit comfortably in a 10-gallon container.
Pros:
✅ Truly compact for tiny spaces
✅ No pruning required
✅ Disease-resistant characteristics
Cons:
❌ Hybrid seeds can’t be saved
❌ Shorter harvest window than indeterminates
Price: $8-$12
3. Silvery Fir Tree Tomato Seeds (Thresh Seed Co.)
This Russian heirloom stands out with its unique, deeply cut foliage that resembles fir tree needles. Silvery Fir Tree Tomato produces nearly perfect 2-3 inch red tomatoes on plants that max out at just two feet tall.
Key Specifications:
- 50 seeds per packet
- Earliest tomato in many trials (55-60 days)
- Heirloom, open-pollinated variety
- Ideal for short-season climates
Northern gardeners and high-altitude growers particularly love this variety. Its early maturity makes it perfect for regions where frost threatens before Labor Day. The compact plant varieties like this thrive in 5-gallon containers and tolerate cooler temperatures better than heat-loving slicers.
Pros:
✅ Exceptionally early harvest
✅ Cold-tolerant for northern gardens
✅ Beautiful ornamental foliage
Cons:
❌ Smaller fruit size
❌ Limited availability during peak season
Price: $6-$9
4. Seed Needs Tiny Tim Tomato Seeds
When space is at an absolute premium, Seed Needs Tiny Tim becomes your best friend. This dwarf cherry tomato barely reaches 12-18 inches tall but produces surprisingly heavy yields of sweet, scarlet fruits measuring about one inch across.
Key Specifications:
- Ultra-compact 12-18 inch plants
- 60-day maturity from transplant
- No staking required
- Perfect for 5-inch pots
According to University of Maryland Extension, dwarf varieties like Tiny Tim excel in hanging baskets and windowsill gardens where larger plants would struggle. Customer feedback consistently praises the sweet-tart flavor that makes these perfect for snacking straight off the vine. I’ve personally grown these indoors under grow lights with fantastic results.
Pros:
✅ Smallest footprint of any variety
✅ No support structure needed
✅ Kid-friendly snacking tomatoes
Cons:
❌ Very small individual fruits
❌ Lower total yield per plant
Price: $5-$8
5. Patio Princess Hybrid Tomato Seeds (Jays Seeds)
Bred by Burpee specifically for patio gardening, Patio Princess delivers restaurant-quality 4-5 ounce tomatoes on plants that stay under two feet tall. This determinate variety combines compact growth with serious productivity.
Key Specifications:
- 200 seeds per packet
- 65-68 days to first harvest
- 4-5 ounce globe-shaped fruits
- Disease-resistant and heat-tolerant
The hybrid vigor shows in both disease resistance and consistent yields. Multiple gardeners report harvesting 15-20 pounds of tomatoes from a single plant in a 5-gallon bucket. The fruits have that perfect balance of acid and sugar that makes them incredible for fresh eating.
Pros:
✅ Excellent disease resistance
✅ High yields for container size
✅ Classic tomato flavor profile
Cons:
❌ Seeds not available year-round
❌ Requires consistent fertilization
Price: $10-$15
6. Mountain Princess Heirloom Tomato Seeds
This West Virginia-bred heirloom brings old-fashioned flavor to container gardens. Mountain Princess produces bright red, 8-ounce fruits on determinate plants that reach 3-4 feet—larger than most patio varieties but still manageable in big containers.
Key Specifications:
- Approximately 100 seeds per packet
- USDA certified organic
- Early-season production (68 days)
- Mild, sweet flavor profile
While this variety needs a 10-15 gallon container, the payoff comes in substantial, slicing-size tomatoes that rival anything from traditional gardens. Commercial growers and CSA farmers appreciate the productivity and early timing. The compact plant varieties in the determinate category like this one benefit from Iowa State Extension’s fertilization protocols for container tomatoes.
Pros:
✅ Slicing-size fruits in containers
✅ Organic certification
✅ Excellent for short growing seasons
Cons:
❌ Needs larger containers
❌ Requires moderate staking
Price: $8-$12
7. 1,500+ Tomato Seeds Variety Pack (10 Varieties)
For serious container gardeners planning multiple plantings, this massive variety pack offers incredible value. The 1,500+ Seeds Collection includes Roma VF, San Marzano, Cherry, and seven other distinct varieties—all heirloom and non-GMO.
Key Specifications:
- Over 1,500 total seeds across 10 varieties
- Mix of determinate and indeterminate types
- USA-sourced heirloom genetics
- Suitable for both containers and hydroponics
This bulk option shines for gardeners doing succession planting throughout the season. You get enough seeds to experiment, share with neighbors, and still have plenty left for next year. The variety ensures you’ll find balcony garden seeds perfectly suited to your specific growing conditions.
Pros:
✅ Exceptional seed-to-dollar value
✅ Wide variety for experimentation
✅ Enough for multi-year use
Cons:
❌ Not all varieties are container-optimal
❌ Seeds mixed together, not individually packaged
Price: $12-$18
Understanding Determinate vs. Indeterminate Tomato Seeds 📊
The single most important decision when selecting tomato seeds for containers involves understanding plant growth habits. This distinction determines everything from container size to support needs.
Determinate tomato seeds produce plants that grow to a preset height, usually 3-4 feet maximum, then stop. All fruit sets within a concentrated 2-3 week window. Think of them as the bush beans of the tomato world—compact, predictable, and perfect for balcony garden seeds where space is limited. Varieties like Patio Princess and Containers Choice Red exemplify this category.
Indeterminate varieties grow continuously until frost kills them, often reaching 6-8 feet or more. They produce fruit steadily throughout the season but demand larger containers (15+ gallons) and robust support structures. While some gardeners successfully grow indeterminates in big containers, most compact plant varieties perform better for typical patio situations.
For containers, determinate wins nine times out of ten. These dwarf tomato varieties deliver concentrated harvests without the constant pruning and tying that indeterminates demand. According to University of New Hampshire Extension, determinate varieties also experience fewer problems with blossom end rot in containers because their controlled growth pattern maintains more consistent water uptake.
Quick Decision Guide
Choose Determinate If:
- Container size is under 10 gallons
- Space for staking/caging is limited
- You want all fruit at once for canning
- You’re new to container gardening
Choose Indeterminate If:
- You have 15+ gallon containers
- Room exists for tall stakes or trellises
- You prefer steady, season-long harvests
- You enjoy the pruning/training process
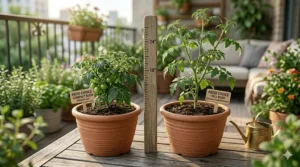
Choosing the Right Container Size for Your Tomato Seeds 🪴
Container selection makes or breaks your tomato growing success. Too small, and plants become root-bound and stressed. Too large, and soil stays soggy, inviting root diseases.
Size Recommendations by Plant Type
For dwarf cherry tomatoes like Tiny Tim and ultra-compact varieties:
- Minimum: 2 gallons (perfect for windowsills)
- Optimal: 5 gallons (best production)
- Container dimensions: 10-12 inches diameter, 10 inches deep
For standard determinate varieties including Patio Princess and Containers Choice Red:
- Minimum: 5 gallons (acceptable in pinch)
- Optimal: 7-10 gallons (strong growth)
- Container dimensions: 12-14 inches diameter, 12-14 inches deep
For larger determinates like Mountain Princess:
- Minimum: 10 gallons (bare minimum)
- Optimal: 15 gallons (much better results)
- Container dimensions: 16-18 inches diameter, 16 inches deep
The Clemson University research demonstrates that doubling container size from 5 to 10 gallons often increases yields by 60-80%, not just 2x. The additional soil volume provides water buffering and nutrient reserves that smaller pots simply can’t match.
Material Considerations
Plastic containers work brilliantly for patio cherry tomatoes because they retain moisture and cost less. However, they heat up quickly in direct sun, potentially cooking roots. Dark colors amplify this problem—choose light-colored plastic or wrap dark pots in reflective material.
Fabric grow bags have become my personal favorite for best vegetables for pots. The breathable material prevents root circling and naturally air-prunes roots, creating incredibly healthy root systems. They’re lightweight, fold flat for storage, and the 10-gallon versions cost less than quality ceramic pots.
Ceramic and terracotta look gorgeous but dry out fast and add significant weight. Reserve these for smaller varieties like Tiny Tim where the enhanced aesthetics justify the extra watering attention.
Soil and Growing Medium Essentials 🌱
Garden soil kills container tomatoes. That dirt from your backyard compacts in pots, suffocating roots and creating drainage nightmares. Successful container growing demands purpose-built potting mixes.
The Perfect Container Mix Recipe
Quality soilless potting mix forms the foundation for tomato seeds for containers. Look for blends containing:
- Composted bark or coir (40-50%): Provides structure and prevents compaction
- Peat moss or coir (30-40%): Holds moisture and nutrients
- Perlite or vermiculite (10-20%): Ensures drainage and aeration
- Compost (10-20%): Adds nutrients and beneficial microbes
According to research from Penn State Extension, mixes high in peat moss compress excessively during the growing season, reducing root mass by up to 30%. Their container trials showed the best results came from bark-based mixes blended with 20% compost.
For organic growers, making your own mix guarantees quality control. Combine 5 parts composted pine bark, 3 parts coconut coir, 1 part perlite, and 1 part finished compost. Mix thoroughly before filling containers.
pH and Nutrient Optimization
Tomatoes thrive in slightly acidic conditions between 6.0-6.8 pH. Most commercial potting mixes fall within this range, but testing takes the guesswork out. Simple pH test strips cost less than five dollars and prevent months of struggling with nutrient lockout.
Before planting, blend in these amendments per 5-gallon container:
- 1/4 cup bone meal (phosphorus for root development)
- 2 tablespoons kelp meal (micronutrients and growth hormones)
- 1 tablespoon Epsom salts (magnesium for chlorophyll production)
These slow-release nutrients sustain young plants through their first month when root systems are establishing. After that, regular liquid fertilization becomes essential for compact plant varieties producing heavy fruit loads in limited soil volumes.
Watering Strategies for Container Tomatoes 💧
Water management separates thriving container tomatoes from struggling ones. Unlike in-ground plants that access deep soil moisture, containerized best vegetables for pots depend entirely on you for hydration.
The Goldilocks Zone
Too little water stresses plants, triggers blossom end rot, and concentrates sugars to make fruits taste bitter. Too much water drowns roots, leaches nutrients, and promotes fungal diseases. Finding that perfect middle requires understanding how containers dry.
In typical summer conditions, expect to water:
- Small containers (2-5 gallons): Daily, sometimes twice daily during heat waves
- Medium containers (7-10 gallons): Every 1-2 days
- Large containers (15+ gallons): Every 2-3 days
These are starting points. Your actual needs depend on temperature, humidity, wind exposure, and plant size. The finger test never lies—stick your index finger two inches into the soil. If it feels dry, water thoroughly. If moist, wait.
Watering Technique Matters
When you water, drench the entire root zone until water flows from drainage holes. This thorough soaking encourages deep root growth and flushes accumulated salts from fertilizer. Shallow, frequent watering creates shallow roots that struggle during stress periods.
Morning watering timing proves optimal for several reasons. It ensures plants face the day’s heat fully hydrated. Wet foliage dries quickly in morning sun, reducing disease pressure. Evening watering works in a pinch but leaves foliage damp overnight when fungal diseases thrive.
Consider self-watering containers if your schedule makes daily watering challenging. These feature reservoirs that maintain consistent moisture levels—perfect for patio cherry tomatoes that suffer when water supply fluctuates. I’ve successfully grown Patio Princess in self-watering containers with results that matched my carefully hand-watered plants.
The University of Minnesota Extension emphasizes that consistent moisture prevents the blossom end rot that plagues roma and paste types. Their research showed that moisture fluctuation—not necessarily drought—triggers this calcium transport disorder.
Fertilization Schedule for Maximum Production 🌿
Container soil is nutritionally finite. Once plants exhaust the initial nutrient charge in your potting mix, growth stalls unless you provide supplemental feeding. This reality makes fertilization more critical for balcony garden seeds than traditional garden tomatoes.
Phase 1: Vegetative Growth (Weeks 1-4)
During the first month after transplanting, tomato seedlings focus on building strong stems and extensive root systems. Support this foundation with balanced fertilizers containing equal NPK ratios like 10-10-10 or 20-20-20.
Apply liquid fertilizer at half-strength weekly. This gentle approach prevents burning tender young roots while ensuring steady nutrient availability. Fish emulsion makes an excellent organic choice—dilute 1 tablespoon per gallon of water and drench the root zone.
Phase 2: Flowering and Fruiting (Week 5 Onward)
When flowers appear, shift to high-potassium formulations that promote fruit development. Look for tomato-specific fertilizers with 5-10-10 or 9-15-30 ratios. The elevated potassium (K) supports flower production and fruit quality.
Increase feeding frequency to every 5-7 days, using full-strength solutions. As plants mature and fruit loads increase, some varieties benefit from twice-weekly feeding. Watch for signs of excessive nitrogen—lush green growth with few flowers indicates dialing back nitrogen and increasing potassium.
Calcium Supplementation
Blossom end rot—those ugly dark spots on fruit bottoms—stems from calcium deficiency during rapid fruit growth. Prevent this frustrating condition with supplemental calcium from:
- Calcium nitrate: Water-soluble and immediately available (1 tablespoon per gallon every 2 weeks)
- Crushed eggshells: Slow-release calcium worked into potting mix
- Gypsum: Mix 1/4 cup into soil at planting for determinate tomato seeds
Consistent watering matters even more than calcium supplementation. Irregular moisture prevents calcium uptake regardless of soil levels, according to Ohio State Extension research.
Sunlight Requirements and Placement 🌞
Tomato seeds for containers need serious sun—period. These plants evolved in the intense light of Central and South American highlands, and they refuse to produce abundantly without it.
The Six-Hour Minimum
All tomato varieties require at least 6 hours of direct sunlight daily. Less than this produces leggy, weak plants with minimal fruit set. However, that “minimum” represents the bare threshold for survival, not thriving. Push for 8-10 hours when possible.
Observe your space throughout the day. That seemingly sunny balcony might only receive 4 hours of direct light due to building shadows. Afternoon sun counts too—intensity matters more than timing. A spot getting blazing 2-5 PM sun outperforms soft morning light for dwarf tomato varieties.
Strategic Container Placement
The mobility of container growing becomes your secret weapon. Track sun patterns across your space and position containers where light hits longest. As seasons shift and sun angles change, move containers to chase optimal exposure.
Southern exposures in the Northern Hemisphere provide maximum light. Western exposure works well too, delivering intense afternoon sun that compact plant varieties convert into sugars. Eastern exposures get gentle morning light but may fall short of the 6-hour minimum. Northern exposures rarely provide adequate light for productive tomato growing.
Against walls and fences, maximize reflected light by painting surfaces white or installing reflective materials. This passive technique can boost effective light intensity by 20-30%, helping borderline locations become productive.
When Natural Light Falls Short
Indoor and shaded patio situations demand supplemental lighting for best vegetables for pots. Modern LED grow lights consume minimal electricity while providing spectrum-optimized output for plant growth.
For Tiny Tim and other ultra-compact varieties, a simple 40-watt LED panel suspended 12 inches above plants delivers excellent results. Run lights 14-16 hours daily to simulate long summer days. The initial investment pays dividends when you’re harvesting fresh patio cherry tomatoes in January.
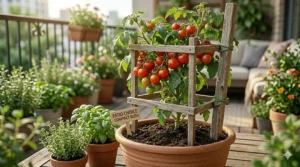
Support and Staking Methods 🎋
Even determinate tomato seeds benefit from structural support. While they won’t tower like indeterminates, fruit weight still causes stems to flop without help.
Support Options for Container Tomatoes
Tomato Cages: Traditional wire cages work adequately for dwarf tomato varieties. Choose cages with at least 4-inch mesh openings—smaller mesh makes harvesting frustratingly difficult. Install cages at planting time to avoid damaging established roots. For varieties like Patio Princess, 3-foot tall cages provide ample support.
Single Stakes: Simple bamboo or wooden stakes (4-6 feet tall) handle compact plant varieties efficiently. Drive the stake 8-10 inches into the container’s center, being careful not to pierce the bottom. As plants grow, use soft garden ties or cloth strips to loosely attach the main stem every 6-8 inches of growth. Never tie tightly—stems need room to expand.
DIY PVC Structures: For balcony garden seeds in multiple containers, build a custom support framework from 1/2-inch PVC pipe. Create a rectangle slightly larger than your container, then connect vertical supports at each corner. Run horizontal crosspieces at 12-inch intervals. This setup supports multiple plants simultaneously and looks cleaner than individual cages.
Florida Weave: This professional technique works brilliantly for rows of containers. Drive stakes at each end of your container lineup, then weave strong twine around plants and stakes in a figure-eight pattern. Add new levels of twine every 8-10 inches as plants grow. The system requires minimal materials while providing excellent support.
According to Penn State Extension container trials, even compact determinate varieties yielded 25% more fruit when properly supported versus unsupported plants. Support reduces stem stress, improves air circulation, and keeps fruit off soil where rot and pests lurk.
Common Problems and Solutions 🔧
Container tomatoes face unique challenges different from their in-ground cousins. Early recognition and proper response keep small problems from becoming crop failures.
Blossom End Rot
Those depressing dark, leathery spots on fruit bottoms plague container growers relentlessly. Despite popular belief, this isn’t truly a calcium deficiency—it’s a calcium transport problem triggered by inconsistent watering.
Solutions:
- Maintain steady soil moisture (not wet, not dry)
- Mulch soil surface to reduce evaporation
- Ensure containers have adequate drainage
- Add calcium at planting (1/4 cup gypsum per 5-gallon pot)
Once affected fruits show symptoms, remove them immediately. They won’t recover, and removing them redirects plant energy to healthy fruit development.
Leaf Curl and Yellowing
Lower leaves yellowing and curling while upper growth stays green usually signals nitrogen deficiency in fast-growing plants. Container soil’s limited nutrients deplete quickly when tomato seeds for containers hit peak production.
Solutions:
- Increase feeding frequency to weekly
- Switch to higher-nitrogen formulation temporarily
- Top-dress containers with compost
- Check pH—outside 6.0-6.8 range locks nutrients out
Conversely, excessive nitrogen creates lush green growth with few flowers. In this case, cut nitrogen and boost potassium with fertilizers rated 5-10-15 or similar.
Spider Mites and Aphids
Concentrated plantings on patios create pest heaven. Spider mites spin fine webbing on leaf undersides while sucking plant juices. Aphids cluster on new growth and shoot tips.
Solutions:
- Spray plants thoroughly with water to dislodge pests
- Apply insecticidal soap following label directions
- Introduce beneficial insects like ladybugs
- Neem oil works for both prevention and treatment
The confined nature of balcony garden seeds means pest populations explode rapidly. Weekly inspections catch problems early when simple interventions still work.
Root-Bound Plants
Plants in undersized containers eventually run out of root space. Growth slows dramatically, leaves yellow despite adequate fertilization, and plants wilt quickly after watering. Gently remove a plant from its container—if roots form a solid mass circling the pot, it’s root-bound.
Solutions:
- Transplant into larger containers (next size up, minimum)
- Score root ball sides before transplanting to encourage new growth
- Prune back foliage by 20-30% to balance roots and shoots
- For late-season root binding, maintain current size but increase feeding
Prevention beats treatment. Start with appropriately sized containers rather than planning to upsize later.
Harvesting and Extending Your Season 🍅
The reward for months of careful attention arrives when fruits reach peak ripeness. Proper harvesting technique and season extension strategies maximize your tomato harvest.
Identifying Perfect Ripeness
Color change provides the most obvious ripeness indicator. Red varieties transform from green through orange to deep red. Yellow and purple varieties show their characteristic hues fully developed. However, color alone misleads—truly ripe tomatoes yield slightly to gentle pressure.
The “shoulder” area where stem attaches should feel soft. Fruit should separate easily from the vine with gentle twisting. If you’re pulling hard, wait another day or two. For patio cherry tomatoes, fruits typically ripen within 3-5 days of showing color.
Indeterminate and determinate tomato seeds ripen at different rates. Compact plant varieties often produce concentrated harvests—you’ll go from zero to overwhelmed within a week. Plan accordingly with canning or preservation supplies ready.
Daily Harvest Routine
Check plants daily during peak production. Ripe tomatoes left too long on the vine split, especially after rainfall or heavy watering. They also attract birds, insects, and create entry points for rot.
Harvest in morning after dew dries but before afternoon heat builds. Fruits picked in intense sun often develop tough skins and off-flavors. The coolness of morning preserves that just-picked freshness longer.
Extending the Season
Start Early: In spring, black plastic mulch or water-filled Wall O’ Water protectors warm soil faster, allowing earlier planting of balcony garden seeds. Every week earlier you plant potentially yields another week of harvest.
Cover for Frost: When fall frost threatens, drape lightweight row cover or old sheets over plants overnight. Many dwarf tomato varieties continue producing for 3-4 weeks after first frost with simple protection.
Move Indoors: Container mobility enables bringing plants inside as weather cools. A sunny window or grow light setup keeps best vegetables for pots producing through November and sometimes December. I’ve harvested Tiny Tim tomatoes at Thanksgiving from plants moved indoors in early October.
Green Tomato Ripening: Before hard frost, harvest all green fruits larger than golf balls. Store at 65-70°F in a single layer. They’ll ripen over the following 2-3 weeks, extending your tomato season well into autumn.
Comparison Table: Determinate vs. Indeterminate Growth Habits
| Characteristic | Determinate (Bush) | Indeterminate (Vining) |
|---|---|---|
| Maximum Height | 3-4 feet | 6-10+ feet |
| Container Size Needed | 5-10 gallons | 15-20+ gallons |
| Pruning Required | Minimal to none | Regular pruning essential |
| Support Needs | Light cage or stake | Heavy-duty cage or trellis |
| Fruiting Pattern | All at once (2-3 weeks) | Continuous until frost |
| Best For | Patios, balconies, small spaces | Large containers, long harvests |
| Popular Varieties | Patio Princess, Tiny Tim | Better Boy, Cherokee Purple |
Benefits of Container Tomatoes vs. Traditional Garden Growing
| Benefit | Container Growing | Traditional Garden |
|---|---|---|
| Space Required | As little as 1 square foot | Minimum 6-9 square feet per plant |
| Soil Control | Complete control over mix | Limited by existing soil quality |
| Mobility | Can move to optimize sun | Fixed location |
| Pest Pressure | Generally lower | Higher from soil-borne pests |
| Early Season Start | Containers warm faster | Slow spring soil warming |
| Disease Prevention | Easier to prevent soil diseases | Rotation challenges |
| Accessibility | Waist-high harvesting possible | Ground-level or staked |
| Initial Cost | Higher (containers, soil) | Lower (just amendments) |
Value Analysis: Container Size vs. Yield Performance
| Container Size | Initial Cost | Soil Needed (cu ft) | Average Yield | Cost Per Pound |
|---|---|---|---|---|
| 2-gallon | $3-$5 | 0.3 | 2-4 lbs | $1.25-$2.50 |
| 5-gallon | $5-$8 | 0.7 | 6-10 lbs | $0.60-$1.30 |
| 10-gallon | $10-$15 | 1.3 | 12-18 lbs | $0.70-$1.25 |
| 15-gallon | $15-$25 | 2.0 | 18-25 lbs | $0.75-$1.40 |
Yield estimates based on determinate varieties with optimal care
✨ Don’t Miss These Exclusive Deals!
🔍 Take your container tomato growing to the next level with these carefully selected seed varieties. Click on any highlighted product name to check current pricing and availability. These seeds will help you create authentic homegrown tomatoes your family will love!
Starting Tomato Seeds Indoors: A Step-by-Step Guide 🌱
While purchasing transplants works fine, starting from seed unlocks access to hundreds of varieties unavailable as plants. The process requires patience but costs pennies compared to buying starts.
Timing Your Seed Starting
Count backward from your last expected spring frost date. Most tomato seeds for containers need 6-8 weeks from sowing to transplant-ready size. In my Zone 6 garden with a May 15 frost date, I start seeds around March 20-April 1.
Starting too early creates leggy, overgrown seedlings that struggle after transplanting. Too late delays your harvest by weeks. Get your local frost dates from Wikipedia’s climate data or county extension offices.
The Seed Starting Process
Week 1-2: Germination
- Fill seed-starting cells with sterile seed-starting mix
- Plant seeds 1/4 inch deep, two per cell
- Water gently, then cover with humidity dome
- Maintain 70-80°F soil temperature with heating mat
- Seeds germinate in 5-10 days
Week 3-4: Seedling Development
- Remove humidity dome after leaves emerge
- Provide 14-16 hours of bright light daily
- Keep soil consistently moist but never soggy
- Thin to one seedling per cell once true leaves appear
- Maintain 65-70°F air temperature
Week 5-6: Transplanting and Hardening Off
- Transplant into 4-inch pots when 3-4 inches tall
- Bury stem up to first true leaves to encourage rooting
- Begin hardening off 10 days before outdoor transplanting
- Gradually expose to outdoor conditions over 7-10 days
Seed Starting Troubleshoi
Damping Off: This fungal disease kills seedlings suddenly. Prevention includes using sterile mix, avoiding overwatering, and ensuring good air circulation. Once it strikes, affected seedlings can’t recover—discard them immediately.
Leggy Growth: Insufficient light causes tall, weak seedlings with large gaps between leaves. Position grow lights 2-3 inches above seedling tops and run 16 hours daily. Natural windowsill light rarely provides adequate intensity for compact growth.
Slow Germination: Cool soil temperatures delay germination dramatically. Below 65°F, germination may take 3-4 weeks or fail entirely. A seedling heat mat consistently maintains optimal 75-80°F temperatures for rapid sprouting of compact plant varieties.
Varieties for Specific Container Situations 🎯
Different growing situations demand different tomato varieties. Matching seeds to your exact conditions determines whether you succeed spectacularly or struggle needlessly.
For Tiny Spaces (Windowsills, Small Balconies)
When working with extremely limited space, ultra-compact varieties become essential. Tiny Tim reigns supreme here, followed closely by Red Robin. These patio cherry tomatoes produce real harvests in containers smaller than a coffee can.
Other excellent ultra-compact options include:
- Micro Tom: The world’s smallest tomato plant at just 6-8 inches
- Window Box Roma: Compact paste tomato perfect for sauces
- Balcony: Specifically bred for 12-inch containers
For Maximum Production
When yield matters more than space conservation, larger determinates in big containers deliver impressive harvests. Mountain Princess and Bush Goliath produce slicing-size tomatoes rivaling anything from traditional gardens.
High-yielding container varieties include:
- Celebrity: Widely adapted hybrid with disease resistance
- Husky Red: Compact indeterminate (semi-determinate) with heavy yields
- Better Bush: Improved flavor and production over original Bush varieties
For Hot Climates
Extreme heat stresses many tomato varieties, reducing fruit set and quality. Heat-tolerant dwarf tomato varieties maintain production when temperatures regularly exceed 90°F.
Phoenix and Heatwave II tolerate sustained heat that stops other varieties. Surefire sets fruit reliably in both cool and hot conditions, making it foolproof for unpredictable climates.
For Short Growing Seasons
Northern gardeners and high-altitude growers need early-maturing varieties that produce before autumn frost arrives. Silvery Fir Tree and Sub-Arctic Plenty ripen fruit 20-30 days faster than standard varieties.
Cold-climate champions include:
- Glacier: Ready in just 55 days from transplant
- Early Girl Bush: Compact version of popular Early Girl
- Manitoba: Bred specifically for Canadian prairies
For Shade Tolerance
While no tomato truly thrives in shade, some varieties tolerate partial shade better than others. Look for varieties noted as “shade-tolerant” in seed catalogs.
Black Cherry and Yellow Pear produce reasonably well with just 5-6 hours of direct sun. Cherry types generally handle shade better than large-fruited varieties because smaller fruits require less energy to ripen.
Companion Planting in Container Gardens 🌿
Container growing doesn’t mean abandoning companion planting principles. Strategic companion combinations maximize limited space while providing pest protection and growth benefits.
Ideal Tomato Companions for Containers
Basil: The classic pairing works beautifully in containers. Plant basil around tomato perimeters in 10+ gallon containers. Basil allegedly repels aphids and hornworms while improving tomato flavor. Whether science backs these claims or not, you’ll harvest fresh pesto ingredients alongside your patio cherry tomatoes.
Marigolds: French marigolds deter nematodes and various insects with their pungent odor. Tuck 2-3 marigold plants around container edges. They add vibrant color while potentially protecting tomato roots from soil pests.
Lettuce and Spinach: These cool-season greens grow happily beneath tomato foliage in large containers. Plant lettuce seedlings 6-8 inches from tomato stems in early spring. Harvest leaves before summer heat and tomato canopy create too much shade. This succession strategy makes efficient use of balcony garden seeds.
Oregano and Thyme: Mediterranean herbs share similar growing requirements with tomatoes. Their aromatic oils may deter certain pests. Both herbs cascade attractively over container edges, creating living mulch that shades soil and reduces moisture evaporation.
Plants to Avoid Near Tomatoes
Brassicas (Cabbage, Broccoli, Cauliflower): Heavy feeders that compete aggressively with tomatoes for nutrients. Their root zones release compounds that may inhibit tomato growth.
Fennel: Allelopathic compounds from fennel stunt nearby plant growth. Keep fennel in its own container far from tomatoes.
Potatoes: Both plants face similar diseases (blight, etc.). Growing them together doubles disease pressure and makes prevention nearly impossible.
Walnut Trees: Never position containers near black walnut trees. Juglone in walnut roots, leaves, and bark kills tomatoes and most other garden plants.
FAQ: Your Container Tomato Questions Answered ❓
❓ How many tomato plants can I grow in a 5-gallon bucket?
❓ What is the best fertilizer for tomatoes in pots?
❓ Can I reuse potting soil from last year's tomato containers?
❓ Why are my container tomato leaves turning yellow from the bottom up?
❓ Do container tomatoes need different care than garden tomatoes?
Conclusion: Your Container Tomato Success Starts Now 🌟
Growing tomato seeds for containers transforms even the smallest outdoor space into a productive food garden. Whether you’re cultivating patio cherry tomatoes on a sixth-floor balcony or filling a sunny deck with an array of dwarf tomato varieties, the rewards extend far beyond fresh produce.
The seven varieties detailed in this guide represent the cream of the crop for container growing. Each has proven itself through years of testing across diverse growing conditions. From ultra-compact Tiny Tim for windowsills to productive Mountain Princess for larger pots, you now have the knowledge to select perfect varieties for your specific situation.
Remember that success with balcony garden seeds comes from matching varieties to container size, providing consistent care, and paying attention to what your plants tell you. Those slightly curled leaves or yellowing bottom foliage aren’t random—they’re communication that attentive gardeners learn to decode.
Start small if you’re new to container growing. A single 5-gallon pot with Patio Princess or Containers Choice Red builds confidence and skills without overwhelming you. As your experience grows, expand into diverse varieties and experiment with succession planting for continuous harvests.
The investment in quality tomato seeds for containers pays dividends throughout the growing season and beyond. Those $8 worth of seeds potentially produce 15-20 pounds of organic tomatoes—easily worth $60-80 at farmers’ markets. More valuable than the dollar savings is knowing exactly what went into your food and enjoying flavors that store-bought tomatoes can’t match.
Your container tomato garden awaits. Choose your seeds, prepare your containers, and get ready to experience the incomparable satisfaction of growing your own best vegetables for pots. That first sun-warmed tomato plucked from a plant you nurtured from seed creates a connection to food that grocery store produce never provides.
Recommended for You 📚
- 7 Best Disease Resistant Tomato Seeds for Blight-Free Gardens 2026
- 7 Best Organic Seeds vs Conventional in 2026
- 7 Best Heirloom vs Hybrid Tomatoes 2026
Disclaimer: This article contains affiliate links. If you purchase products through these links, we may earn a small commission at no additional cost to you.
✨ Found this helpful? Share it with your friends! 💬🤗