
In This Article
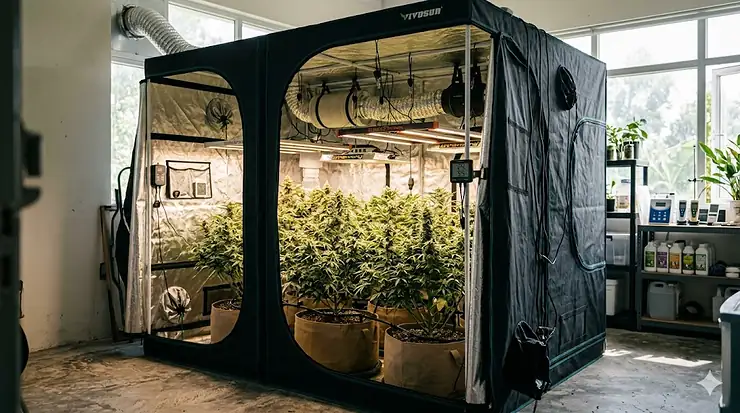
Stepping up from a standard 4×4 tent to a large indoor grow tent isn’t just about more space—it’s about fundamentally changing what’s possible in your cultivation setup. Whether you’re a home grower ready to scale beyond hobby-level production or someone planning a small commercial operation, the right extra large grow tent creates an environment where you can manage 15 to 40+ plants simultaneously while maintaining the environmental control that makes controlled-environment agriculture so effective.
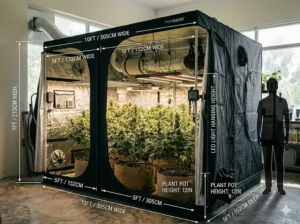
What most people don’t realize until they make the jump is that larger tents actually offer better climate stability than their smaller counterparts. That 8×8 or 10×10 footprint means you’re working with significantly more air volume, which translates to less dramatic temperature and humidity swings when you open doors for maintenance. You’re not fighting constant fluctuations the way you would in a cramped 2×2 space. The catch? You’ll need to think differently about airflow patterns, lighting coverage, and equipment placement—challenges we’ll address throughout this guide.
In this comprehensive review, I’ll walk you through seven standout options in the large indoor grow tent category, from budget-conscious 8×8 models that deliver solid performance around $200 to premium walk-in grow tent configurations that push past $1,200 but offer commercial-grade durability. Each one brings something different to the table, and your ideal choice depends on factors like ceiling height restrictions, whether you’re planning soil or hydroponic systems, and how much weight your lighting and ventilation setup will demand from the frame.
Quick Comparison: Top Large Indoor Grow Tents at a Glance
| Model | Dimensions | Canvas | Weight Capacity | Plant Count | Price Range | Best For |
|---|---|---|---|---|---|---|
| VIVOSUN S888 | 96″x96″x80″ | 600D | Standard | 16-24 | $150-$220 | Budget-conscious scaling |
| Gorilla 10×10 | 120″x120″x83″ | 1680D | 2-5x stronger frame | 36-48 | $1,150-$1,350 | Premium durability seekers |
| Mars Hydro 8×8 | 96″x96″x80″ | 1680D | 330 lbs | 16-36 | $280-$350 | Mid-range reliability |
| AC Infinity CLOUDLAB 811 | 120″x120″x80″ | 2000D | 250 lbs | 30-40 | $500-$600 | Tech-forward growers |
| Spider Farmer 8×8 | 96″x96″x80″ | 1680D | Standard | 12-16 | $200-$280 | Smart system integrators |
| Spider Farmer 5×10 | 60″x120″x80″ | 1680D | Standard | 14-18 | $180-$250 | Rectangular space optimizers |
| TopoGrow 8×8 | 96″x96″x80″ | 600D | Standard | 12-20 | $140-$190 | Entry-level large format |
Looking at this data, the pattern becomes clear: canvas density and frame strength are where premium models justify their cost. The Gorilla and AC Infinity options use thicker material that won’t develop light leaks or pinholes after 18 months of use, while budget picks like VIVOSUN and TopoGrow deliver adequate performance if you’re careful during setup and accept you might need replacement parts sooner. Plant capacity varies widely not because of floor space alone, but because of how different growers manage canopy density—a SOG approach packs in far more plants than a SCROG method in the same footprint.
💬 Just one click — help others make better buying decisions too! 😊
✨ Don’t Miss These Exclusive Deals!
🔍 Take your indoor cultivation to the next level with these carefully selected products. Click on any highlighted item to check current pricing and availability. These tools will help you create optimal growing conditions your plants will thrive in!
Top 7 Large Indoor Grow Tent: Expert Analysis
1. VIVOSUN S888 8×8 Grow Tent – Best Budget-Friendly Large Format
The VIVOSUN S888 delivers 64 square feet of growing space without requiring you to take out a second mortgage, which immediately makes it the accessibility champion in this category. At 96″x96″x80″, you’re looking at room for 16-24 plants depending on your training method, and the 600D oxford canvas with double-stitched seams provides adequate light blocking for most growers who aren’t chasing absolute perfection.
Here’s what the spec sheet won’t tell you: VIVOSUN positioned this as their volume seller, which means they prioritized cost efficiency over ultra-premium materials. The 600D canvas thickness is fine for blocking light, but after 12-18 months of regular use, you may notice minor wear at high-stress points like door corners. The metal frame handles typical LED and ventilation weight without issue, though I wouldn’t load it up with older HPS setups that push serious poundage. What makes this tent work for budget-conscious growers is the observation window design and removable floor tray—features that used to be premium-only but VIVOSUN brought downstream.
Customer feedback consistently mentions two things: straightforward assembly (most people finish in 45-60 minutes solo) and functional zipper quality that beats their previous tent experience. The complaints? Light leaks around the zipper if you don’t carefully align everything during setup, and some users report the included poles feeling slightly thin compared to premium competitors.
Pros:
✅ Accessible price point makes 8×8 growing achievable for home cultivators
✅ Observation window lets you check plant status without environmental disruption
✅ Removable floor tray simplifies cleanup after inevitable spills
Cons:
❌ 600D canvas shows wear faster than 1680D alternatives
❌ Frame may bend slightly under heavy multi-light configurations
Price-wise, you’re in the $150-$220 range depending on retailer sales. For someone graduating from a 4×4 tent but not ready to invest premium dollars, this represents solid value with the understanding you’re accepting some durability tradeoffs.
2. Gorilla Grow Tent 10×10 – Premium Choice for Long-Term Investment
When people talk about “commercial-grade” in the consumer tent space, they’re usually thinking of the Gorilla Grow Tent 10×10. With a 120″x120″x83″ footprint that’s expandable to nearly 9 feet tall with extension kits, this isn’t just a large tent—it’s a walk-in grow tent that fundamentally changes how you interact with your plants during maintenance cycles.
The differentiator here isn’t subtle: Gorilla uses 1680D “Ripsistant” fabric that’s genuinely 9 times thicker than standard budget tent material, paired with an all-steel frame construction that creates a structure rated 2-5x stronger than competing models. What this means in practice is you can hang four 1,000-watt equivalent LED fixtures, a complete carbon filtration system, and additional circulation fans without the frame developing the slight bow you see in lighter-duty tents. The 100 square feet of floor space accommodates 36-48 plants in 5-gallon containers with proper spacing, making this a legitimate room-size grow tent for serious home operations or small commercial testing.
Real-world user reports highlight the height extension capability as the game-changer—being able to start plants low and raise the ceiling as they stretch means you’re not fighting vertical restrictions during flower. The diamond reflection technology claims 30% improved light distribution, though in my experience the practical benefit is more about even coverage that reduces hot spots under fixtures. The actual flood pool (not just a tray) genuinely contains water, which matters when you’re dealing with hydroponic systems or large-scale hand-watering.
Some growers complain about light pinhole development after several months, particularly around stitched seams, though this affects a minority of users. At 159 pounds, the tent requires two people for setup and you’ll need a vehicle capable of transporting two large boxes.
Pros:
✅ Height extension system allows adaptation as plants grow taller
✅ Frame strength supports professional lighting and ventilation loads
✅ True flood pool design contains spills that would damage other tents
Cons:
❌ Premium pricing places it in the $1,150-$1,350 range
❌ Weight and size make solo setup impractical
For cultivators planning multi-year operations who can justify the upfront investment, this warehouse grow tent alternative delivers reliability that budget models simply can’t match.
3. Mars Hydro 8×8 Grow Tent – Mid-Range Sweet Spot
The Mars Hydro 8×8 occupies that middle ground where you get 1680D canvas durability without paying Gorilla-level pricing, making it the Goldilocks option for growers who’ve experienced budget tent limitations but aren’t ready for top-tier investment. At 96″x96″x80″, the footprint matches other 8×8 models, but the construction tells a different story—the frame supports up to 330 pounds of equipment, which in practical terms means you can run three to four high-wattage LED bars without structural concerns.
What separates Mars Hydro from budget competitors is their attention to light-leak prevention. The double-stitched seams paired with heavy-duty SBS zippers create a seal that holds up to daily use without requiring constant zipper re-alignment or additional light-blocking tape. The diamond mylar interior claims 98% reflectivity and a 25% boost in light intensity, though the measurable benefit is really about eliminating dead zones where light would otherwise get absorbed by lower-quality materials. For growers running mixed-spectrum LEDs or high-efficiency quantum boards, this maximizes your lighting investment.
Customer reviews consistently mention the observation window as a standout feature—it’s sized large enough for meaningful visual inspection but positioned to maintain thermal control when closed. The removable floor tray design actually stays in place during use (not always the case with budget models where trays shift around). Plant capacity ranges from 16-36 depending on whether you’re growing trees in 10-gallon pots or packing in smaller containers for a SOG approach.
The criticism? Some users report the zipper pulling away from fabric under repeated stress, though this appears to be batch-dependent. Setup takes about 60-75 minutes with two people, slightly longer than simpler budget models due to the reinforced frame assembly.
Pros:
✅ 1680D canvas provides durability at mid-range pricing
✅ 330-pound weight capacity handles professional lighting setups
✅ Diamond mylar reduces wasted light compared to flat reflective materials
Cons:
❌ Occasional zipper durability issues reported
❌ Heavier construction adds complexity to assembly
In the $280-$350 range, this hits the value zone for growers who need reliability beyond budget options but can’t rationalize premium tent costs.
4. AC Infinity CLOUDLAB 811 10×10 – Technology-Forward Premium Option
The AC Infinity CLOUDLAB 811 represents where the large indoor grow tent category is headed: professional-grade materials married to smart integration features that anticipate automation needs. At 120″x120″x80″, you’re getting 100 square feet of floor space wrapped in 2000D canvas—the thickest material currently available in consumer grow tents. This isn’t marketing fluff; the fabric genuinely feels industrial compared to standard options, and the 1-inch steel poles (versus the typical 18-22mm diameter) create a frame that supports 250 pounds without flexing.
What makes this a commercial-scale cultivation alternative is the forward-thinking design elements. The controller mounting plate with lightproof cable passthrough solves a problem most growers don’t realize they have until they’re running environmental controllers, CO2 systems, and automated irrigation through a tent—managing all those cables typically means compromising your light seal. AC Infinity built the solution directly into the tent structure. The additional cinched duct ports for humidifiers, heaters, and AC units mean you’re not drilling holes or creating custom modifications when you scale up environmental control.
The mylar lining underwent lab testing to verify it achieves highest-in-class light reflectivity, and while I’m skeptical of manufacturer claims that can’t be independently verified, the material quality is visibly superior to standard options. The taller viewing windows provide full canopy visibility without opening main doors, maintaining climate stability during check-ins. For serious growers planning 30-40 plant operations with professional lighting arrays, this provides the infrastructure other tents force you to retrofit.
Customer experiences highlight the heavy-duty catch tray and extra hanging bars as practical benefits during actual grow cycles. The complaints? Some users expect perfection at this price point and report minor stitching inconsistencies, though this affects a tiny percentage of units.
Pros:
✅ 2000D canvas represents the durability ceiling in consumer tents
✅ Integrated controller mounting simplifies automation setup
✅ Additional duct ports accommodate comprehensive climate control
Cons:
❌ Premium pricing in the $500-$600 range
❌ Feature set may exceed needs of growers not planning automation
For cultivators building professional growing operations within residential spaces, this bridges the gap between consumer tents and commercial growing structures.
5. Spider Farmer 8×8 Grow Tent – Smart Integration Champion
The Spider Farmer 8×8 earns its position through seamless integration with Spider Farmer’s GrowHub Smart System (GGS), making it the obvious choice for growers already invested in their ecosystem or planning automated environmental control. At 96″x96″x80″ with 1680D canvas, the physical specs match competitors, but the differentiating feature is the GGS-compatible smart hook system that simplifies mounting sensors, controllers, and equipment without cobbling together custom solutions.
What the product page undersells is how much cleaner your setup becomes when hardware and software anticipate each other. The enlarged observation window on this model is specifically sized to accommodate external sensors while maintaining visibility, and the extra cable port is positioned for controller routing without creating light leak vulnerabilities. For growers planning to run automated light dimming, ventilation scheduling, and climate response systems, this eliminates the frustration of retrofit modifications.
The 12-16 plant capacity represents Spider Farmer’s conservative estimate assuming larger containers and generous spacing—most growers running standard 5-gallon pots will comfortably fit 18-24 plants with proper training. The 1680D canvas provides adequate durability for multi-year use, though some customer reviews note it doesn’t feel quite as robust as Mars Hydro’s material despite sharing the same denier rating (likely a difference in weave density versus stated thickness).
User feedback splits between those thrilled with the GGS integration and those who bought the tent independently wishing they’d known about the smart system potential. Setup requires about 60 minutes with two people, and the modern white exterior finish is polarizing—some love the home-aesthetic appearance, others prefer traditional black tents that blend into basement or garage spaces.
Pros:
✅ GGS smart hook system streamlines automated growing setup
✅ Enlarged viewing window accommodates sensors and equipment
✅ White exterior offers aesthetic alternative to standard black tents
Cons:
❌ Maximum value requires investment in Spider Farmer ecosystem
❌ Some users report canvas feeling less substantial than competitors
In the $200-$280 range, this makes sense for growers planning automation who value ecosystem cohesion over standalone tent performance.
6. Spider Farmer 5×10 Grow Tent – Rectangular Space Solution
The Spider Farmer 5×10 addresses a specific real-world constraint: many basements, garages, and spare rooms aren’t square, making a standard 8×8 or 10×10 tent an awkward fit. At 60″x120″x80″, this extra large grow tent provides 50 square feet of growing space configured for rectangular areas, accommodating 14-18 plants while leaving walkway access that’s more practical than trying to wedge yourself around a square tent’s corners.
The configuration makes particular sense for growers running two separate grow lights down the length rather than a single large fixture, as you can create distinct lighting zones if needed for staggered harvest schedules. The 1680D canvas and GGS compatibility mirror the 8×8 model, so you’re getting the same smart integration potential in a different footprint. The enlarged observation window and extra cable port maintain functionality despite the altered dimensions.
What growers appreciate about this size is the workflow improvement—maintaining plants along a wall or against a long space becomes significantly easier than crawling into the back corners of square tents. You can position this with one long side accessible, set up two separate growing zones end-to-end, or dedicate one section to vegetative growth and the other to flowering if you’re creative with light scheduling.
Customer reviews mention light leak concerns more frequently than with other Spider Farmer models, suggesting the rectangular construction creates additional stress points during manufacturing. The zipper quality receives mixed feedback, with some users reporting smooth operation and others experiencing hang-ups that require careful handling.
Pros:
✅ Rectangular configuration fits non-square spaces efficiently
✅ Length allows two-zone lighting or workflow-friendly plant access
✅ Same GGS compatibility as square Spider Farmer models
Cons:
❌ More frequent light leak reports than other Spider Farmer tents
❌ Mixed zipper quality feedback
Priced in the $180-$250 range, this solves a specific spatial problem that makes it worth consideration despite some quality control inconsistencies.
7. TopoGrow 8×8 Grow Tent – Entry-Level Large Format Access
The TopoGrow 8×8 represents the absolute floor for large indoor grow tent pricing while still delivering usable performance, making it the gateway option for growers ready to scale but working with tight budgets. At 96″x96″x80″ with 600D canvas, you’re getting the same basic footprint as premium competitors but with materials and construction optimized for cost efficiency rather than long-term durability.
What TopoGrow delivers is functional space for 12-20 plants (conservative estimate based on their frame weight capacity) without the bells and whistles of mid-range options. The diamond mylar interior provides adequate reflectivity, the metal corners offer basic structural integrity, and the zippers work smoothly enough during the first 6-12 months of use. For growers who plan to upgrade to premium tents within a year or two but need immediate capacity, this serves as a temporary solution that doesn’t waste premium dollars on interim equipment.
The honest assessment is that this tent shows its budget nature during extended use. Customer feedback consistently mentions light leaks developing around zippers and stitching after several months, particularly for users in humid environments where fabric experiences more stress. Some units arrive with bent poles (usually from shipping) that require straightening before assembly. The frame handles standard LED lighting adequately but starts to bow under heavier multi-fixture setups.
What separates this from being simply “cheap” is that TopoGrow seems to understand their market position—they’re not pretending to compete with Gorilla or AC Infinity. They’re offering 64 square feet of covered growing space at a price that makes large-format cultivation accessible to growers who would otherwise be stuck with smaller tents.
Pros:
✅ Lowest price point makes 8×8 growing financially accessible
✅ Adequate performance for short-term or interim operations
✅ Basic features work sufficiently for growers with modest expectations
Cons:
❌ 600D canvas develops light leaks faster than premium alternatives
❌ Frame strength limits heavy equipment loading
❌ Quality control inconsistencies with shipping condition
At $140-$190, this fills a specific niche: growers who need immediate large-format space while saving for ultimate equipment upgrades.
Setting Up Your Large Grow Space: First 30 Days Success
Making the jump to a room size grow tent changes your cultivation workflow in ways most guides gloss over. The first critical decision happens before you even unpack the tent: floor location relative to your electrical panel and HVAC. That 8×8 or 10×10 footprint means you’re pulling significantly more power than a 4×4 setup—we’re talking 15-20 amps minimum for lights alone, plus ventilation, circulation fans, and any climate control. Running extension cords from distant outlets creates voltage drop issues that dim your lights below optimal output.
During assembly week one, take extra time leveling the tent frame before adding canvas. Large tents amplify any floor irregularities, and a tent that’s not square to the floor develops stress points at corners that accelerate wear. Use shims or adjustable feet if needed—I’ve seen growers skip this step and regret it when zippers start binding after three months. Once the canvas is on, run a complete light-leak test in total darkness before moving plants inside. Mark any problem areas with tape and address them with weather stripping or light-blocking tape, because catching issues during empty setup is far easier than discovering them mid-grow cycle.
Week two through four, focus on dialing environmental systems before introducing plants. Large tents take longer to reach stable temperature and humidity compared to smaller spaces—that increased air volume means your fans need to run longer to achieve complete air exchange. Test your ventilation system’s ability to maintain negative pressure (tent walls should pull inward slightly), which prevents odor escape and maintains climate stability. Run your lights at full power for 72 hours straight to identify any hot spots where ceiling-mounted fixtures create localized heat problems, then adjust fan placement to address circulation dead zones before they affect your plants.
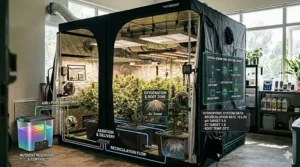
Commercial-Scale Cultivation in Residential Spaces
Transitioning from hobbyist growing to warehouse grow tent operations within a home setting requires addressing regulatory, infrastructure, and practical challenges most guides ignore. According to research from Virginia Tech on controlled environment agriculture, proper environmental management and climate control become increasingly critical as production scales up. The first conversation needs to happen with your homeowner’s or renter’s insurance—scaling to 20+ plants significantly increases fire and water damage risk, and many policies specifically exclude home-based agricultural operations. Discovering coverage gaps after a preventable accident creates financial nightmares that dwarf the cost of proper insurance riders.
Electrical infrastructure becomes critical at this scale. Most residential circuits weren’t designed to continuously support four high-wattage LED fixtures plus ventilation and climate control. You’re looking at 30-50 amps of dedicated load, which in many homes requires professional electrician consultation to verify panel capacity and potentially install dedicated circuits. The DIY approach of daisy-chaining power strips is how grow room fires start—I’ve seen aftermath photos that should convince any rational person to spend the $500-$1200 for proper electrical upgrades.
Water supply positioning determines workflow efficiency in walk-in grow tent operations. If your tent is 40 feet from the nearest water source, you’re either hauling 5-gallon buckets multiple times weekly or investing in water distribution systems. Consider installing a dedicated spigot near your grow space or running food-grade water lines with backflow prevention to avoid contaminating home water supply. Drainage matters equally—large tent operations with hydroponic systems or heavy hand-watering need floor drains or dedicated collection systems, otherwise you’re mopping up gallons of runoff that will eventually damage subfloors.
Climate Control for Large Format Spaces
Managing environment in an 8×8 or larger tent requires fundamentally different thinking than small-tent approaches. The increased air volume creates thermal momentum—temperature changes happen more slowly, which sounds like a benefit until you’re trying to cool down a space that’s crept 5 degrees above target during a summer afternoon. As noted by Ohio State University’s controlled environment agriculture research, proper climate control involves manipulating multiple variables including temperature, humidity, carbon dioxide levels, and airflow. Your ventilation system needs to be sized not just for air exchange (CFM matching tent cubic feet), but for heat removal capacity, which depends on fixture wattage, ambient room temperature, and desired tent temperature.
The math most growers get wrong is inline fan selection. A 96″x96″x80″ tent contains 4,380 cubic feet, and standard advice suggests CFM rating matching that volume for one complete air exchange per minute. Reality is more complex: you need to account for carbon filter restriction (reduces effective CFM by 25-40%), duct length and bends (each 90-degree turn reduces flow by roughly 10%), and the fact that large tents need faster exchange rates during lights-on periods when plants are respiring heavily. For an 8×8 tent, you’re realistically looking at 6-8 inch inline fans rated 400-600 CFM to maintain proper negative pressure and temperature control.
Humidity management becomes more sophisticated at this scale. Small tents can sometimes get away with passive dehumidification, but 20+ plants transpiring simultaneously in a large tent pump serious moisture into the air—we’re talking 2-4 gallons of water per day during peak growth. You’ll need active dehumidification capacity in the 50-70 pint range, positioned to create proper air circulation patterns. The trap many growers fall into is placing dehumidifiers at floor level where cold, dense air settles, while humid air rises to the canopy level where it actually causes problems.
Lighting Strategy: Covering 64-100 Square Feet
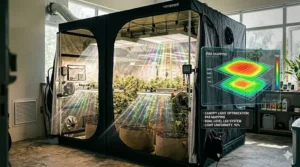
Illuminating an extra large grow tent requires rethinking fixture selection and placement compared to smaller spaces. The mistake I see repeatedly is growers who scale up tent size but maintain small-tent lighting strategy—they buy one high-wattage fixture, hang it center-tent, and wonder why edge plants underperform. Physics doesn’t work that way; light intensity follows inverse square law, meaning edges of an 8×8 tent are receiving dramatically less light than the center if you’re using a single-point source. Research published by the National Institutes of Health on indoor horticulture emphasizes the importance of tailored lighting strategies for optimal plant development in controlled environments.
The effective approach for 8×8 tents (64 square feet) is multiple mid-wattage fixtures rather than one massive light. Think three to four bars in the 200-300 watt range positioned to create overlapping coverage, versus one 1000-watt fixture trying to do everything. This distributes heat more evenly, reduces hot spots directly under fixtures, and allows you to adjust intensity across different growing zones if needed. For 10×10 tents (100 square feet), you’re looking at four to six fixtures creating a grid pattern that maintains consistent PPFD (photosynthetic photon flux density) across the entire canopy.
Fixture height becomes more critical in larger spaces. The standard advice to keep LEDs 12-18 inches from canopy works for small tents where you’re managing a few plants, but in large tents with 20-40 plants, canopy height will vary significantly unless you’re extremely dedicated to training. Raising fixtures to 24-36 inches above the tallest plants allows better light spread across the entire space, though this requires higher-wattage fixtures to maintain intensity. The balance point depends on your specific grow style—SCROG operations with uniform canopy height can run lights closer, while SOG approaches with varying plant heights need fixtures further away for even coverage.
When to Choose 8×8 vs 10×10 Configurations
The decision between 8×8 and 10×10 tent sizes involves more than simple square footage calculations. An 8×8 tent (64 sq ft) represents the practical limit for single-person maintenance while still allowing comfortable movement around plants. You can reach plants from tent edges without needing to fully enter the space, which maintains cleaner workflows and reduces contamination risks from bringing external debris onto the growing floor. Doorway access remains manageable—you can slide equipment in and out without requiring strategic planning.
A 10×10 tent (100 sq ft) crosses into walk-in grow tent territory where you’re functioning inside the space rather than reaching in from outside. This changes maintenance routines significantly; you’ll spend more time inside the tent during watering, training, and harvesting operations, which means thinking about pathways between plant rows, positioning equipment for easy access, and ensuring you’re not damaging plants while maneuvering. The upside is substantially increased yield potential—that extra 36 square feet translates to 12-15 additional plants in typical configurations, but the workflow tradeoffs need consideration.
From a purely practical standpoint, most residential grow spaces are better served by 8×8 tents unless floor space genuinely allows for 10×10 setups with comfortable surrounding clearance. A 10×10 tent placed in a 10×11 room creates a miserable experience—you’re brushing against tent walls during access, can’t properly position ventilation equipment, and risk damaging tent fabric through incidental contact. The rule of thumb is 2-3 feet of clearance on at least two sides (preferably three) for comfortable operation, meaning you need a 12×13 room minimum for 10×10 tent success.
Ventilation Requirements: Moving Air at Scale
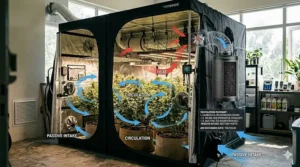
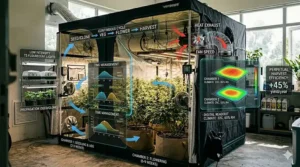
Proper air movement in large indoor grow tents requires thinking about three distinct airflow types: intake air replacement, internal circulation, and exhaust removal. Most growers get the first and third right (inline fans moving air in and out) but neglect internal circulation, which in large tents creates microclimates where individual plants experience dramatically different conditions despite being in the same tent.
Intake requirements for 8×8 and larger tents exceed simple passive intake that works in smaller setups. While you can technically rely on negative pressure to pull air through lower vents, this creates uneven air distribution where areas near intake vents receive fresh air while far corners become stagnant. Active intake using a lower-CFM fan (about 60-70% of your exhaust fan rating) pushes fresh air into the tent’s lower levels where it naturally rises through the canopy, creating even distribution. Position intake fans to blow across plant bases rather than directly at them, maintaining gentle air movement without causing wind stress.
Internal circulation in large spaces requires 2-4 oscillating fans strategically positioned to create overlapping coverage zones. The goal isn’t hurricane-force wind (which damages plants), but gentle, consistent air movement that prevents stagnant pockets. Position one fan low to circulate air through plant bases, one or two at mid-canopy level creating gentle leaf movement, and potentially one near the ceiling to disrupt thermal layering. The indicator you’ve got circulation right is subtle leaf movement throughout the entire canopy—if some plants remain still while others dance, you’ve got dead zones that encourage mold and pest establishment.
FAQ: Large Indoor Grow Tent Essentials
❓ How many plants can you fit in a large indoor grow tent?
❓ What size inline fan do I need for an 8x8 grow tent?
❓ Do large grow tents need more ventilation than smaller ones?
❓ How much does it cost to run a large indoor grow tent?
❓ Can I put a walk-in grow tent in my basement?
Conclusion: Choosing Your Ideal Large Format Setup
Selecting the right large indoor grow tent comes down to honestly assessing three factors: your actual budget including all supporting equipment, your maintenance workflow preferences, and your growth timeline. Budget growers starting out should consider the VIVOSUN S888 or TopoGrow 8×8 as capacity-building tools with the understanding these serve as stepping stones rather than permanent solutions. You’ll likely upgrade within 18-24 months, but they provide immediate scaling ability without requiring premium investment before you’ve proven the operation model works for you.
Mid-range growers planning 2-3 year operations benefit most from the Mars Hydro 8×8 or Spider Farmer 8×8, which balance durability with reasonable pricing. These tents survive multiple grow cycles without major degradation, handle professional lighting setups, and include quality-of-life features that reduce daily frustration. If you’re already invested in smart growing systems or planning automation, the Spider Farmer GGS compatibility makes sense; otherwise, Mars Hydro delivers slightly more robust construction at similar pricing.
Premium buyers building commercial-scale cultivation operations or committed to long-term residential growing should focus on Gorilla or AC Infinity options. Yes, you’re paying 3-5x budget tent pricing, but the durability difference is real—these tents last 5+ years with minimal degradation, support heavy professional equipment without structural concerns, and include design features that budget manufacturers simply don’t think about. The Gorilla 10×10 delivers maximum floor space with proven reliability, while the AC Infinity CLOUDLAB 811 brings forward-thinking integration features that anticipate automation needs.
Whatever size you choose, remember that the tent is just infrastructure—success comes from the environment you create inside it. Start with stable climate control, dial in consistent watering practices, and gradually optimize from there. Large tents give you room to experiment with multiple strains simultaneously, test different growing techniques side by side, and ultimately achieve yields that make the entire operation worthwhile.
Recommended for You
- 7 Best Gorilla Grow Tent 8×8 Models – 2026
- 7 Best Gorilla 4×8 Grow Tent Options for Serious Growers in 2026
- 7 Best 5×5 Grow Tent Setups for Maximum Yields (2026)
Disclaimer: This article contains affiliate links. As an Amazon Associate, I earn from qualifying purchases. If you purchase products through these links, we may earn a small commission at no additional cost to you.
✨ Found this helpful? Share it with your friends! 💬🤗
