
In This Article
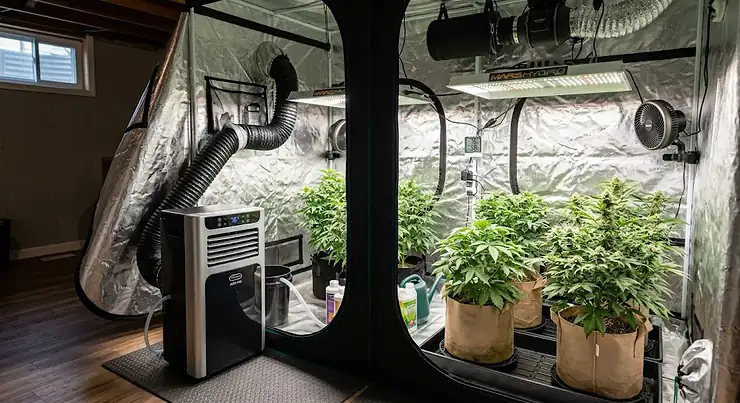
Somewhere around week three of flower, your tent thermometer creeps past 88°F and stays there, and suddenly your canopy looks tired even though you did everything “right.” That’s usually the moment growers start searching for a portable ac for grow tent use, and honestly, it should have happened a lot sooner. A portable AC is a self-contained cooling unit that vents hot air through a duct hose while chilling and dehumidifying the air left behind — no permanent installation, no contractor, just a box on wheels standing between your plants and a heat wave. 🌡️
Grow lights are the real culprit here. A 600W LED can dump over 2,000 BTUs of heat into a sealed tent every hour, and once summer ambient temps stack on top of that, fans alone stop cutting it. That’s the gap a dedicated cooling unit fills, and it’s why this guide exists — to walk you through seven real, currently available units, how to size one correctly, and what actually happens to your plants when you get it wrong.
We tested spec sheets against verified buyer feedback rather than manufacturer marketing copy, cross-referencing cooling capacity, noise levels, and real-world tent performance. You’ll find budget-friendly picks alongside premium purpose-built units, an honest look at where portable ACs fall short of mini-splits, and a full BTU sizing walkthrough so you’re not guessing. Whether you’re running a single 2×4 tent in a spare closet or a 5×5 operation with multiple lights, there’s a sizing tier here that fits — along with the reasoning to pick the right one instead of the biggest one.
What Is a Portable AC for Grow Tent Use?
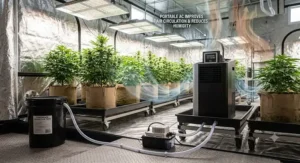
A portable ac for grow tent applications is a freestanding, wheeled air conditioner that cools and dehumidifies a sealed growing space by drawing in warm air, chilling it with a refrigerant compressor, and exhausting the extracted heat outside through a flexible duct hose — all without permanent ductwork or wall-mounted components.
Quick Comparison Table
Before diving into full reviews, here’s a fast snapshot of how the seven units stack up on the metrics that matter most for grow tent cooling: BTU capacity, hose configuration, and ideal tent size. According to ENERGY STAR’s sizing guidance, undersizing a cooling unit is one of the most common — and most expensive — mistakes buyers make, since an underpowered AC runs constantly without ever hitting target temperature.
| Product | BTU | Hose Type | Best For |
|---|---|---|---|
| AC Infinity TERRAFORM 7 | 8,000 | 4-way ducted | Serious growers wanting VPD automation |
| Whynter ARC-14S | 14,000 | Dual-hose | Hot climates, larger tents |
| VIVOSUN AeroLush C08 | 8,000 | Single-hose | Canopy-level probe monitoring |
| BLACK+DECKER BPACT14WT | 14,000 | Single-hose | Bigger tents on a mid budget |
| Frigidaire FHPH132AB1 | 13,000 | Single-hose | Remote app monitoring |
| SereneLife SLPAC10 | 10,000 | Single-hose | Budget 3×3 to 4×4 tents |
| Garvee 3-in-1 | 8,000 | Single-hose | First-time growers on a budget |
Reading across this table, the split between purpose-built grow units (AC Infinity TERRAFORM 7, VIVOSUN AeroLush C08) and repurposed general-use portable ACs (everything else) is the real decision fork here — the former cost more but talk directly to your grow environment, while the latter simply move BTUs without knowing a VPD chart from a hole in the ground. Dual-hose units like the Whynter ARC-14S also earn their premium by avoiding the negative-pressure problem that plagues single-hose models in sealed tents, a detail we’ll unpack further down.
💬 Found a pick you like already? Tap through and check today’s price before it changes.
💬 Just one click — help other golfers find the right club for their game too!😊
Top 7 Portable ACs for Grow Tents: Expert Analysis
Every unit below is real, currently sold, and evaluated on cooling capacity, noise, hose design, and aggregated buyer sentiment — not manufacturer claims. Prices shift constantly, so treat the ranges here as a starting point for research, not gospel.
1. AC Infinity TERRAFORM 7 — VPD-aware climate control for serious tents
What sets the AC Infinity TERRAFORM 7 apart isn’t raw cooling power, it’s that the unit actually understands what “climate” means to a plant, not just a thermostat. Rated at 8,000 BTU and built to cover tents up to 10x10x10 feet, it runs off a 4-way ducting system that can be reconfigured for positive, negative, or neutral pressure — meaning it doubles as odor control alongside temperature control. Based on the spec comparison against general-purpose units, the built-in VPD (vapor pressure deficit) triggers are the real differentiator: the unit reads temperature, humidity, and leaf-level data together rather than reacting to a single number, which matters enormously during flower when small humidity swings invite bud rot. This is the pick for growers who’ve already dialed in the basics and want automation that reduces daily babysitting, not a first unit for someone still learning what VPD even means. Reviewers consistently note that the WiFi app connectivity works reliably for remote monitoring, though a few mention the learning curve on the ten-level programming isn’t instant.
Pros:
- ✅ VPD-based automation beyond simple temperature control
- ✅ 4-way ducting allows pressure and odor management
- ✅ WiFi app monitoring works well for remote checks
Cons:
- ❌ Steeper learning curve than a basic thermostat unit
- ❌ 8,000 BTU ceiling limits it to smaller footprints
Expect to pay in the $400-$550 range at the time of research — a premium price, but one that buys genuine climate automation rather than just cold air.
2. Whynter ARC-14S — dual-hose efficiency for hot climates
The Whynter ARC-14S solves the single biggest inefficiency in portable cooling: negative pressure. Its dual-hose design pulls fresh outdoor air in for the condenser instead of sucking conditioned tent air back out, which — based on the spec comparison — translates to meaningfully faster recovery after you open the tent flap to check on plants. At 14,000 BTU, this unit has real headroom for larger tents or multiple lights, something the 8,000 BTU purpose-built units on this list simply can’t match. What most buyers overlook about dual-hose units is that the efficiency gain isn’t cosmetic — DOE testing shows single-hose designs can lose 30-40% of their effective cooling to that negative-pressure drag, so the Whynter ARC-14S is doing genuinely different work, not just bigger-number marketing. This is the call for growers in hot climates or anyone running more than one light in a 4×8 or 5×5 tent. Aggregated buyer feedback frequently praises the unit’s ability to hold steady temperatures during heat waves, with occasional complaints about its footprint being larger than expected.
Pros:
- ✅ Dual-hose design avoids negative-pressure inefficiency
- ✅ 14,000 BTU handles larger tents and multiple lights
- ✅ Strong reputation for holding temperature during heat waves
Cons:
- ❌ Bulkier footprint than single-hose competitors
- ❌ Higher price point than similarly rated single-hose units
Prices typically land in the $450-$600 range, and for anyone battling genuinely hot ambient conditions, the efficiency alone can justify the gap over cheaper single-hose alternatives.
3. VIVOSUN AeroLush C08 — canopy-level probe monitoring
The standout here is the trailing temperature and humidity probe, which you plant directly at canopy height instead of relying on the sensor built into the unit’s housing. That one design choice changes everything about how the VIVOSUN AeroLush C08 actually cools your space. At 8,000 BTU, it’s sized for a standard 4×4 tent running a single 600W LED, and because the probe reads conditions where your plants actually live rather than the air near the compressor, the unit responds to real growing conditions instead of a proxy measurement. Here’s what to weigh: this precision comes from the same 8,000 BTU ceiling as budget units, so it isn’t more powerful, it’s more accurate — a meaningful distinction for dialing in VPD during flower but less relevant if you’re just trying to keep a tent from cooking. Reviewers who ran this unit through a full summer season report that the companion app’s remote alerts caught temperature drift before it became a problem, which is difficult to verify independently but lines up with the sensor placement logic.
Pros:
- ✅ Canopy-level probe reads real plant-zone conditions
- ✅ App alerts flag temperature drift in real time
- ✅ Sized appropriately for standard 4×4 single-light tents
Cons:
- ❌ Same 8,000 BTU cap as budget competitors
- ❌ Probe placement requires some initial trial and error
Expect a price range around $350-$480, positioning it as a mid-range pick for growers who value precision over raw output.
4. BLACK+DECKER BPACT14WT — bigger cooling for bigger tents
When a tent runs hot no matter what you try, the BLACK+DECKER BPACT14WT brings the brute-force answer: 14,000 BTU of cooling capacity in a widely available, easy-to-source unit. The remote control is a small but genuinely useful detail for growers who don’t want to open the tent and disturb plants just to bump the temperature down two degrees. Based on the spec comparison, this unit trades the grow-specific intelligence of the AC Infinity TERRAFORM 7 for sheer capacity — there’s no VPD logic here, just a strong compressor and a straightforward digital display, which is exactly what larger tents running 1000W HPS fixtures actually need most. The included window venting kit makes installation reasonably painless for a first-timer. Growers running bigger operations or multiple high-wattage lights consistently rate this unit highly for holding consistent temperatures even during sustained summer heat, with the main complaint being the compressor noise at full power.
Pros:
- ✅ 14,000 BTU handles larger tents or multiple lights
- ✅ Remote control avoids disturbing plants for adjustments
- ✅ Straightforward setup with an included window kit
Cons:
- ❌ No grow-specific VPD or climate automation
- ❌ Noticeably louder than dual-hose or inverter models
Pricing generally sits in the $380-$500 range, making it a solid value pick when raw cooling capacity matters more than smart features.
5. Frigidaire FHPH132AB1 — remote app monitoring on a budget
The Frigidaire FHPH132AB1 earns its spot by putting smartphone control within reach of growers who don’t want to pay AC Infinity prices for it. Rated around 13,000 BTU, it’s positioned squarely between the compact 8,000 BTU units and the heavier-duty 14,000 BTU options, which makes it a flexible middle ground for a 4×6 or small 5×5 setup. What the spec sheet won’t tell you, but tech-savvy buyers note, is that the app’s scheduling function lets you run the unit harder during lights-on hours and ease off during lights-off periods automatically — a manual version of what the pricier automated units do natively. This is the pick for growers comfortable setting up their own schedule logic rather than paying for a unit that does the VPD math for them. Aggregated reviews describe the app as reliable for remote adjustments, though a handful of users report occasional WiFi drop-offs requiring a restart.
Pros:
- ✅ Smartphone app control at a below-premium price
- ✅ 13,000 BTU fits mid-sized tents comfortably
- ✅ Scheduling function supports lights-on/lights-off cycling
Cons:
- ❌ Occasional WiFi connectivity drops reported by users
- ❌ Lacks true VPD sensing found in grow-specific units
Look for it in the $350-$470 range depending on retailer, a fair trade for app control without the full grow-tech price tag.
6. SereneLife SLPAC10 — budget pick for small to mid tents
For a first tent, spending premium dollars on climate automation rarely makes sense, and that’s exactly the gap the SereneLife SLPAC10 fills. At 10,000 BTU, it slightly outsizes the compact 8,000 BTU units without stepping into the bulkier 14,000 BTU category, landing it comfortably in the sweet spot for a 4×4 or 5×5 tent with a single mid-power light. Based on the spec comparison, this unit doesn’t try to compete on smart features — it’s a straightforward compressor, a basic digital display, and a self-evaporating system that reduces (though doesn’t eliminate) manual tank draining. That simplicity is the honest selling point: fewer features means fewer things to troubleshoot when you’re already juggling nutrients, lighting schedules, and pest management. Reviewers consistently describe it as reliable for the price, with the most common complaint centering on the plastic build quality feeling less durable than pricier competitors over long-term daily use.
Pros:
- ✅ Sized well for 4×4 to 5×5 single-light tents
- ✅ Self-evaporating system reduces manual tank draining
- ✅ Low price point for a full-featured 10,000 BTU unit
Cons:
- ❌ Plastic housing feels less durable long-term
- ❌ No app connectivity or smart scheduling features
Typical pricing runs $280-$380, making this one of the more approachable entry points on this list.
7. Garvee 3-in-1 Portable Air Conditioner — value pick for first-time growers
Skepticism is the right instinct when a budget unit promises cooling, dehumidifying, and fan modes for less than half the price of premium competitors — but the Garvee 3-in-1 largely backs up the claim for small-scale use. At 8,000 BTU, it’s matched to a 4×4 or smaller tent running a single light in the 400-600W range, and the 24-hour programmable timer is a genuinely useful inclusion at this price point, letting growers schedule harder cooling during lights-on hours to save on electricity. Here’s what to weigh: this unit won’t touch a 5×5 tent with multiple HID lights, so buyers need to be honest about their footprint before assuming the low price extends to bigger setups. Aggregated customer feedback skews notably positive, with a large share of reviews citing consistent performance for the price and few complaints beyond the expected compressor hum common to budget compressors.
Pros:
- ✅ Lowest entry price among the units on this list
- ✅ 24-hour timer supports lights-on/lights-off scheduling
- ✅ Strong aggregated review sentiment for a budget unit
Cons:
- ❌ 8,000 BTU limits it to smaller single-light tents
- ❌ Compressor noise is more noticeable than premium models
Expect a price range around $220-$320, making it the most accessible entry point for anyone testing the waters with their first grow tent.
Top 7 Portable ACs for Grow Tents at a Glance
| Product | BTU | Best For | Price Range |
|---|---|---|---|
| AC Infinity TERRAFORM 7 | 8,000 | VPD automation | $400-$550 |
| Whynter ARC-14S | 14,000 | Hot climates, larger tents | $450-$600 |
| VIVOSUN AeroLush C08 | 8,000 | Canopy-level precision | $350-$480 |
| BLACK+DECKER BPACT14WT | 14,000 | Larger tents, raw capacity | $380-$500 |
| Frigidaire FHPH132AB1 | 13,000 | App control on a budget | $350-$470 |
| SereneLife SLPAC10 | 10,000 | Budget-friendly mid-size tents | $280-$380 |
| Garvee 3-in-1 | 8,000 | First-time growers | $220-$320 |
Stacked side by side, the price-to-BTU ratio makes an interesting case for the BLACK+DECKER BPACT14WT if capacity is your priority, since it delivers 14,000 BTU for less than the Whynter ARC-14S asks for the same rating — the trade-off being dual-hose efficiency you give up in exchange. Meanwhile, both grow-specific units (AC Infinity TERRAFORM 7 and VIVOSUN AeroLush C08) cluster at the same 8,000 BTU ceiling despite different price points, confirming that their premium comes from intelligence rather than horsepower.
BTU Sizing Guide: How Many BTUs Does Your Grow Tent Actually Need?
Getting BTU sizing wrong is the single most common mistake in this hobby, and it cuts both ways — an undersized unit runs constantly without ever reaching target temperature, while an oversized one short-cycles and fails to pull moisture out of the air properly, according to DOE’s federal purchasing guidance on room air conditioner sizing. The math starts with your lighting, not your tent’s square footage, because lights are almost always the dominant heat source in a sealed grow space.
- Calculate your LED heat load. LED fixtures convert roughly 30-40% of their wattage to heat, translating to about 3.4 BTU/hr per watt of actual draw — so a 600W LED adds around 2,000-2,400 BTU/hr.
- Calculate your HPS/HID heat load if applicable. These fixtures run hotter, contributing 4.0-4.5 BTU/hr per watt, meaning a 1000W HPS adds roughly 4,000-4,500 BTU/hr on its own.
- Add equipment heat. Inline fans, pumps, and other electronics contribute a smaller but real load — budget an extra 10-15% on top of your lighting total.
- Add a 20-30% safety margin. This accounts for ambient room heat gain, wall conduction, and the reality that peak summer days push harder than your baseline calculation assumes.
- Match your total to a real BTU rating. A 4×4 tent with a single 600W LED typically lands in the 8,000-10,000 BTU range; a 5×5 or larger tent with multiple lights often needs 12,000-14,000 BTU or more.
- Round up, never down. When your calculation lands between two common unit sizes, choose the larger rating — an oversized-by-a-little unit is far less costly than one that never catches up.
- Reassess seasonally. Your winter heat load and summer heat load are not the same number, and a unit sized for a mild spring may fall short once ambient temperatures climb.
| Tent Size | Light Load | Recommended BTU |
|---|---|---|
| 2×4 ft | 300-400W LED | 6,000-8,000 |
| 4×4 ft | 600W LED | 8,000-10,000 |
| 5×5 ft | 600-800W LED | 10,000-12,000 |
| 4×8 or 5×5 (multi-light) | 1000W+ HID/HPS | 12,000-14,000+ |
This chart is a starting point, not a substitute for the math above — a 4×4 tent in a hot attic or garage will need to round up a tier compared to the same tent in a climate-controlled basement, since ambient heat gain compounds whatever your lights are already producing.
✨ Compare BTU Ratings Side by Side Before You Buy!
🔍 Check the current specs on any of these seven units to confirm the BTU rating matches your calculated heat load — sizing correctly the first time saves you a return and a summer of temperature swings.
How to Choose a Portable AC for Grow Tent Setups
- Start with BTU sizing, not price. Work through the calculation above before you compare a single product — buying based on budget first is how growers end up with an underpowered unit.
- Decide between single-hose and dual-hose. Dual-hose units cost more upfront but avoid the negative-pressure drag that makes single-hose units work harder for the same result.
- Weigh grow-specific features against general-purpose ones. VPD triggers and canopy probes are genuinely useful in flower but add cost that beginners running a simple veg tent may not need yet.
- Check the exhaust and drainage setup. Confirm the tent has a ducting port sized for the unit’s hose, and understand whether the unit self-evaporates or needs manual tank draining.
- Factor in noise level. A compressor running inches from a bedroom wall is a different consideration than one in a garage or basement — check aggregated noise complaints before buying.
- Look at real aggregated review sentiment, not star averages alone. A 4.5-star rating built on hundreds of reviews tells you more than a 5.0 average built on a dozen.
- Confirm the return policy before opening the box. BTU needs are easy to miscalculate on a first attempt, and a flexible return window protects you from a costly sizing mistake.
Mini AC vs Full-Size Units: Which Fits Your Grow Tent
The term mini ac grow tent gets thrown around loosely, but it typically refers to compact 6,000-8,000 BTU units built for 2×2 to 4×4 tents rather than a genuinely different technology. The appeal is obvious: less floor space consumed inside an already cramped tent footprint, lower upfront cost, and often quieter operation since smaller compressors simply move less air. The trade-off is equally obvious once you do the BTU math — a mini unit sized for a single 300-400W LED will run constantly and still lose ground in a 5×5 tent under a 1000W HPS fixture, turning a “budget-friendly” purchase into a unit that never actually reaches target temperature.
Full-size 12,000-14,000 BTU units solve that headroom problem but introduce their own costs: more floor space consumed, higher electricity draw, and often more noise. The honest answer is that a mini ac grow tent setup makes sense specifically for small single-light tents where minimizing footprint matters as much as cooling capacity — for anything larger, sizing up is cheaper in the long run than running an undersized unit around the clock trying to catch up.
Air Conditioner Grow Tent Setup: Practical Usage Guide
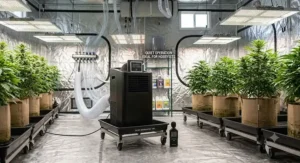
Getting an air conditioner grow tent installation right on day one prevents most of the problems growers report in their first month. Start by routing the exhaust hose through the tent’s largest ducting port, sealing any gaps with the included collar or a bit of foam tape — a poorly sealed port lets hot exhaust air leak straight back into the tent, undermining the entire point of running the unit. Position the AC unit so cool air discharges toward the canopy center rather than a single corner, since uneven airflow creates hot pockets that skew temperature readings if your thermometer sits somewhere the cool air never reaches.
For the first 30 days, common mistakes include placing the sensor too close to the compressor’s own exhaust (giving an artificially cool reading while the actual canopy stays hot), running the unit at maximum cooling constantly rather than letting the thermostat cycle naturally, and forgetting to check the condensate drain or evaporation tray weekly — a full tray can trip a shutoff or, worse, overflow into your grow medium. Set a maintenance reminder to clean the intake filter monthly; a clogged filter forces the compressor to work harder for the same output, quietly inflating your electricity bill. Once the unit is dialed in, layer in an oscillating fan to distribute cooled air evenly across the canopy rather than relying on the AC’s own airflow alone — this single addition resolves most of the hot-corner complaints growers report after their first cooling season.
Real-World Scenarios: Matching Growers to the Right Grow Room AC Unit
The apartment grower: Running a 2×4 tent with a single 400W LED in a spare closet, noise and footprint matter as much as cooling power. A compact 8,000 BTU unit like the Garvee 3-in-1 or VIVOSUN AeroLush C08 fits the footprint without overwhelming a small closet, and the timer function on either lets cooling ramp up specifically during lights-on hours to keep the electricity bill in check.
The hot-climate multi-light grower: Running a 5×5 tent with two 600W LEDs in a Southwest garage where ambient summer temps regularly clear 95°F, undersizing is the real risk here. The Whynter ARC-14S or BLACK+DECKER BPACT14WT provide the 14,000 BTU headroom needed to keep pace, with the dual-hose design of the Whynter unit earning back some of its higher price through reduced negative-pressure strain during the hottest stretches.
The dialed-in flower specialist: Already comfortable with VPD charts and chasing consistency through flower, this grower benefits most from the AC Infinity TERRAFORM 7‘s automated triggers, which respond to leaf-level conditions rather than requiring manual adjustment every time humidity shifts during the sensitive final weeks before harvest.
Grow Tent Cooling: Portable AC vs Fans, Evaporative Coolers, and Mini-Splits
Grow tent cooling isn’t a single-technology problem, and portable ACs are only the right tool for certain situations. Oscillating fans move air and reduce localized hot spots, but they cannot remove heat from a sealed tent — they simply redistribute the same total BTU load, which is why fans alone fail once a light-heavy tent crosses a certain wattage threshold. Evaporative coolers add moisture while cooling, which sounds appealing until you remember that most flowering setups need lower humidity, not higher — making evaporative cooling a poor match for late-stage grows in humid climates. Mini-split systems, as noted in comparisons across the industry, deliver the best long-term efficiency and quietest operation of any option, but require a permanent outdoor compressor placement and professional-grade installation that a rented apartment or temporary tent setup simply can’t accommodate.
| Method | Removes Heat? | Installation | Best For |
|---|---|---|---|
| Oscillating fan | No (redistributes only) | None | Air circulation, not cooling |
| Evaporative cooler | Yes, adds humidity | Minimal | Dry climates, early veg |
| Portable AC | Yes | Ducting port only | Tents without permanent install access |
| Mini-split | Yes, most efficient | Professional, permanent | Dedicated grow rooms |
Reading this comparison, portable units occupy the practical middle ground — genuine heat removal without the humidity trade-off of evaporative cooling or the installation commitment of a mini-split. For a renter or anyone unwilling to drill through an exterior wall, a portable AC remains the only option that actually addresses the underlying heat load rather than working around it.
Summer Temperature Management: Keeping Your Tent Stable in Peak Heat
Summer temperature management is where most portable AC purchases actually get tested, since a unit that performs fine in April can fall short once ambient room temperatures climb past 85°F in July. The core challenge is that your AC isn’t just fighting your lights anymore — it’s fighting the heat leaking into your grow space from the room around it, and that additional load rarely gets factored into initial BTU calculations made during cooler months. Growers in un-air-conditioned garages, attics, or south-facing rooms should plan to round their BTU sizing up by one full tier compared to the baseline chart, since ambient heat gain compounds directly with lighting heat rather than replacing it.
Beyond sizing, timing matters. Running your cooling unit at a slightly lower fan speed continuously outperforms blasting maximum cooling intermittently, since research on indoor plant environments confirms that stable conditions support healthier growth better than dramatic swings, even if the swings average out to the same number. Shifting your lights-on period to cooler overnight hours during the hottest weeks — running lights from evening through early morning instead of daytime — is a free adjustment that meaningfully reduces the peak cooling demand your AC has to meet, since it no longer has to fight both grow-light heat and midday ambient heat simultaneously.
Heat Stress Prevention: What Happens When Your Grow Tent Runs Too Hot
Heat stress prevention isn’t just about comfort — sustained high temperatures measurably damage plant tissue and reduce yield. According to Oregon State University Extension, plant growth slows once temperatures sustain above 90°F for extended periods, and many plants begin showing visible stress signs well before reaching dangerous extremes. In a sealed grow tent, that threshold arrives faster than growers expect, since the enclosed space traps heat that would otherwise dissipate.
Common signs of heat stress include leaf cupping or rolling — the plant’s attempt to reduce leaf surface area and slow moisture loss — along with wilting, which signals the plant can no longer maintain internal water pressure against the rate of evaporation. During flower specifically, sustained heat stress can cause “foxtailing” or uneven bud development as the plant reallocates energy toward survival rather than steady growth. The frustrating part is that by the time visible symptoms appear, some yield impact has typically already occurred, which is exactly why proactive cooling — sized correctly from the start — beats reactive troubleshooting after the canopy already looks stressed. A correctly sized portable AC, checked daily during the hottest weeks of summer, is the single most effective heat stress prevention measure available to an indoor grower without professional HVAC access.
Common Mistakes When Buying a Portable AC for Grow Tent Setups
Undersizing tops the list by a wide margin — growers frequently size for their tent’s square footage rather than their lighting’s actual heat output, missing the fact that a 4×4 tent under a single 300W LED and a 4×4 tent under a 1000W HPS have wildly different cooling needs despite identical floor space. A close second is ignoring hose configuration: buying the cheapest single-hose unit without understanding the negative-pressure penalty, then wondering why the unit seems to underperform its rated BTU once installed. Skipping noise research is another frequent regret, particularly for growers placing a unit in a bedroom closet or shared living space, where a compressor rated at 55-60 decibels can be genuinely disruptive.
Growers also commonly overlook drainage requirements, assuming every unit self-evaporates when several budget models require manual tank emptying every few days — a detail buried in the specs rather than the marketing copy. Finally, chasing smart features before nailing basic sizing is a subtler mistake: a WiFi-connected unit that’s still undersized for your tent doesn’t solve your actual problem, it just lets you watch the temperature climb from your phone instead of standing in front of the tent.
Long-Term Cost & Maintenance
The purchase price is only the entry cost — electricity draw is where portable ACs differentiate meaningfully over a full grow season. An 8,000 BTU unit typically draws 700-900 watts, while a 14,000 BTU unit can pull 1,100-1,400 watts depending on efficiency rating, meaning the difference between the smallest and largest units on this list can add up to real money if you’re running cooling for 12+ hours daily across an entire grow cycle. Dual-hose and inverter-style compressors, like the one in the Whynter ARC-14S, typically use 30-40% less energy than comparable single-speed single-hose units for the same cooling output, which can offset a chunk of the higher upfront price over a season or two.
Maintenance costs stay relatively low across all seven units here — monthly filter cleaning, periodic condensate draining on non-self-evaporating models, and an occasional coil check are standard across the board. The bigger long-term cost consideration is unit lifespan: cheaper compressors under near-constant summer duty tend to show wear faster than premium units built for continuous-cycle use, so growers running cooling nearly around the clock during peak summer should weigh the AC Infinity TERRAFORM 7 or Whynter ARC-14S‘s higher upfront cost against a shorter expected lifespan from budget alternatives under the same workload.
FAQ
❓ How many BTUs do I need for a 4x4 grow tent?
❓ Can I use a regular portable AC in a grow tent?
❓ Is a single-hose or dual-hose AC better for a grow tent?
❓ Do portable ACs remove humidity from a grow tent?
❓ How do I stop my grow tent from overheating in summer?
Conclusion
Choosing the right portable ac for grow tent cooling really comes down to two honest questions: how much heat is your lighting actually producing, and how much are you willing to pay to manage that heat intelligently versus just powerfully. Budget picks like the Garvee 3-in-1 and SereneLife SLPAC10 handle small single-light tents reliably without unnecessary features, while the AC Infinity TERRAFORM 7 and VIVOSUN AeroLush C08 justify their premium through genuine climate precision for growers already dialed into VPD management. For larger tents or genuinely hot climates, the extra capacity and dual-hose efficiency of the Whynter ARC-14S or the straightforward power of the BLACK+DECKER BPACT14WT close the gap that smaller units simply can’t reach.
Whatever you choose, get the BTU math right before you get anything else right — a beautifully featured unit that’s undersized for your lighting will disappoint you just as thoroughly as the cheapest unit on the market. Size correctly, seal your ducting properly, and give the unit a full lights-on cycle to prove itself before assuming something’s wrong.
✨ Ready to Cool Your Grow Tent the Right Way?
🔍 Compare current pricing and availability on any of these seven units, and check the BTU sizing chart above one more time before you check out — your plants will thank you by the time peak summer heat arrives.
Recommended for You
- Fogger for Grow Tent: 7 Proven Picks That Fix Dry Air Fast (2026)
- Cool Mist Humidifier Grow Tent: 7 Best Picks for 2026
- Electric Dehumidifier Tent: 7 Top Picks to Stop Mold in 2026
Disclaimer: This article contains affiliate links. As an Amazon Associate, I earn from qualifying purchases. If you purchase products through these links, we may earn a small commission at no additional cost to you.
✨ Found this helpful? Share it with your friends! 💬🤗
