
In This Article
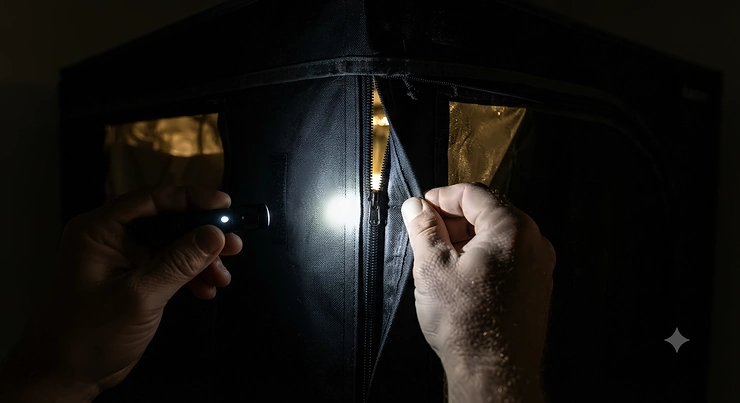
A grow tent light leak is any gap, pinhole, or seam in a tent’s fabric, zipper, or vent where outside light sneaks in — or where your grow light sneaks out — during the dark cycle. It sounds tiny. It isn’t. A stray sliver of light hitting your canopy at 2 a.m. can be the difference between a clean harvest and a stressed-out plant that decides to grow pollen sacs out of spite.
I’ve talked to enough growers (and read enough late-night forum meltdowns) to know that light leaks are the quiet killer of home grows. Nobody notices the pinhole by the zipper pull until week three of flower, when suddenly there’s a weird nub where a calyx should be. The good news: this is one of the most fixable problems in indoor gardening, and it usually comes down to picking the right tent and sealing the handful of predictable weak points every tent has. Even outdoor growers dealing with light pollution from streetlights face the same core issue — plants need genuinely uninterrupted darkness to behave the way they’re supposed to. That principle, sometimes called photoperiodism, is the whole reason tent construction quality matters as much as it does.
Below, I’ve broken down seven real, currently available grow tents — budget through premium — based on their actual canvas thickness, zipper design, and reported leak performance, plus the fixes, comparisons, and buyer logic you need to make a confident call. No fluff, no invented reviews, just what the specs and the grower community actually say.
Quick Comparison Table
| Tent | Best For | Canvas | Price Range |
|---|---|---|---|
| AC Infinity CLOUDLAB 844 | Best overall lightproofing | 2000D diamond mylar | $150-$200 range |
| Gorilla Grow Tent | Heaviest equipment loads | 1680D reinforced | $250-$350 range |
| VIVOSUN S448 | Best value 4×4 | 600D double-stitched | $100-$140 range |
| Mars Hydro Grow Tent Kit | All-in-one beginners | 1680D canvas | $150-$220 range |
| iPower 32″x32″x63″ | Tightest closets/budget | Water-resistant Oxford | under $70 |
This table is intentionally short — five rows, easy to scan — but it hides some important nuance. The AC Infinity CLOUDLAB 844 and Gorilla Grow Tent both sit at the top for pure light containment, yet they solve different problems: one is about zipper engineering, the other is about frame strength for growers stacking multiple lights and filters. Meanwhile, the VIVOSUN S448 proves you don’t need to spend $300 to get a genuinely lightproof zipper, and the iPower shows that even a budget tent can hold up if your space and expectations are modest
Top 7 Lightproof Grow Tents: Expert Analysis
1. AC Infinity CLOUDLAB 844 — zero-leak SBS zippers with flap overlap
The standout here is the front zipper flap system, which overlaps the zipper track itself so light has to bend around two layers of fabric instead of squeezing through a single seam. At 48×48×80 inches, it’s a true 4×4 footprint built on 1-inch steel poles — the thickest in the category — wrapped in 2000D diamond mylar canvas that’s noticeably heavier than the 600D fabric found on most competitors. That extra denier isn’t just about durability; thicker weaves block more ambient light by default, before you even factor in the zipper design. Based on the spec comparison, this is the tent for growers who’ve already been burned by a leaky budget model and don’t want to think about it again. Reviewers consistently note the controller mounting plate’s lightproof cable passthrough as a detail that solves a problem most tents ignore entirely — routing power cords without punching a permanent light gap in the wall. The catch tray is removable and stain-resistant, which matters more than it sounds once you’ve dealt with nutrient spills.
Pros:
- ✅ Front zipper flaps block light at the main seam
- ✅ Lightproof cable passthrough for controllers and cords
- ✅ Thickest 1-inch steel poles support heavy equipment
Cons:
- ❌ Premium pricing compared to base VIVOSUN or iPower models
- ❌ Larger footprint may not suit small closets
At around $150-$200, the value verdict is straightforward: if flowering-stage protection is your top priority, this tent earns its price tag through zipper engineering alone.

2. Gorilla Grow Tent — thickest poles for serious weight loads
What most buyers overlook about Gorilla’s design is that light containment and structural strength are actually the same conversation — a tent that sags under an inline fan and carbon filter starts creating gaps at the seams and roof, which is its own kind of light leak. The Gorilla Grow Tent uses reinforced 1680D fabric and some of the sturdiest pole hardware sold to home growers, with height-extension kits available for tall strains heading into stretch. Reviewers in cultivation forums consistently praise the frame’s ability to hold multiple hanging accessories without bowing, which keeps the tent’s shape — and its seams — tight over months of use. On paper this means less long-term drift in fabric tension, which is exactly the thing that eventually opens tiny leak points in cheaper tents.
Pros:
- ✅ Height-extension kits handle tall flowering plants
- ✅ Reinforced fabric resists sagging under heavy gear
- ✅ Long track record among serious home cultivators
Cons:
- ❌ Highest price point of the tents on this list
- ❌ Overkill for a single small plant or first-time grower
In the $250-$350 range, this is a buy-once purchase for anyone running multiple grow cycles a year rather than a one-season experiment.
3. VIVOSUN S448 — lightproof zipper at half the price
The 48-inch by 48-inch VIVOSUN S448 delivers reliable light control with 100% reflective mylar walls and a lightproof zipper, plus an observation window that lets you check on plants without breaking the tent’s climate seal. The 600D fabric is thinner than the AC Infinity’s canvas, but double-stitched seams compensate by reducing the pinhole gaps that show up at fabric joints on cheaper tents. Here’s what to weigh: this tent gives you most of the lightproof grow tent performance of premium models at a noticeably lower price, provided you’re not hanging heavy multi-light setups on its 100-pound top bar. Reviewers frequently mention the tool-free corner connectors as a genuine time-saver during setup, and the removable floor tray keeps runoff contained during watering.
Pros:
- ✅ Lightproof zipper without premium-tier pricing
- ✅ Tool-free corners speed up assembly
- ✅ Observation window preserves climate control
Cons:
- ❌ 100-pound top bar limits heavy equipment stacking
- ❌ Thinner canvas than 2000D premium alternatives
At $100-$140, this is the sweet spot for most first- and second-time flowering-stage growers on a real budget.
4. Mars Hydro Grow Tent Kit — complete kit skips the guesswork
This bundle comes with a dimmable 3×3 grow light, a highly reflective hood, and a four-inch carbon filter, which matters for light-leak prevention in a way people don’t expect — a mismatched, off-brand light and hood combo is a common source of internal light bounce and heat stress that mimics leak symptoms. Buying the tent and lighting as a matched kit means the reflective interior is tuned to the light’s spread pattern from day one. Based on the spec comparison, this is the strongest option for someone who doesn’t want to research grow lights, ducting, and filtration separately — everything ships calibrated to work together. The tent shell itself uses a standard heavy canvas with the zipper-flap protection that’s become close to an industry baseline for anything marketed toward flowering-stage protection.
Pros:
- ✅ Matched light and hood reduce internal reflection issues
- ✅ Includes carbon filter for odor control
- ✅ Beginner-friendly, fewer components to source separately
Cons:
- ❌ Less flexible if you already own a different light
- ❌ 3×3 footprint caps plant count for bigger grows
Priced in the $150-$220 range as a full kit, the value case is strong once you account for what buying the components separately would cost.
5. CoolGrows 96″x48″x80″ — dual windows without dual light leaks
At 96 by 48 by 80 inches, this large grow tent can handle serious growing capacity, with dual observation windows, a light-proof exterior, and easy-access doors. The standout engineering challenge with any large-format tent is that more seams and more windows mean more opportunities for light to escape, so the dual-window design here is worth noting specifically because both windows use the same overlapping zip-flap approach as the main door rather than a cheaper single-layer mesh. What most buyers overlook about big tents like this one is that size amplifies whatever zipper quality you’re working with — a minor leak on a 2×2 is a rounding error, but the same leak on an 8×4 canopy can hit multiple plants at once. Reviewers describe the frame as durable and the setup process as manageable for a tent this size, though it’s clearly a two-person job.
Pros:
- ✅ Dual observation windows without sacrificing light seal
- ✅ Large footprint suits multi-plant flowering rooms
- ✅ Easy-access doors reduce accidental light exposure
Cons:
- ❌ Bulky footprint requires a dedicated room
- ❌ Assembly is easier with two people
In the $150-$200 range for this much square footage, it’s one of the better cost-per-square-foot options in this list.
6. Opulent Systems 2-in-1 Grow Tent — 98% lightproof mylar in a dual chamber
This tent offers a dual-tier compartment for growing seedlings before moving them into the larger flowering section, using highly reflective mylar that’s both waterproof and 98% light-proof. The clever part of this design is that it directly solves a scheduling problem: seedlings and vegging clones often run on an 18/6 cycle while your flowering section needs strict 12/12 darkness, and cross-contamination between the two light schedules is a classic, avoidable cause of hermaphrodite prevention failures. Keeping both stages under one shell with a separating divider means you’re managing one tent’s leak points instead of two entirely separate structures. Based on the spec comparison, the 98% figure is honest marketing — it’s not a claim of total blackout, and growers who need absolute darkness during late flower should still spot-check the divider seam.
Pros:
- ✅ Separates veg and flower schedules in one tent
- ✅ 98% light-blocking waterproof mylar interior
- ✅ Efficient use of space for small operations
Cons:
- ❌ Divider seam needs manual light-leak checking
- ❌ Smaller flowering chamber than dedicated single-purpose tents
Typically found under $100, it’s one of the more inventive budget picks for anyone tight on room.
7. iPower 32″x32″x63″ — smallest footprint that still blocks light
This compact tent balances durable construction with easy setup and useful storage, built around water-resistant Oxford fabric. The honest take here: at this size and price, you’re not getting the SBS zipper flap technology of the premium picks, and light pollution prevention around the zipper pull is something you’ll likely need to reinforce yourself with a strip of felt or tape after a few months of use — a known, commonly reported issue on budget-tier tents rather than a flaw unique to this model. That said, for a single plant in a closet or dorm room, the fabric itself blocks light reliably, and the frame is stable enough for a small clip fan and light. On paper this means it’s the right call for testing the waters before committing to a bigger, pricier setup.
Pros:
- ✅ Fits tight closets and small apartments easily
- ✅ Water-resistant fabric holds up to splashes
- ✅ Lowest price point on this list
Cons:
- ❌ Zipper seal may need reinforcement over time
- ❌ Limited to one or two small plants
At under $70, it’s the entry point for anyone who wants a real lightproof grow tent without a big financial commitment.
Practical Usage Guide: Sealing Every Light Leak Before Day One
Setting up a new tent is the cheapest moment to prevent light leaks — every fix here takes minutes now versus hours of troubleshooting mid-flower. Start by fully zipping every panel and physically walking around the tent in a pitch-dark room with your eyes adjusted for a few minutes; your night vision will catch pinholes a quick glance never will. Pay special attention to corner seams, ducting collars, and the base where fabric meets the tray — these are the three spots that fail first on almost every tent brand. During the first 30 days, re-check seams weekly, since fabric settles and zippers loosen slightly with repeated use.
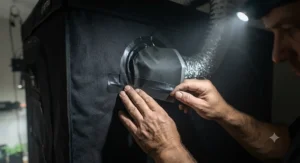
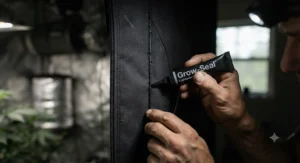
For maintenance, keep a small roll of black gaffer tape and a tube of black silicone sealant on hand; both are cheap, reusable fixes for pinholes that show up around cable ports. Optimization tricks worth doing on day one: route your cords through the dedicated cable ports rather than through a cracked door seam, and add a simple velcro cinch strap around any duct opening bigger than your fan hose. The most common first-month mistake is leaving the observation window’s inner flap unlatched because it “still looks closed” — it isn’t, and it’s a frequent, easily overlooked light pollution prevention gap.
Real-World Scenarios: Which Grow Tent Fits Your Setup
Picture a college student growing a single autoflower in a dorm closet with zero tolerance for a roommate noticing a light leak under the door — the compact iPower 32″x32″x63″ at under $70 makes sense here, paired with a strip of felt weatherstripping around the zipper for extra insurance. Now picture a small-scale home grower running four photoperiod plants through a full veg-to-flower cycle who needs strict flowering stage protection without spending a fortune — the VIVOSUN S448 hits that budget-to-performance ratio well, especially since its lightproof zipper is already built in rather than something you retrofit.
Finally, consider a more serious grower running a two-stage operation — clones under 18/6 light while a separate batch finishes flowering under 12/12 — who’s tired of managing two separate tent purchases. The Opulent Systems 2-in-1 Grow Tent was essentially built for this exact scenario, keeping both schedules physically separated under one lightproof shell. In all three cases, the deciding factor isn’t just budget; it’s how much light-leak insurance your specific grow actually needs.
Problem → Solution: Fixing Grow Tent Zipper Light Leaks
Grow tent zipper repair is the single most-searched fix in this space, and for good reason — zippers are the moving part, and moving parts wear out first. Problem 1: pinhole leaks at the zipper pull. Solution: apply a small strip of black felt or self-adhesive weatherstripping directly behind the pull tab, where the teeth gap slightly at rest. Problem 2: a zipper that no longer closes flush. Solution: rub the teeth with a pencil (graphite acts as a dry lubricant) or a dedicated zipper wax before assuming you need a replacement. Problem 3: light bleeding through the seam where two zipper flaps meet. Solution: overlap the flap slightly further and secure it with a strip of velcro rather than relying on the zipper alone to hold the seam shut.
Problem 4: a fully broken zipper slider. Solution: replacement sliders sized to match your zipper’s tooth width are inexpensive and widely available, and swapping one is a 10-minute fix that beats replacing the whole tent. Problem 5: light leaking through the tent’s ducting collar rather than the zipper at all — easy to misdiagnose as a zipper problem. Solution: cinch the duct collar tighter around the fan hose with a zip tie, since a loose collar is one of the most commonly misattributed leak sources.
How to Choose a Lightproof Grow Tent
Choosing the right tent comes down to seven checkable criteria, roughly in order of importance:
- Canvas denier — thicker fabric (1600D-2000D) blocks more ambient light by default, before zipper quality even factors in.
- Zipper style — look specifically for SBS zippers with an overlapping flap, not a single-layer zip with no cover.
- Frame strength — a sagging frame eventually stresses seams into gapping, so pole thickness matters for light containment, not just weight capacity.
- Cable and duct passthroughs — dedicated lightproof ports beat cutting your own hole for a cord.
- Size versus space — an oversized tent for your room means excess unsupported fabric, which flexes and creates gaps over time.
- Observation windows — convenient, but confirm they use a double-layer flap rather than thin mesh.
- Brand track record — check grower forums for long-term leak reports, not just first-week reviews.
Running through this checklist before buying takes ten minutes and saves you from discovering a leak three weeks into flower, when it’s much harder to fix without disturbing your plants.
Common Mistakes When Buying a Grow Tent
The most common mistake is buying based on square footage alone and ignoring canvas denier entirely — a bigger tent with thin, 300D fabric will leak more light than a smaller tent built with 1680D or 2000D material. A close second is assuming all zippers are equivalent; the difference between a basic single-zip door and an SBS zipper with an overlapping flap is enormous in practice, even though it rarely shows up clearly in a product photo. Buyers also frequently skip checking duct and cable port design, then end up cutting an extra hole in the fabric themselves — which is a self-inflicted, permanent light leak that’s nearly impossible to fully reverse.
Another frequent misstep: buying a tent sized exactly to your current plant count with zero room for a filter, fan, or light upgrade later, which forces awkward duct routing through door seams instead of dedicated ports. Finally, plenty of growers skip the pitch-dark inspection walkthrough after setup, assuming a tent that “looks sealed” in daylight is actually sealed — daylight hides small gaps that are obvious the moment your eyes adjust to darkness.
Grow Tent vs DIY Blackout Room
A dedicated grow tent and a DIY-blacked-out closet or room solve the same underlying problem — total darkness during the flowering photoperiod — but they get there very differently. A grow tent arrives with reflective interior mylar, purpose-built ducting collars, and a zipper system engineered specifically for light containment, so the leak-prone points are limited and predictable. A DIY room, by contrast, usually means blackout curtains, taped seams around a door frame, and towels stuffed under gaps — solutions that work initially but tend to shift, sag, or get bumped out of place over a multi-month flowering cycle.
The tradeoff is upfront cost versus long-term reliability. A DIY setup can be cheaper on day one, especially if you already have a spare closet, but it demands more ongoing vigilance and rarely matches a tent’s reflectivity, which affects yield as much as light leaks affect timing. For anyone serious about consistent flowering stage protection across multiple cycles, a purpose-built tent is generally the more reliable long-term investment, even though the initial cost is higher.
Light Pollution Prevention During the Flowering Stage
Once a photoperiod plant flips to a 12/12 flowering schedule, its dark period isn’t downtime — it’s an active biological process. During the dark phase, cannabis plants continue vital processes such as respiration and energy use, converting stored resources into growth-supporting sugars, and light pollution during that window can stress plants, disrupt flowering, cause reversion to a vegetative state, or increase hermaphroditism risk. That’s the core reason light pollution prevention isn’t optional once flowering starts — it’s not just about keeping the room dark for aesthetics, it’s about not interrupting a process the plant is actively running.
Because photoperiod plants rely on undisturbed hours of darkness to flower properly, even brief interruptions from ambient light pollution can cause plants to revert to vegetative growth, develop hermaphroditic traits, or produce reduced yields. A well-built lightproof grow tent addresses this directly by physically blocking exterior light sources — streetlights, hallway fixtures, even a phone screen checked at the wrong moment — from ever reaching the canopy during that dark window. Reviewers across multiple tent brands consistently flag the zipper seam and cable passthrough as the two spots worth double-checking every single grow cycle, since those are the points most likely to degrade first.
Hermaphrodite Prevention: Why Light Leaks Flip Female Plants
Hermaphroditic inflorescences — where pistillate flowers are accompanied by anther formation — lead to unwanted seed production, and research has documented plants forming hermaphroditic flowers after exposure to extended darkness periods or altered photoperiods during flowering, tied to stress factors that may shift internal phytohormone ratios. In plain terms: a light leak during the dark cycle is a stress event, and stress is one of the more reliable triggers for a female plant to start producing male flower structures, which self-pollinate the canopy and tank both yield and potency.
A broader review of sex-expression instability in cannabis notes that photoperiod disruption has frequently been associated with altered sex expression, and that these abiotic stressors can act independently or alongside hormonal factors to amplify developmental disruption. Hermaphrodite prevention, in other words, starts with mechanical reliability — a tent with a genuinely lightproof zipper and sealed cable ports removes one of the most common, most avoidable stress triggers before it ever has a chance to affect the plant’s sex expression. It’s worth noting, per growers who’ve studied this closely, that trivial light leaks alone won’t reliably cause hermaphroditism in stable genetics — but combined with heat stress, nutrient issues, or a genetic predisposition, a light leak becomes the tipping-point factor. A deeper technical breakdown of how photoperiod interruption affects flowering physiology is available from Cannabis Business Times, if you want to go further down this particular rabbit hole.
Long-Term Cost & Maintenance
Cost-per-use is where budget tents quietly lose their advantage. A $70 tent that needs zipper repair kits, weatherstripping, and eventual frame replacement within a year and a half ends up costing close to the same as a $150 tent that lasts three to four grow cycles without intervention. Factor in the cost of a single lost or hermaphrodite-compromised harvest — seeds where there should be flower, reduced cannabinoid content, wasted nutrients and electricity — and the total cost of ownership math tips further toward investing in better lightproofing upfront.
Maintenance itself is cheap regardless of tent tier: a $10 roll of felt weatherstripping, an occasional pencil-graphite zipper lubrication, and an annual pitch-dark inspection walkthrough cover most of what any tent needs. The real long-term cost driver isn’t the tent price — it’s whether you actually do that maintenance, since even premium tents develop small leaks as fabric and zippers age.
Features That Actually Matter (And Those That Don’t)
Features that matter: canvas denier, SBS zippers with overlapping flaps, dedicated lightproof cable ports, and pole thickness relative to your equipment load. These directly determine whether your tent holds its shape and seal over a full flowering cycle. Features that get marketed hard but matter less than you’d think: flashy color options, extra tool pockets (nice, but irrelevant to light leaks), and oversized branding on the exterior fabric.
One feature that’s genuinely underrated: a removable, stain-resistant floor tray. It has nothing to do with light leaks directly, but it protects the fabric-to-floor seam from moisture damage, which over time can warp fabric near the base and create exactly the kind of gap this whole article is about preventing.
Frequently Asked Questions
❓ What causes grow tent light leaks the most?
❓ Can a small light leak really cause hermaphrodite plants?
❓ How do I stop a grow tent zipper from leaking light?
❓ Is a thicker grow tent canvas always better for light pollution prevention?
❓ Do grow tents fully block light during the flowering stage?
Conclusion
Grow tent light leaks aren’t a mystery problem — they show up at the same predictable spots every time: zippers, cable ports, and aging seams. The fix isn’t complicated either. Start with a genuinely lightproof grow tent built with SBS zippers and dense canvas, whether that’s the premium AC Infinity CLOUDLAB 844, the value-driven VIVOSUN S448, or the budget-friendly iPower 32″x32″x63″, then back it up with a five-minute maintenance habit: a pitch-dark walkthrough, some felt weatherstripping, and attention to your ducting collars.
Do that consistently, and light pollution prevention stops being a source of anxiety every flowering cycle and becomes a checklist item you clear in minutes. Your plants stay on schedule, your genetics stay stable, and you spend your energy on the parts of growing that are actually supposed to be fun.
✨ Ready to lock down your grow room for good? Check current prices on the tents above and pick the one that matches your space and budget. 🌱🔒
Recommended for You
- Grow Tent Ventilation Setup: 7 Real Fixes for Heat & Smell (2026)
- Grow Tent Bundle 2026: 7 Complete Kits Worth Your Money
- Gorilla Vs Vivosun Tent: 7 Grow Tents Ranked for 2026
Disclaimer: This article contains affiliate links. As an Amazon Associate, I earn from qualifying purchases. If you purchase products through these links, we may earn a small commission at no additional cost to you.
✨ Found this helpful? Share it with your friends! 💬🤗
