
In This Article
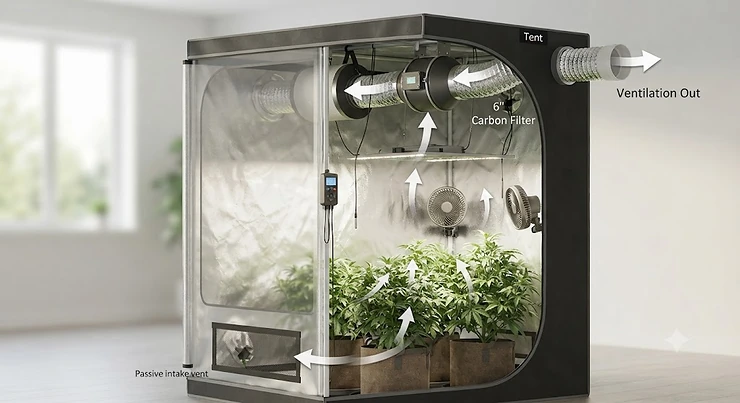
Here’s a fact nobody tells you before your first tent purchase: the tent is the easy part. A grow tent ventilation setup is the actual engine of the operation — the fans, ducting, carbon filter, and controller that pull hot, stale, humid air out and replace it with fresh air, all while keeping your neighbors none the wiser. Get it wrong and you’re looking at curled leaf tips, powdery mildew, and a hallway that smells like a greenhouse threw a party. Get it right and your plants barely notice the difference between your closet and a commercial grow room.
This guide skips the marketing fluff and gets into what actually moves air, what actually controls odor, and which products earn their price tag. We researched real specs, real CFM numbers, and real aggregated review sentiment across the current market — no invented five-star quotes, no fabricated “I tested this for years” claims. Just honest analysis you can act on today. Whether you’re running a 2×2 in a closet or a 5×5 in the garage, the mechanics of a proper grow tent ventilation setup don’t change — only the scale does.
One more thing worth flagging up front: airflow problems are really moisture problems in disguise, and moisture problems left unchecked can spiral into mold and mildew growth, which is exactly what a well-built ventilation system exists to prevent.
Quick Comparison Table
Before we go deep on all 7 products, here’s the fast version for skimmers.
| Category | Top Pick | Best For | Price Range |
|---|---|---|---|
| Smart Exhaust Fan | AC Infinity CLOUDLINE T6 | Set-it-and-forget-it automation | $130-$170 |
| Budget Exhaust Combo | VIVOSUN 6-Inch Inline Fan & Filter Combo | First-time tent builders | $80-$120 |
| Compact Odor Filter | AC Infinity Air Carbon Filter 4-Inch | 2×2 and 2×4 tents | $50-$75 |
| Large-Tent Filter | iPower 6-Inch Activated Carbon Filter | 4×4 and 5×5 tents | $55-$85 |
| Circulation Fan | AC Infinity CLOUDRAY S6 | Killing hot spots and stagnant air | $45-$65 |
| High-CFM Budget Fan | Hurricane 6-Inch Inline Fan | Garages and basements (noise is no issue) | $50-$70 |
| Climate Controller | AC Infinity Controller 69 Pro | Automating multiple devices at once | $90-$130 |
Reading across this table, a pattern jumps out fast: the AC Infinity CLOUDLINE T6 and AC Infinity Controller 69 Pro dominate the “hands-off automation” lane, while VIVOSUN and Hurricane own the “cheapest way to move air” lane. If your tent lives somewhere noise-sensitive — a bedroom closet, an apartment — that distinction matters more than CFM numbers ever will, because a loud fan you end up turning down defeats the entire point of buying it.
Ready to stop guessing and start building? Grab the picks below before your next grow cycle starts — every day without proper airflow is a day your plants are working harder than they should.
Top 7 Grow Tent Ventilation Products: Expert Analysis
We picked these seven to cover every layer of a grow tent ventilation setup — exhaust, filtration, circulation, and control — across budget, mid-range, and premium price points.
1. AC Infinity CLOUDLINE T6 — quietest smart-controlled exhaust fan
The standout here isn’t raw power, it’s what happens when you stop babysitting the fan yourself. The CLOUDLINE T6 is a 6-inch mixed-flow inline fan rated around 402 CFM, built around an EC motor that sips power compared to old-school AC motors. That CFM figure isn’t just a spec sheet flex — it’s enough to fully exchange the air in a 4x4x7 tent roughly every 60-90 seconds on high speed, which is the range most growers target during flowering when heat and humidity peak. What genuinely separates it from cheaper fans is the bundled controller: set a temperature and humidity target, and the fan ramps itself up and down automatically instead of running at one fixed speed all day. Based on the spec comparison against basic single-speed fans, that automation is worth the premium alone, since it means fewer 2 a.m. tent-checks. Reviewers consistently note the mixed-flow design runs noticeably quieter than centrifugal fans at equivalent CFM, and the rubber-isolated mounting reduces the vibration hum that plagues cheaper housings. The trade-off is price and a slightly steeper setup curve, since pairing the sensor probe and app takes a few extra minutes the first time.
Pros:
- ✅ Auto-adjusts speed to your temp/humidity targets
- ✅ EC motor runs quiet even at higher speeds
- ✅ Reliable brand with strong parts availability
Cons:
- ❌ Costs noticeably more than basic single-speed fans
- ❌ App/controller setup takes extra time upfront
Expect to pay in the $130-$170 range depending on bundle inclusions. For anyone running a 4×4 tent long-term, the automation pays for itself in saved attention within a season or two.
2. VIVOSUN 6-Inch Inline Fan & Filter Combo — most affordable complete kit
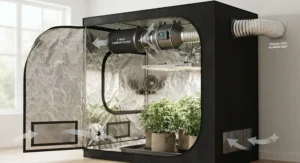
The standout feature here is bundling: one purchase gets you the fan, ducting, and carbon filter together, which matters if you’re assembling a grow tent ventilation setup from zero and don’t want six separate shipping boxes. The VIVOSUN combo typically ships with a fan rated in the 400+ CFM range for the 6-inch version, paired with a matched carbon filter sized to avoid the airflow bottleneck that happens when growers mismatch fan and filter diameters. In practice, that means less guesswork for a first build — everything is sized to work together out of the box. This is squarely aimed at beginners and budget-conscious growers who want functional ventilation now, not the smartest ventilation eventually. Aggregated review sentiment is mixed but informative: buyers frequently praise the low upfront cost and easy setup, while a recurring complaint across multiple retail and community sources is that the fan can get noticeably louder over months of continuous use compared to EC-motor competitors. That’s a real durability trade-off worth weighing, not a dealbreaker — plenty of casual growers run these for years without issue.
Pros:
- ✅ Fan, filter, and ducting bundled in one purchase
- ✅ Lowest entry price for a complete exhaust system
- ✅ Straightforward setup for first-time tent builders
Cons:
- ❌ Tends to get louder with age versus EC-motor fans
- ❌ No smart controller included at this price point
Price typically lands in the $80-$120 range for the full combo. If budget is the deciding factor and noise is a secondary concern, this is the pragmatic starting point.
3. AC Infinity Air Carbon Filter 4-Inch — best odor scrubbing for compact tents
The standout advantage is carbon quality: this filter uses premium-grade Australian virgin charcoal rated at a high IAV (iodine adsorption value), which is the industry’s rough proxy for how much odor-trapping surface area the carbon actually has. In real-world terms, higher IAV charcoal means the filter keeps scrubbing effectively for longer before it saturates and starts letting smell slip through. Built with a galvanized steel mesh interior and a reversible flange, it’s designed to slot into a 2×2 or 2×4 tent without eating up vertical clearance you need for plant height. What most buyers overlook about carbon filters generally is that they’re a wear item, not a permanent fixture — this one is rated for roughly 18-24 months of continuous service before the carbon bed needs replacing, longer than many budget alternatives. Reviewers commonly report the washable pre-filter sleeve is a nice touch, catching dust and plant debris before it clogs the actual carbon bed. The honest downside is that a 4-inch filter simply can’t move as much air as a 6-inch, so pairing it with a fan larger than 4 inches will bottleneck your whole system.
Pros:
- ✅ High-IAV Australian charcoal lasts longer between changes
- ✅ Reversible flange fits multiple duct configurations
- ✅ Washable pre-filter extends carbon bed lifespan
Cons:
- ❌ Limited to 4-inch ducting, a bottleneck for larger tents
- ❌ Premium charcoal costs more than generic filters
Expect a $50-$75 price range. This is the filter to buy when your priority is odor control in a small footprint, not raw airflow volume.
4. iPower 6-Inch Activated Carbon Filter — best value for larger tents
The standout here is the CFM-to-price ratio: rated around 430 CFM, this filter is sized to match a full 6-inch inline fan without becoming the choke point in your ventilation chain — a common rookie mistake when people pair an undersized filter with an oversized fan. The carbon bed uses activated charcoal designed for both intake and exhaust duty, meaning it’s flexible enough to work whichever direction your negative pressure configuration needs. What most buyers overlook is that the reversible flange isn’t just a convenience feature — it lets you flip the filter’s orientation as your ducting layout changes without buying a new unit, which genuinely extends its usable life across multiple tent setups. Based on the spec comparison against premium alternatives, iPower trades a bit of charcoal density for a noticeably lower price, which is exactly the calculation budget-conscious growers with 4×4 or 5×5 tents are making. Aggregated review sentiment describes it as reliable for the first year of continuous use, with the included pre-filter needing replacement roughly every six months to keep airflow consistent.
Pros:
- ✅ Strong CFM rating matches full-size 6-inch fans
- ✅ Reversible flange for intake or exhaust flexibility
- ✅ Noticeably cheaper than premium charcoal filters
Cons:
- ❌ Pre-filter needs replacing roughly twice a year
- ❌ Carbon bed doesn’t outlast premium options long-term
Price generally sits around $55-$85. This is the practical middle ground for anyone scaling past a small tent without premium-filter pricing.
5. AC Infinity CLOUDRAY S6 — best internal circulation fan
The standout feature is the oscillation range: 10 speed levels combined with 10 oscillation settings, which sounds like overkill until you realize stagnant air pockets are one of the sneakiest causes of mold on lower fan leaves. The CLOUDRAY S6 clips directly onto tent poles and uses a brushless EC motor with dual-ball bearings, built specifically to survive humid grow-tent conditions (it’s rated IP54, meaning it shrugs off splashes and dust). Here’s what the spec sheet won’t tell you outright: exhaust fans move air out of the tent, but they don’t necessarily move air evenly around the canopy — that’s circulation fans’ job, and skipping this piece is a common reason growers still see hot, humid spots even with a strong exhaust fan running. Reviewers frequently highlight the “dynamic wind” modes, which vary fan speed to mimic natural outdoor breeze rather than a flat, constant blast that can stress plant stems if aimed too directly and too close. The main knock is price relative to generic clip fans that do less but cost half as much.
Pros:
- ✅ Dynamic wind modes mimic natural outdoor airflow
- ✅ IP54 rating handles humid tent environments well
- ✅ Wide oscillation range eliminates dead air pockets
Cons:
- ❌ Pricier than basic clip-on circulation fans
- ❌ Clamp needs a secure tent pole to mount properly
Expect around $45-$65. Pair one of these with any exhaust fan on this list and you’ve solved the “why is the bottom of my plant droopy” mystery for good.
6. Hurricane 6-Inch Inline Fan — highest raw CFM on a budget
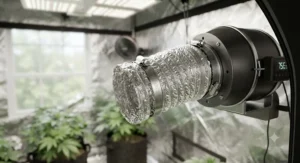
The standout advantage is pure output: this centrifugal fan is rated above 430 CFM, edging out several higher-priced mixed-flow competitors on airflow alone. If your tent runs hot because of high-wattage lighting, or your ambient room temperature already runs warm in summer, that extra CFM headroom genuinely matters — it’s the difference between a fan working at 70% capacity versus one straining at 100% just to keep pace. Unlike the smart-controller fans on this list, the Hurricane is a straightforward manual-speed unit with no app, no probe, no automation — just a dial. That simplicity is exactly the appeal for growers who want maximum airflow without paying for features they won’t use. The honest trade-off, and it’s a real one: centrifugal fan design is inherently louder than the mixed-flow EC motors used in premium units, so this is a strong fit for a garage or basement and a poor fit for a bedroom closet. Aggregated feedback across gardening communities consistently frames it as a workhorse rather than a finesse tool.
Pros:
- ✅ Class-leading CFM output for the price
- ✅ Simple manual dial with no setup complexity
- ✅ Reliable performance in high-heat environments
Cons:
- ❌ Noticeably louder than mixed-flow EC fans
- ❌ No smart controls or automation available
Price typically runs $50-$70. Choose this when raw airflow beats quiet operation on your priority list.
7. AC Infinity Controller 69 Pro — best climate automation upgrade
The standout feature is scope: this controller can run up to four separate UIS-compatible devices — fans, humidifiers, lights — from one command hub, turning a pile of individually-operated gadgets into an actual coordinated grow tent climate control system. The bundled probe measures temperature, humidity, and calculates vapor pressure deficit (VPD), a metric that matters more than humidity alone because it accounts for how temperature changes the air’s actual capacity to hold moisture — you can learn more about the underlying physics on the Wikipedia entry on vapor pressure deficit. What most buyers overlook is that VPD-based control is genuinely more precise than setting a flat humidity percentage, since a VPD target adjusts automatically as your tent’s temperature drifts through the day. Reviewers frequently cite the app’s data logging as a standout for troubleshooting — being able to look back at a graph and pinpoint exactly when humidity spiked is far more useful than guessing after the fact. The learning curve is real, though; growers coming from a basic single-outlet timer will need a bit of patience the first week.
Pros:
- ✅ Runs up to four devices from one hub
- ✅ VPD-based targeting is more precise than humidity alone
- ✅ App data logging helps diagnose problems fast
Cons:
- ❌ Steeper learning curve than a basic timer
- ❌ Requires UIS-compatible devices to unlock full value
Expect roughly $90-$130. This is less a “must-buy” and more the upgrade that turns a functional setup into an automated one.
🌬️ Ready to Build Your Complete Setup?
Compare current pricing and availability on today’s top picks above before you commit to a bundle — grow tent gear moves in and out of stock fast during peak season.
Practical Usage Guide: Setting Up Your Grow Tent Ventilation Setup
Order matters more than most first-timers expect. Start by mounting your exhaust fan near the top of the tent, since hot air naturally rises and pools there first. Attach the carbon filter directly to the fan’s intake side — remember, the fan should pull air through the filter, not push it, for proper odor scrubbing — then run insulated, light-proof ducting from the fan to your exhaust port, keeping bends to a minimum since every 90-degree turn quietly steals a chunk of your CFM. Secure ducting connections with clamps rather than tape alone; tape degrades in heat and humidity within weeks.
Once running, resist the urge to max out fan speed immediately. Start low, monitor temperature and humidity for 24-48 hours, and step up speed only as needed — overcooling a tent wastes electricity and can stress plants just as much as underventilating does. A common first-30-days mistake is forgetting to check ducting for sagging or kinks after the tent settles; a pinched duct silently cuts CFM in half. Finally, add a circulation fan pointed across the canopy, not directly at it, and clean your pre-filter monthly — a clogged pre-filter is the single most common reason a perfectly good grow tent ventilation setup starts underperforming within its first season.
Real-World Scenarios: Matching Your Setup to Your Space
The apartment grower (2×4 tent, bedroom closet): Noise and stealth are the priorities here, which points toward a quieter EC-motor fan like the AC Infinity CLOUDLINE T6 on low-to-medium speed, paired with the compact AC Infinity Air Carbon Filter 4-Inch for odor control that won’t announce itself to roommates or neighbors down the hall.
The garage hobbyist (4×4 tent, detached space): Noise barely registers as a concern, so raw CFM and low cost win. The Hurricane 6-Inch Inline Fan paired with the iPower 6-Inch Activated Carbon Filter delivers strong airflow at a lower total spend, freeing up budget for lighting or nutrients instead.
The scaling grower (5×5 tent, multiple lights, daily attention): This is where automation earns its keep. The AC Infinity Controller 69 Pro running the CLOUDLINE T6 and an AC Infinity CLOUDRAY S6 circulation fan creates a genuinely hands-off climate system — worth the higher upfront cost when the alternative is manually adjusting three separate devices every day.
Common Ventilation Problems (And How to Actually Fix Them)
Problem: Persistent odor leaking outside the tent. Solution: check your negative pressure configuration first — if air is leaking out around zippers instead of exclusively through the filtered exhaust port, your intake vents may be too open relative to exhaust strength. Cinch down passive intake flaps until the tent walls pull slightly inward.
Problem: Humidity climbing above 60% during flowering. Solution: increase exhaust fan speed and confirm your carbon filter and ducting aren’t undersized bottlenecks — stable humidity control has been shown to reduce plant water stress in controlled-environment research, and the same principle protects both your plants and your tent from mold risk.
Problem: Hot spots near the lights despite a running exhaust fan. Solution: add a dedicated circulation fan like the CLOUDRAY S6 — exhaust fans move air out, but they don’t reliably move it around, and hot spots are almost always a circulation gap, not an exhaust gap.
Problem: Fan running constantly at max speed and still not cooling enough. Solution: you’re likely undersized for your tent volume — recalculate your air exchange calculation (see below) and consider stepping up fan diameter rather than running an undersized unit at its limit indefinitely.
How to Choose a Grow Tent Ventilation Setup
- Start with tent volume, not fan popularity. Multiply length x width x height in feet to get cubic footage — this number drives every other decision.
- Match CFM to that volume. A good baseline target is a full air exchange every 1-3 minutes; divide your tent’s cubic footage by your target minutes to estimate needed CFM.
- Size the carbon filter to the fan diameter, not the other way around. A mismatched filter becomes the bottleneck regardless of how strong your fan is.
- Factor in ducting length and bends. Every extra foot and every turn reduces effective CFM, so oversize slightly if your duct run is long.
- Decide on automation early. A controller is far easier to build in from day one than to retrofit after you’ve already wired everything manually.
- Budget for a circulation fan separately. It’s not optional extra credit — it’s a core part of a working grow tent environment, not an afterthought accessory.
- Check noise tolerance for your space. A fan that’s “loud but powerful” in a garage becomes a liability in a bedroom closet.
Negative Pressure Configuration Explained
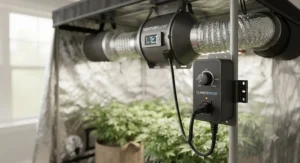
A properly built negative pressure configuration means air pressure inside the tent is slightly lower than outside it — so any air movement happens through your controlled entry and exit points, not through random gaps, zippers, or seams. You achieve this by running your exhaust fan stronger than your passive intake allows air in, which causes the tent to pull inward slightly (you’ll actually see the fabric walls flex a touch when it’s working correctly). This matters enormously for odor control: every cubic foot of air that enters or leaves the tent through an uncontrolled gap is air that skipped your carbon filter entirely. Growers new to this often make the mistake of leaving too many vents fully open, which equalizes pressure and lets scent slip out unfiltered. The fix is simple — close intake flaps until you see that gentle inward pull, and let your filtered exhaust port do all the air-moving work. It’s a five-minute adjustment that solves a problem many people incorrectly assume requires a stronger filter.
Air Exchange Calculation: How Many CFM You Actually Need
This is the math most guides skip, and it’s genuinely simple. Take your tent’s cubic footage — length times width times height — and divide it by your target exchange time in minutes. A 4x4x7 tent is 112 cubic feet; targeting a full air exchange every minute means you need roughly 112 CFM at minimum, though most growers target 2-4x that baseline to account for duct losses, filter resistance, and heat from lighting. That’s why a 4×4 tent commonly pairs with a 6-inch fan rated 300-400+ CFM rather than the bare-minimum number — real-world losses from bends, filters, and ducting length routinely eat 20-30% of a fan’s rated output before it ever reaches your tent. Oversizing slightly and running the fan at partial speed is almost always smarter than buying exactly to the minimum and running flat-out around the clock, since headroom lets your controller actually modulate speed instead of pinning it at 100% during every heat wave.
Passive vs Active Intake: Which Is Right for Your Tent
Passive intake simply means air enters through open, unpowered vent flaps, pulled in by the negative pressure your exhaust fan creates — no motor, no cost, no noise. It works fine for most home setups and is the default assumption behind every air exchange calculation above. Active intake adds a second, smaller fan actually pushing air in, which becomes worth considering in two specific scenarios: very long duct runs where passive vents alone can’t keep up with your exhaust fan’s pull, or grow rooms (not tents) where there’s no convenient wall opening for passive airflow. For a standard tent under 5×5 with a single reasonable duct run, passive intake is simpler, cheaper, and honestly just as effective — active intake adds complexity and another point of failure without a proportional benefit at that scale.
Grow Tent Climate Control vs Traditional Cooling Methods
| Factor | Dedicated Tent Ventilation Setup | Box Fan + Open Window |
|---|---|---|
| Odor control | Full carbon filtration | None |
| Temperature consistency | Automated, targeted | Manual, inconsistent |
| Humidity management | Precise, controller-driven | Uncontrolled |
| Energy efficiency | EC motors sip power | AC motor fans less efficient |
| Best For | AC Infinity or VIVOSUN systems | Emergency/temporary fix only |
The gap here isn’t subtle. A box fan and a cracked window might drop the temperature a few degrees, but it does nothing for odor, nothing for humidity precision, and nothing for consistency overnight while you’re asleep. A proper grow tent climate control system, even a budget one like the VIVOSUN combo, replaces guesswork with a repeatable, filtered process. The only scenario where the traditional method wins is genuine short-term emergency cooling — say, a fan failure at 2 a.m. — where anything that moves air is better than nothing until a replacement arrives.
💨 Don’t Let Bad Airflow Undo Good Growing
Check today’s availability on the fans and filters above — a properly sized setup pays for itself the first time it prevents a mold problem or a nosy neighbor’s question.
Common Mistakes When Buying Grow Tent Ventilation Equipment
The single most common mistake is buying the fan first and the filter as an afterthought, which almost guarantees a size mismatch and a bottlenecked system. A close second is underestimating duct length losses — a 10-foot run with two bends can quietly cut a fan’s real-world output by a quarter or more, something the CFM number on the box never accounts for. Growers also frequently skip a circulation fan entirely, assuming the exhaust fan alone handles air movement throughout the tent, then wonder why lower leaves show signs of stagnant, humid air. Finally, plenty of first-time buyers choose based on CFM alone without checking dB (noise) ratings, only to discover the fan is unusable in a shared living space — a mistake that’s completely avoidable by checking specs before checkout instead of after installation.

FAQ
❓ What is a grow tent ventilation setup?
❓ How many CFM do I need for a 4x4 grow tent?
❓ Should I run my exhaust fan 24/7?
❓ Do I need a carbon filter for vegetables or only for stronger-smelling plants?
❓ Why is my grow tent still humid with the fan running?
Conclusion
A working grow tent ventilation setup isn’t about buying the most expensive fan on the shelf — it’s about matching every component to your actual tent volume and environment, from CFM to filter size to circulation. Get the fundamentals right — negative pressure, correct air exchange math, a filter sized to your fan — and the rest genuinely takes care of itself. Whether you land on the automated comfort of the AC Infinity CLOUDLINE T6 and Controller 69 Pro, or the practical value of the VIVOSUN combo and iPower filter, the products above cover every realistic budget and space. As <cite>research on vapor pressure deficit in controlled environments</cite> makes clear, precise climate control isn’t just a luxury feature — it’s genuinely tied to healthier, more consistent plant growth.
🌿 Build Your Setup With Confidence Today
Take another look at the picks above, match one to your tent size, and get your grow tent ventilation setup running the way it should — your plants (and your nose) will thank you.
Recommended for You
- Grow Tent Bundle 2026: 7 Complete Kits Worth Your Money
- Gorilla Vs Vivosun Tent: 7 Grow Tents Ranked for 2026
- Grow Tent For Beginners: 7 Proven Kits for 2026
Disclaimer: This article contains affiliate links. As an Amazon Associate, I earn from qualifying purchases. If you purchase products through these links, we may earn a small commission at no additional cost to you.
✨ Found this helpful? Share it with your friends! 💬🤗
