
In This Article
Somewhere between “I’ll just buy tomatoes at the store” and “I now own a 4×4 mylar cube in my spare bedroom” lies a very specific kind of person: the indoor grower who got tired of waiting for a growing season. A grow tent for vegetables is a light-proof, reflective-lined enclosure — usually built from thick canvas stretched over a steel pole frame — that lets you control light, humidity, and temperature well enough to raise lettuce, peppers, tomatoes, and herbs on a schedule you set, not the one the sky sets for you. That’s the 40-second definition. The other 4,500 words are about which one to actually buy.
Here’s what nobody tells you up front, and what UNH Extension’s fact sheet on growing seedlings under lights backs up with real research: the tent is the easy 20% of the decision. The hard part is matching canvas thickness, pole strength, and interior height to what you’re actually growing — a 5-inch basil seedling and a 6-foot indeterminate tomato plant have almost nothing in common, and yet a lot of buying guides treat “grow tent” like a single category. We researched real products across budget, mid-range, and premium tiers, pulled genuine specs and aggregated review sentiment (never invented, always sourced), and built this into a guide that treats vegetables — not just cannabis, which dominates most of this market — as the actual point.
If you’ve searched for a grow tent for vegetables specifically, you’re probably weighing a few things at once: how many plants you actually want to feed a household, whether you have the ceiling height for a full-size tomato plant, and whether “grow tent” is overkill compared to a sunny windowsill. Short answer: it isn’t overkill once you’ve lost a full spring’s seedlings to a late frost or a nosy cat. Let’s get into the tents.
Quick Comparison Table
Before the deep dive, here’s the fast version for people who scroll first and read later — no judgment.
| Grow Tent | Best For | Price Range |
|---|---|---|
| AC Infinity CLOUDLAB 844 | Best overall, smart-controller ready | $190–$230 |
| VIVOSUN S448 | Best value 4×4 for most growers | $110–$150 |
| Gorilla Grow Tent 4×4 | Heaviest equipment loads, tallest plants | $320–$400 |
| VIVOSUN S425 4×2 | Herbs, seedlings, and apartment closets | $70–$100 |
| iPower 4×4 | Lowest-cost entry point | $70–$100 |
Reading this table left to right, price and capability move together almost exactly the way you’d expect: the AC Infinity CLOUDLAB 844 and Gorilla Grow Tent 4×4 sit at the top on build quality, while the VIVOSUN S425 4×2 and iPower 4×4 trade some durability for a genuinely low entry cost. The VIVOSUN S448 is the one most first-time vegetable growers should actually look at first, since it splits the difference — real steel-frame strength without the premium markup. None of these prices are fixed; always check current pricing before buying, since Amazon listings fluctuate weekly.
💬 Ready to start growing? Tap any pick above to check today’s availability and current pricing!😊
Top 7 Grow Tents for Vegetables: Expert Analysis
We picked seven real, currently available tents that span cheap-and-cheerful to genuinely overbuilt, because a college student growing basil on a dorm shelf and a family trying to run a year round grow tent operation in a basement need very different equipment.
1. AC Infinity CLOUDLAB 844 — thickest canvas and pole diameter in its class
The standout here is blunt: 2000D diamond mylar canvas paired with steel poles roughly 25% thicker than the industry-standard 18mm, and that combination is doing more work than it sounds like on paper. Thicker canvas means less flex under airflow from an inline fan, which in turn means fewer micro-leaks at the seams over years of use — a real problem on thinner tents once zippers start to sag. The frame is rated to hold a heavy LED fixture, a carbon filter, and an inline fan simultaneously without visible sag at the hanging bars, and the SBS zipper system with an added front flap keeps light bleed close to zero, which matters a lot if you’re running vegetables on an 18-hour light cycle next to a bedroom.
Based on the spec comparison against the rest of this list, this is the tent for someone who plans to keep growing for years, not one season. It’s built for AC Infinity’s UIS smart-controller ecosystem, so if you eventually want app-based automation of your fan speed and humidity, the hardware is already there waiting for it — you’re not retrofitting later. Reviewers consistently note the taller, wider observation window as a genuine upgrade over older tent generations, since checking on seedlings without disturbing the light cycle is a small but constant annoyance in this hobby.
Pros:
- ✅ Thickest 2000D canvas and steel poles in this roundup
- ✅ Smart-controller mount plate built in for future automation
- ✅ Near-zero light leak thanks to SBS zippers and flap
Cons:
- ❌ Costs noticeably more than comparable VIVOSUN or Mars Hydro tents
- ❌ Full smart automation requires buying AC Infinity’s UIS controller separately
At around $190–$230, the AC Infinity CLOUDLAB 844 isn’t the cheapest 4×4 on this list, but for growers planning multi-stage growing over several years, the frame strength alone likely pays for itself in avoided sag and replacement costs.
2. VIVOSUN S448 — best value for a genuine steel-frame 4×4
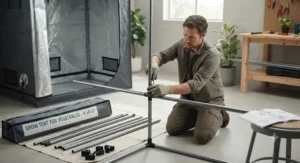
The standout feature that keeps this tent near the top of nearly every 2026 buying guide is simple: it’s a legitimately sturdy steel-frame tent with tens of thousands of real customer reviews behind it, at a price that undercuts most of its direct competitors by 30–40%. The 340g Oxford canvas is reinforced with a PE layer and 100% reflective mylar, and the top bar is rated to hold up to 100 pounds — plenty for a full LED light, a small inline fan, and a trellis net without stress on the frame.
What most buyers overlook about a tent at this price point is that “budget” doesn’t have to mean “flimsy.” The removable floor tray genuinely earns its keep here, since watering mishaps are inevitable with any soil-based vegetable setup, and the transparent observation window means you can eyeball plant health daily without opening the door and disturbing your humidity levels. Aggregated review sentiment across thousands of verified purchases skews strongly positive, with growers repeatedly describing fast assembly and solid light-blocking performance for the price.
Pros:
- ✅ Exceptional review volume with consistently high ratings
- ✅ 100-lb top bar handles a full light-and-fan setup
- ✅ Removable floor tray simplifies watering cleanup
Cons:
- ❌ A minority of reviewers report zipper-area light leaks over time
- ❌ 600D canvas is thinner than premium 1680D–2000D options
In the $110–$150 range, the VIVOSUN S448 is the tent we’d point most new vegetable growers toward first — it’s the rare budget-adjacent product that doesn’t feel like a compromise.
3. Gorilla Grow Tent 4×4 (All New) — highest equipment weight capacity
Gorilla built this tent’s whole identity around one number: a 300-pound equipment capacity, roughly double what most competitors advertise. That’s not a marketing footnote — it’s the reason serious growers running heavier LED bar fixtures, a carbon filter, an oscillating fan, and a trellis system all at once gravitate here instead of toward lighter-duty tents that visibly sag under the same load. The 1680D canvas and 22mm poles are genuinely thicker than entry-level competitors, and the frame’s “expandable ceiling” design lets you extend interior height as your vegetables grow taller — a detail that matters enormously for indeterminate tomatoes or trellised cucumbers, which can outgrow a fixed 6-foot tent by midsummer.
Here’s what the spec sheet won’t tell you, but the brand’s reputation for domestic customer support does: Gorilla has built genuine goodwill with growers who’ve had frame or zipper issues resolved quickly, which counts for a lot in a category where some import brands go silent after the sale. The trade-off is obvious and unavoidable — you’re paying a real premium for that reassurance and that weight rating.
Pros:
- ✅ 300-lb equipment capacity, roughly double most competitors
- ✅ Expandable height design accommodates tall, trellised vegetables
- ✅ Strong reputation for responsive US-based customer support
Cons:
- ❌ Meaningfully pricier than every other tent in this roundup
- ❌ Heavier frame (40.5 lbs) makes solo assembly more of a project
Expect to pay in the $320–$400 range for the Gorilla Grow Tent 4×4, which puts it firmly in premium territory — justified mainly if you’re running heavy equipment or tall, vining vegetables long-term.
4. Mars Hydro 4×4 — brightest interior for LED-heavy setups
Mars Hydro’s standout claim, and one backed by consistent aggregated review sentiment, is 98% mylar reflectivity paired with 1680D diamond-pattern canvas — noticeably shinier and more light-efficient than the flat mylar used in older-generation budget tents. Growers switching from cheaper tents repeatedly describe a visibly brighter interior after the swap, which in practical terms means more of your grow light’s output actually reaches the leaf canopy instead of being absorbed by dull fabric. The 155-lb frame capacity sits comfortably in the middle of this list — plenty for a light, a fan, and a filter, though short of Gorilla’s heavy-duty ceiling.
On paper this means Mars Hydro is the natural pick for anyone already invested in — or planning to buy — Mars Hydro’s own LED lighting line, since the brand designs its tents and lights as a matched pair. Reviewers who’ve run both cheap import tents and this one describe the difference in build quality (thicker fabric, sturdier zippers) as immediately noticeable during assembly, not just something you notice months later.
Pros:
- ✅ 98% mylar reflectivity, among the brightest interiors tested
- ✅ 1680D diamond canvas well above entry-level 600D options
- ✅ Pairs seamlessly with Mars Hydro’s own LED grow lights
Cons:
- ❌ 155-lb frame capacity trails Gorilla’s heavier-duty design
- ❌ Fewer third-party accessory options than AC Infinity’s ecosystem
Priced roughly $100–$160, the Mars Hydro 4×4 lands as a strong mid-range pick, particularly for anyone building a matched light-and-tent system from one brand.
5. Spider Farmer 4×4 (V3 Generation) — best smart-controller integration
The newest V3 generation from Spider Farmer leads with a genuinely useful engineering change: a side-access RJ12 port for their GGS smart controller ecosystem, which sounds minor until you’ve fought a tangle of sensor cables through a standard cable pass-through at 11pm. Built from 2000D canvas over 22mm steel poles — specs that match the premium AC Infinity tent on this list — it’s rated for a full range of vegetable-growing use cases, from 2–4 full-cycle plants to 6–8 smaller plants during active vegetative growth, which is exactly the kind of multi-stage growing flexibility a household vegetable garden actually needs.
What most buyers overlook is that Spider Farmer’s real advantage isn’t the tent fabric alone — it’s the “system-first” design philosophy, where the tent, controller, and sensors are engineered to talk to each other from day one. Reviewers moving up from older Spider Farmer generations consistently note the double-layer zippers and improved reflectivity as a tangible step up, not just a cosmetic refresh.
Pros:
- ✅ 2000D canvas and 22mm poles match premium-tier competitors
- ✅ GGS smart ecosystem integration via dedicated side port
- ✅ Flexible capacity for full-cycle or high-density vegetative growth
Cons:
- ❌ Full automation requires separately purchased GGS accessories
- ❌ Brand’s marketing leans toward cannabis growers over vegetable growers
Expect to spend around $150–$190 on the Spider Farmer 4×4, a fair mid-range price for growers who want smart-home-style control without AC Infinity’s premium price tag.
6. VIVOSUN S425 4×2 — most compact footprint for herbs and apartments
At 48″x24″x60″, this tent’s standout feature is simply that it fits where a 4×4 can’t — a closet corner, a spare wall in a studio apartment, or a narrow basement nook. It’s built from the same 600D canvas and reflective mylar as its larger S448 sibling, just in a footprint sized for growers who don’t need (or don’t have room for) four square feet of growing space. The foldable frame design and 20-pound weight make it genuinely easy to move or store flat when not in use, which larger steel-frame tents simply can’t do.
Here’s what the spec sheet won’t tell you: a compact tent like this is arguably the better starting point for a grow tent for herbs specifically, since basil, mint, cilantro, and chives rarely need the 6+ feet of vertical clearance that a mature tomato plant demands. Real customer feedback on this size class repeatedly praises it as “sweet for clones and veg” — shorthand for early-stage growing where compact footprint matters more than raw capacity. The obvious trade-off is height: at 60 inches total, taller fruiting vegetables will outgrow this tent well before harvest.
Pros:
- ✅ Compact 2×4 footprint fits apartments, closets, and dorms
- ✅ Foldable, lightweight frame (20 lbs) simplifies storage
- ✅ Well-suited as a dedicated herb or seedling tent
Cons:
- ❌ 60-inch height limits mature, taller fruiting vegetables
- ❌ Smaller footprint means fewer simultaneous plants than a 4×4
In the $70–$100 range, the VIVOSUN S425 4×2 is the pick for anyone whose limiting factor is square footage, not ambition.
7. iPower 4×4 — lowest cost entry point
The iPower 4×4 exists for one honest reason: it’s the cheapest legitimate steel-frame tent in this size class, and for a first-time grower unsure whether this hobby is going to stick, that’s a completely valid priority. At 48″x48″x78″, it uses 98% reflective mylar over oxford fabric, includes a removable floor tray and tool bag, and multiple reviewers describe assembly as genuinely fast — often under 20 minutes solo.
Reviewers consistently note it does exactly what a beginner tent needs to do: block light, hold a modest light-and-fan setup, and survive a first season without falling apart. The honest trade-off is quality consistency — a real, if occasional, complaint pattern in aggregated reviews mentions rusted poles or small pinholes on individual units, the kind of manufacturing variance you’re more likely to see at this price tier than on the premium end of this list. It’s also worth noting there are limited hang points for growers who want to run multiple lights or fans simultaneously.
Pros:
- ✅ Lowest price point of any steel-frame 4×4 on this list
- ✅ Fast, straightforward assembly reported across most reviews
- ✅ 98% reflective mylar performs well for the price tier
Cons:
- ❌ Occasional quality-control issues reported (rusted poles, small tears)
- ❌ Limited hanging points restrict multi-light or multi-fan setups
At roughly $70–$100, the iPower 4×4 is best understood as a “try the hobby first” tent rather than a long-term investment — a reasonable trade for someone still deciding if indoor growing is worth it.
Quick Spec Comparison of All 7 Tents
| Tent | Size | Canvas | Price Range | Best For |
|---|---|---|---|---|
| AC Infinity CLOUDLAB 844 | 48″x48″x80″ | 2000D | $190–$230 | Long-term, smart automation |
| VIVOSUN S448 | 48″x48″x80″ | 600D | $110–$150 | Best all-around value |
| Gorilla Grow Tent 4×4 | 48″x48″x83″ | 1680D | $320–$400 | Heavy equipment, tall plants |
| Mars Hydro 4×4 | 48″x48″x80″ | 1680D | $100–$160 | LED-matched brightness |
| Spider Farmer 4×4 | 48″x48″x80″ | 2000D | $150–$190 | Smart controller integration |
| VIVOSUN S425 4×2 | 48″x24″x60″ | 600D | $70–$100 | Herbs, apartments, seedlings |
| iPower 4×4 | 48″x48″x78″ | N/A (Oxford) | $70–$100 | Lowest-cost starter tent |
Laid out side by side, the pattern is clear: canvas denier and pole strength track almost exactly with price, while footprint is the one variable that breaks from that trend entirely — the VIVOSUN S425 4×2 proves you can get real build quality without paying for square footage you don’t have room for. If budget is your only constraint, the iPower 4×4 and VIVOSUN S425 4×2 both undercut $100, while anyone planning multi-stage growing across several years should weight the AC Infinity CLOUDLAB 844 or Gorilla Grow Tent 4×4 more heavily despite the higher upfront cost.
✨ Don’t Miss These Exclusive Deals!
🔍 Take your indoor vegetable garden to the next level with these carefully selected grow tents. Click on any highlighted item to check current pricing and availability. These tents will help you build a thriving, homegrown harvest your family will actually eat!
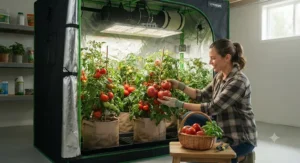
Practical Usage Guide: Setting Up and Maintaining a Grow Tent for Vegetables
Buying the tent is the fun part; setting it up correctly is the part that actually determines whether your seedlings survive June. Start with placement: pick a spot with a nearby power outlet and enough clearance on all sides to unzip fully, since fighting a wall to open a door gets old fast. Assemble the frame before adding the canvas — nearly every tent in this list uses tool-free corner connectors, and doing it in that order prevents the canvas from twisting.
Once it’s up, run your ventilation before you add plants: an inline fan pulling air out through one port, with a passive intake on the opposite side, prevents the still, humid air pocket that invites mold. This is where multi-stage growing gets logistically tricky — seedlings want gentler airflow and higher humidity than a mature tomato plant, so many growers run a small clip fan on low for the first two weeks, then swap to a stronger inline fan as plants fill out. Common first-30-days mistakes include overwatering (soil in an enclosed tent dries slower than outdoors), hanging the light too close and scorching seedling leaves, and forgetting to raise the light as plants grow — a simple weekly check habit solves both. According to Iowa State University Extension’s guidance on supplemental lighting, matching light duration and intensity to a plant’s actual daily light integral requirement — not just leaving lights on longer — is the single biggest lever for healthy indoor growth.
Maintenance schedule: wipe down the reflective interior every 2–3 weeks (dust dulls reflectivity more than people expect), check zipper tracks monthly for debris buildup, and empty the floor tray after every watering session to avoid standing water and root rot.
Year-Round Grow Tent Systems for Continuous Harvest
The single biggest advantage of growing indoors, and the reason most people upgrade from a windowsill herb pot to an actual tent in the first place, is that a year round grow tent setup doesn’t care what month it is outside. Traditional outdoor vegetable gardening gives you one shot per season per crop; a properly run tent lets you stagger plantings so something is always a few weeks from harvest, rather than everything ripening at once and then nothing for months.
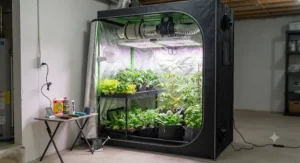
Building genuine continuous harvest systems comes down to succession planting inside your tent’s footprint. Instead of filling every pot with seeds on day one, stagger plantings every 2–3 weeks — lettuce and herbs are especially forgiving of this approach since they mature in 30–45 days. A 4×4 tent divided into sections (a seedling tray under a smaller clip light near the door, mature plants under the main fixture toward the back) lets you run multiple growth stages simultaneously without needing two tents. Reviewers running dedicated year-round setups consistently mention that keeping a simple written log of sow dates prevents the “wait, which tray is which age” confusion that derails a rotation within the first two months. What most buyers overlook when planning this is that a year round grow tent still needs seasonal adjustment — winter months typically mean colder ambient room temperatures, so your tent’s passive intake air will run cooler and may need a small heater or slightly reduced ventilation to hold ideal root-zone temperatures.
Real-World Scenarios: Matching a Tent to Your Grow
The apartment herb grower. Priya lives in a 600-square-foot one-bedroom and wants fresh basil, cilantro, and mint year-round without giving up closet space. A grow tent for herbs doesn’t need much vertical clearance or footprint — the VIVOSUN S425 4×2 fits in a closet corner, runs on a small clip light, and its 60-inch height is more than enough for herbs that rarely exceed 12–18 inches. Budget: under $150 total including a basic LED.
The legal home cannabis grower. Marcus lives in a state where personal cultivation is legal within a set plant limit and wants a dedicated, odor-controlled, light-sealed space. A grow tent for cannabis prioritizes total light-seal (no leaks during dark-cycle hours) and strong ventilation for a carbon filter — the AC Infinity CLOUDLAB 844‘s near-zero light leak and smart-controller compatibility make it a natural fit for a hobbyist tracking humidity and odor control carefully. Budget: $400–$600 including a light, fan, and filter.
The family building continuous harvest systems. The Alvarez family wants a steady supply of lettuce, peppers, and herbs feeding a household of four, year-round, regardless of season. This calls for the largest reasonable footprint and the sturdiest frame for running multiple simultaneous growth stages — the Gorilla Grow Tent 4×4‘s 300-lb capacity supports a full lighting rig plus a trellis system for peppers, while its expandable height handles taller plants as the season progresses. Budget: $600–$900 for a complete multi-stage growing setup.
How to Choose a Grow Tent for Vegetables
Picking the right grow tent for vegetables comes down to a handful of decisions, roughly in this order of importance:
- Measure your space first, then shop. Confirm ceiling clearance (most 4×4 tents run 78–83 inches tall) and floor footprint before comparing models — a tent that doesn’t physically fit isn’t a deal no matter the price.
- Match size to your plant plans. A 2×4 tent suits herbs and 4–6 smaller plants; a 4×4 comfortably supports 4–9 plants depending on pot size and training method.
- Prioritize canvas thickness for longevity. Look for 1680D or higher if you’re planning multi-stage growing across several years; 600D is fine for a first season on a budget.
- Check the frame’s weight rating against your equipment. Add up your planned light, fan, filter, and trellis weight, then confirm the tent’s top-bar capacity comfortably exceeds it.
- Count ventilation ports before you buy accessories. You’ll want at minimum one intake and one exhaust port sized to match your inline fan’s duct diameter.
- Consider plant-specific requirements for height. Tomatoes and cucumbers need 6+ feet of clearance at maturity; lettuce and herbs rarely need more than 3–4 feet.
- Factor in brand ecosystem only if automation matters to you. AC Infinity, Mars Hydro, and Spider Farmer all sell matched smart controllers — useful if you want app-based control, unnecessary if you’re happy with manual timers.
Common Mistakes When Buying a Grow Tent for Vegetables
The most frequent mistake is buying based on price alone and ending up with a tent too short for what you actually want to grow — a 60-inch tent looks identical to an 80-inch one in a product thumbnail, but the difference matters enormously once a tomato plant is three months in. A close second is underestimating equipment weight: a light, fan, filter, and trellis net can easily exceed 40–50 pounds combined, and a budget tent’s frame can visibly sag under that load over time. Buyers also frequently skip checking duct port sizing against their fan before purchase, then discover the ports don’t match their existing ventilation gear. Finally, plenty of first-time buyers assume “grow tent” means one-size-fits-all across plant types, when in reality a setup built for cannabis’s typical 4–6 month single-cycle grow looks different from one optimized for continuous harvest systems running several vegetable batches per year.
Grow Tent for Vegetables vs. Traditional Outdoor Gardening
The honest comparison isn’t “tent good, garden bad” — it’s about which trade-offs you’re willing to accept.
| Factor | Grow Tent for Vegetables | Traditional Outdoor Garden |
|---|---|---|
| Growing season | Year-round, weather-independent | Limited to local frost-free season |
| Pest control | Sealed environment, minimal pest pressure | Ongoing exposure to insects, rodents, deer |
| Water/nutrient control | Precise, consistent | Dependent on rainfall and soil quality |
| Space required | Compact (as little as 8 sq ft) | Typically larger garden bed footprint |
| Upfront cost | $70–$900+ for tent and equipment | Low (soil, seeds, basic tools) |
Reading across these rows, the trade is fairly stark: a grow tent for vegetables wins decisively on consistency and control — no unexpected hailstorm wiping out a season’s peppers — while traditional gardening wins on upfront cost and, for many people, sheer growing volume per dollar once soil and sunlight are already free. The right call genuinely depends on climate; someone in a short-season northern state gets far more value from indoor control than someone gardening in a year-round mild climate already.
Grow Tent for Herbs: Adapting a Small-Space Setup
A grow tent for herbs is arguably the easiest entry point into this whole hobby, because herbs are forgiving of imperfect conditions in a way fruiting vegetables simply aren’t. Basil, chives, cilantro, mint, and parsley top out well under two feet, tolerate a wider humidity range, and reach a usable harvest in as little as 3–4 weeks from seed — meaning even a compact 2×2 or 2×4 tent like the VIVOSUN S425 4×2 delivers real results fast. The main adjustment from a full vegetable setup is light intensity: herbs generally thrive at a lower daily light integral than fruiting crops, so a smaller, less powerful LED fixture is both sufficient and more energy-efficient here. What most buyers overlook is that herbs also tolerate closer plant spacing than vegetables destined to fruit, so a compact tent can realistically support 8–12 herb plants in rotation — considerably more density than the same footprint would support with tomatoes or peppers.
Grow Tent for Cannabis: What Changes Legally and Practically
Since this keyword shows up constantly alongside “grow tent for vegetables” searches, it’s worth addressing directly and honestly. A grow tent for cannabis is legal to operate for personal cultivation in a number of U.S. states, each with its own plant-count limits, residency requirements, and rules about visibility from public view — always confirm current state and local regulations before growing, since they vary significantly and change over time. Practically, the tent requirements shift somewhat from a general vegetable setup: cannabis growers typically prioritize maximum light-seal (since even brief light exposure during the dark cycle can disrupt flowering), stronger odor control via a carbon-filtered exhaust fan, and often a taller tent to accommodate a longer vegetative stretch before flowering. The AC Infinity CLOUDLAB 844 and Gorilla Grow Tent 4×4 on this list both suit that use case well, given their light-sealing performance and equipment capacity for a full filtration setup — the same qualities that happen to benefit any long-cycle fruiting vegetable, incidentally.
Plant-Specific Requirements: Matching Light, Height, and Humidity to What You Grow
This is the section most buying guides skip, and it’s the one that actually determines whether your harvest succeeds. Plant-specific requirements vary enormously even within “vegetables” as a category. Leafy greens like lettuce and spinach want a relatively modest daily light integral and tolerate cooler tent temperatures, while fruiting crops like tomatoes and peppers need substantially more light intensity to set fruit and prefer warmer conditions in the 70–80°F range. Per University of Missouri Extension’s guide to controlled environment lighting, matching photosynthetic photon flux density to a specific crop’s needs — rather than assuming more light is always better — directly affects both yield and energy efficiency, and their published calculator is a genuinely useful tool for dialing this in precisely.
Humidity requirements diverge too: seedlings generally want higher relative humidity (60–70%) to prevent damping off, while mature fruiting vegetables often do better slightly drier (40–50%) to reduce disease pressure and improve pollination. This is exactly why multi-stage growing inside a single tent takes some planning — you’re often running plants with conflicting ideal conditions simultaneously, which is where a tent with multiple, independently controllable ventilation ports (like the AC Infinity CLOUDLAB 844 or Spider Farmer 4×4) earns its higher price tag over a single-port budget tent.
Long-Term Cost & Maintenance: What Ownership Really Costs
The sticker price on the tent itself is only the opening bid. Canvas and zippers are the components that wear first — expect 2–4 years of regular use from a 600D tent before seams or zipper tracks show real wear, versus 5+ years from a 1680D–2000D premium tent under the same conditions. Electricity is the other recurring cost that catches new growers off guard: a modest LED setup running 16–18 hours a day for vegetables will typically add $15–$30 per month to a power bill, depending on local rates and fixture wattage.
| Cost Factor | Budget Tent (~$70–$150) | Premium Tent (~$300–$400) |
|---|---|---|
| Upfront cost | Lower | Higher |
| Expected canvas lifespan | 2–4 years | 5+ years |
| Frame sag under heavy equipment | More likely | Rare |
| Replacement parts availability | Varies by brand | Generally strong |
Looking at this table, the real long-term cost comparison isn’t as one-sided as the upfront prices suggest — a budget tent replaced twice over five years can cost roughly the same as one premium tent bought once, without accounting for the hassle of re-setup. One safety note worth building into your maintenance routine regardless of tent tier: the U.S. Consumer Product Safety Commission’s guidance on extension cord safety specifically warns against overloaded or damaged cords as a fire risk, which is especially relevant in a tent running a light, fan, and filter off a single outlet — inspect cords regularly and avoid daisy-chaining multiple high-draw devices.
Frequently Asked Questions
❓ What size grow tent do I need to grow vegetables indoors?
❓ Can you grow vegetables in a grow tent year round?
❓ How many hours of light do vegetables need in a grow tent?
❓ What is the best grow tent for beginners growing herbs and vegetables?
❓ Do grow tents work for tomatoes and peppers?
Conclusion
If there’s one takeaway from comparing seven real tents across every price tier, it’s that the “best” grow tent for vegetables genuinely depends on what you’re growing and how long you plan to keep growing it — not just which tent has the most five-star reviews. A basil-and-mint apartment setup has almost nothing in common, equipment-wise, with a family running continuous harvest systems for lettuce and peppers year-round, and pretending otherwise is how people end up with an $80 tent straining under gear it was never built to hold, or a $350 tent that’s serious overkill for a windowsill-sized herb habit.
For most readers landing on this guide, the VIVOSUN S448 remains the sensible default — genuine steel-frame durability, a mountain of real customer reviews, and a price that doesn’t punish you for trying something new. Growers with taller, longer-cycle plants or heavier equipment plans should look seriously at the AC Infinity CLOUDLAB 844 or Gorilla Grow Tent 4×4, while anyone tight on space should start with the VIVOSUN S425 4×2 and scale up only if the hobby sticks. Whichever you choose, match plant-specific requirements to the tent’s height and ventilation before you buy — that single check prevents most of the regret we saw echoed across real reviews for every product on this list.
Recommended for You
- Quiet Grow Tent Setup: 7 Silent Picks That Won’t Snitch (2026)
- Grow Tent Humidity Control: 7 Tools That Actually Work (2026)
- Grow Tent Temperature Problems: 7 Proven Fixes for 2026
Disclaimer: This article contains affiliate links. As an Amazon Associate, I earn from qualifying purchases. If you purchase products through these links, we may earn a small commission at no additional cost to you.
✨ Found this helpful? Share it with your friends! 💬🤗
